Are you looking for an effective way to burn 700 calories per day? If so, a treadmill could be one of the best ways to help you burn certain calories. But how to burn 700 calories on a treadmill?
Burning calories on a treadmill isn’t an easy task; it demands hard work. Following are the possible steps you should follow while burning 700 calories.
Warm up for 5 minutes and Set a 1% incline
Walk or run without holding handrails
Workout in the middle of the treadmill
Strive for 46-48 strides in 30 seconds
Try speed intervals in your workout
Walk, Jog and Run on the treadmill at a rate of 3.5:5: 7 mph.
That’s not all! More tips are here to give you the right direction to burn calories with a smart routine. Don’t miss it!
Is Burning 700 Calories On A Treadmill Good? (Expert’s Opinion)
You can burn 700-1000 calories on a treadmill per day. Whether you aim to lose 5-6 pounds per month is not too much for you.
But, it may be too much if you’re just a beginner for this workout. And, also if you only want to maintain weight and not lose weight, then burning over 500 calories on a treadmill will not be a better choice for you.
According to Taylor ( The Gym Expert) – ❝Burning 2000 calories per week is enough to lose weight. ❞
But this may vary according to the age, sex, body weight or height of a person. These factors affect what amount of calories you should burn by a treadmill workout.
Again, she recommends making a schedule and doing the workout according to a certified trainer in the gym.
How To Burn 700 Calories On A Treadmill (Step-by-step Guideline)
The treadmill has many benefits for burning calories, weight, etc. The three things you need to do- make a schedule, follow a trainer’s guide and then work out as follows.
10 best tricky steps will give you a less effortless workout and the satisfactory result you dreamt of! Let’s know how it works-
Step 1: Warm up for 5-10 minutes before stretch
The first thing you need to do is warm up your body before doing any workout. So, prepare for a walkout on the treadmill by warming your body up for 5-10 minutes.
Then, stretch your arm, leg, hips, ankles, back and shoulder before exercise.
Step 2: Set a 1% incline on the treadmill
Always set a 1% incline on the treadmill. It will burn more calories than a flat surface. You can burn more than 10 calories per mile while setting a 1% incline on the treadmill.
Step 3: Walk or run without holding handrails
Holding handrails can give you confidence while walking or running on a treadmill. But, you just give your extra effort with this unnecessary step.
Withholding handrails, you can’t benefit from the incline or burn more calories.
Also, you can have a balanced walk as a beginner when you choose the best walking treadmill.
Step 4: Always keep your head in a neutral position
You can feel pain in your neck and shoulders after completing your daily workout on the treadmill. The forward head postures only cause this pain. That’s why you can’t fulfill your aim to burn 700 calories.
Remember to keep your head in a neutral position to reduce stress on body parts and muscles. Hold your arms at a 90° angle and keep your hand at hip level.
Step 5: Workout in the middle of the treadmill
Always try to keep walking or running in the middle of the treadmill. Walking or running on the treadmill’s sides can stress your neck and shoulders.
Step 6: Strive for 46-48 strides in 30 seconds.
Speed up your run by shortening the strides. Likes striving for 46-48 strides in 30 seconds will burn more calories.
Step 7: Try speed intervals in your workout.
You can’t speed up your workout at once. First, you need to start your workout at a normal pace for about 3-5 minutes and then run at a faster pace for about 30-60 minutes.
Step 8: Walk at a rate of 3.5 mph per hour on the treadmill
Now, it’s time to maintain a targeted schedule that burns 700 calories. Every day you must walk at a rate of 3.5 mph on a treadmill. At 155 pounds, you can burn approximately 300 calories by walking 3.5 mph in 1 hour on a treadmill.
Step 9: Jog at a rate of 5 mph per hour on the treadmill
Jogging is another effective way to burn about 600 calories within an hour. You have to jog at a rate of 5 mph per hour. At 155 pounds, you can burn 600 calories by doing this workout on a treadmill.
Step 10. Run at a rate of 6 mph per hour on the treadmill
By only following this step, you can burn 700 calories per day. You have to run at a rate of 6 mph per hour and you can easily burn 700 calories.
How Long Does It Take To Burn 700 Calories On A Treadmill
Typically, you can burn 700 calories on a treadmill by walking, running or jogging.
You need about one hour if you choose to run at a rate of 6 mph.
If you walk at a rate of 3.5mph, you need 2 hours and 30 minutes to burn 700 calories. You can burn 700 calories within 1 hour and 30 minutes by jogging at a rate of 5 mph.
Burn 700 Calories on a Treadmill at 10% Within 15 min
Let’s do a myth:
1%=10 calories burn per mile
2%=20 calories burn per mile
3%=30 calories burn per mile
4%=40 calories burn per mile
5%=50 calories burn per mile
6%=60 calories burn per mile
7%=70 calories burn per mile
8%=80 calories burn per mile
9%=90 calories burn per mile
10%=100 calories burn per mile
So To lose 700 calories, you need to run 7 miles at 10% incline. This will take nearly 12 to 15 min.
How To Burn Most Calories On Treadmill
You can burn the most calories on the treadmill with a proper workout schedule, training and rest. Always make a target before starting a workout.
If you are a beginner, you must first work out at average speeds. After a few weeks, work out at a high rate speed according to your physician’s consultation. It will burn more calories.
If you aim to lose weight, then do cardiovascular exercise for 30-60 minutes five days per week. For maintaining weight or health, do it 60 minutes 5 days per week.
How to burn 100 calories on treadmill
It’s very easy to burn 100 calories on a treadmill. You just have to walk at a rate of 6 mph for 10 minutes. It will increase your heart rate and easily burns 100 calories.
How many minutes on treadmill to burn 100 calories
You need only invest 10 minutes in burning 100 calories on the treadmill. Walking at a rate of 6 mph for 10 minutes, you can burn 109 calories without extra effort.
How long on the treadmill to burn 1000 calories
You can burn 1000 calories on the treadmill for about 60 minutes at high speeds. You need to run at a rate of 7.5 mph for 60 minutes. Hence, you can burn 1000 calories. Or, you can jog at a rate of 5 mph for 2 hours to burn 1000 calories.
FAQ
Is burning 400 calories on a treadmill good?
A general rule is to burn 400-500 calories per day is enough to lose weight. So, burning 400 calories on a treadmill is good for losing about 1 pound per week.
Is burning 300 calories on the treadmill good?
If you want to lose 1 pound in between 12-13 days, then burning 300 calories on the treadmill is good for you. You can burn 300 calories by walking at 3.5 mph per hour on a treadmill.
How long does to burn 400 calories on the treadmill?
You will need 30-35 minutes to burn 400 calories if you’re jogging at a rate of 5 mph on a treadmill. Again, you can also burn calories on a treadmill by running at a rate of 6 mph for 30 minutes.
Is burning 250 calories on treadmill good?
If you want to lose 1 pound in two weeks, then burning 250 calories is good enough. You must run at 5mph for 30 minutes to burn 250 calories.
Is burning 100 calories on a treadmill good?
Yes. You can easily burn 100 calories by waking for 10 minutes at a rate of 6 mph. It is good if you want to maintain your weight as a present.
Is it possible to burn 700 calories in an hour?
It is possible to burn 700 calories within an hour. You have to run at 6 mph in an hour on a treadmill.
How far do I have to walk to burn 700 calories?
You have to walk 11-12 miles to burn 700 calories.
What happens if you burn 700 calories a day?
If you burn 700 calories daily, you’ll lose 3-5 pounds weekly. But it also depends on your age and weight. Always take a physician consult before burning more calories, like 700 calories.
Verdict
Workout on a treadmill is an effective way to burn 700 calories. Before doing this exercise, you need to consult a physician.
Also, training under a certified gym instructor is a plus point to getting the desired result. You need to eat a healthy diet when you burn over 500 calories daily. Otherwise, it will bad impact on your fitness.
Hopefully, you’ve got your answer. Now, follow the techniques and work hard to fulfill the goal. If you’ve any questions, don’t hesitate to ask me in the comment section. That’s all for today!
Every ice skater dream of hitting the ice rinks with the perfect skates! But when it comes to purchasing the best skates, this will be messy. Don’t you understand what skates to pick? Well, make it easier for you.
The reliable brand always popularly serves the best, featuring ice skate shoes. Like, Jackson Ultima, Riedell, and lake placid are the brand that offers quality skates for particular skaters as their skill level. You need to pick one skate which suits your skating, skill, budget and your particular needs.
Therefore, you need to dive into more research, which is also tough. Don’t worry! You’ll find every single piece of information according to skate experts & coaches to get the perfect skates for you. This complete guideline will also take you in a deep review of the reliable brands which help you more! So, read this entire article.
Is ice skating an expensive hobby?
Ice skating is an expensive hobby if you take it professionally. Again, if you’re just a beginner skater or take it as a leisure activity, this hobby is also cheaper!
❝According to Patty Cranston (Skating coach & choreographer), a junior national-level skater must spend $70,000 in 2016! Now just think about the equivalent cost of an expert skater in the present years!❞
A professional ice skater has a specific goal to achieve pro-level skating techniques. So, they have to spend more time practicing in ice rinks which results in paying fees for it! As an expert ice skater, you need to spend $7-$15 per two-hour session.
Training under a professional coach also makes expenses. If you want to get trained skating under a professional coach, you should pay around $10,000-$20,000 annually.
Again, professional ice skaters always choose the best equipment. Like, an expensive pair of skater shoes or a top-brand costume!
The registration fees and entry fees for competition also matter of cost. Overall, ice skating is an expensive hobby for professional ice skaters.
On the contrary, you’re just often going to practice ice skating as a physical exercise or reduce mental stress. In this condition, you don’t have to put an extra cost on the ice rink, coach, or equipment.
You’ll need to spend $7,000-$10,000 annually on basic training, coach fees, and equipment. That’s why ice skating is a cheaper hobby for a beginner-level skater.
What are the best shoes for skating?
Not all top brands or expensive pairs of skating shoes are the best of all time! It’s not a regular boot or a jogging shoe which has a brand tag and you’re ready to purchase!
Every stake doesn’t have the same personal need! The best pair of skating shoes depends upon their personal preference.
Few skating experts expect better durability and flexibility rather than the impact of their pair of skating shoes. Whereas some skater needs better impact and outsole quality rather than durability.
However, there are so many different aspects you need to consider while you’re looking for the best skating shoes. Because the word “skating” consists of a large number of styles, techniques & activities.
Simply, I can recommend some reliable brands that will give you hints to purchase. But ultimately, you need to find the exact shoes you dreamt of!
A List of the top 10 best Ice Skates In the World
American Athletic Shoe Women’s Sumilon Lined Figure Skates
Lake Placid Summit Boy’s Adjustable Ice Skate
Riedell Skates – Soar Adult Ice Skates
Roces Women’s Italian Style Brits Superior Ice Skate
American Athletic Shoe Women’s Leather Lined Ice Skates
Jackson Ultima Finesse Women’s/Girls Figure Ice Skates
Riedell Skates – Soar Youth Ice Skates
DUWIN Ice Skates
Jackson Ultima Softec Vibe Women’s/Girls Adjustable Skate
If you’re searching for entry-level skates for your daughter or granddaughter, then American Athlete shoes are great to purchase! The more you get is great ankle support and comfortable skates with this budget-friendly skate shoe.
Luckily, a pair of American athlete shoes always have a beautiful pattern and design. And, this time they did not forget to include a nice appearance in the design of Women’s figure skate shoes. This pair of shoes are fully lined with smiling lining which offers a stylish look.
As a beginner shoe, this will provide every little thing you need with a stainless steel blade! You can easily learn the basic tricks of skating without feeling any pressure on the ankle.
The pair of shoes are also designed with a multi-layered turquoise outsole which gives you pretty flexibility for doing basic skating tricks.
Previously I said, this pair of shoes is only for beginners. If you’re expecting practice spinning, jumping or any advanced skating tricks, then it’ll be a foolish idea!
If you’re often skating indoors or at an outdoor ice rink and want to learn some general tricks, then you can purchase it! Otherwise, it has no extra tips to give you.
Lake placid is offering great adjustable ice skating shoes for growing kids. This pair of shoes is so popular and highly recommended by experts for beginners.
After purchasing, the pre-sharpened blades of these skating shoes will impress you at once. The adjustable system is so easy that it only requires pushing a button. And, it will adjust the length of your child’s feet.
The easy-on and easy-off buckle system make it great for ankle support. Also, there’s a power strap and laces for a perfect fit.
The best thing it offers is comfort! Deluxe comfort padding makes feet super comfortable so that there’s no chance of pain after performing continuous ice skating.
Expecting a little bit from these incredible shoes isn’t a big deal! You’ll be glad to know that it’s water-proof soles. So, there’s no risk of less durability. Your boy can use it during his growing stage and last over years!
Pros
Super comfortable.
Easy-on and Easy-off process at the skating rink
Enough warm for outdoor skating.
Great durability over the years
Give enough support to ankles
Blades don’t need frequent sharpening.
Cons
The blade is too long for younger kids and beginners.
Comparatively little challenging to skate with for entry-level skaters.
This time is for introducing adult ice skates which are very popular among beginner skaters. Riedell offers a great pair of shoes with super quality, comfortable padding, great stability & flexibility and versatile blade design.
The first thing your eyes will catch is the foam-backed velvet lining in this skate which provides superb comfort for your feet. The sole design in these skates is very lightweight as it’s a PVC sole.
Riedell skates feature a split tongue design which offers great support and stability while skating.
The stainless steel blade offers better handling and speed for all types of recreational skating.
Pros.
Good quality blade for beginners.
Super comfortable and keeps the fit warm.
Lightweight skates
The price is very affordable
Good for beginners as well as recreational skaters.
Cons.
Only suitable for skaters ages up to 12 years.
4. Roces Women’s Italian Style Brits Superior Ice Skate
Women’s choice is always something fashionable, and hence Roces offer the most stylish skates for women!
Not only this one looks attractive, but also you’ll get everything you need for casual public skating! These skates are fit true to size and very adjustable.
The comfort seems okay with anatomic padding. There’s a reinforced synthetic upper which provides enough ankle support and flexibility
Like others, this skate isn’t designed with leather. The whole skates designed with fabric so the comfort doesn’t feel so much in these skates.
Anyhow, this pair of shoes provides lace closure for tightening your ankle and a carbon steel blade for doing easy skating activities.
Pros.
Well and stylish design
Offers ankle support and flexibility.
Keep your feet warm on ice skates.
Inexpensive price
Cons
Not too comfortable as it designs with fabric.
5. American Athletic Shoe Women’s Leather Lined Ice Skates
Another magical skating shoe which will impress you for sure! Who doesn’t want to look like a professional skater on an ice rink? You’ll get this pair of boots with an extraordinary look which creates a vibe like a professional.
This time American Athletic shoes come for very beginner to advanced beginner uses. The multi-layered ankle support creates extra stability and flexibility in this shoe. Again, this pair of shoes has quarter padding that feels so comfortable to wear.
If you notice the design of this shoe, you’ll find an overall split leather lining. That’s why it is extremely durable and more comfortable than other skaters.
The blade design is also nicely done. It’s a hollow grounded nickel-plated blade which helps to glide or perform well in an ice rink.
Pros.
Sizing is true to shoe size.
Very sturdy & comfortable
Inexpensive price
Cons.
Some users said that toe picks are too small.
The blades haven’t come sharpened.
6. Jackson Ultima Finesse Women’s/Girls Figure Ice Skates
Jackson ultima always offers good quality skates and this time it keeps its promise. I must have to say, these skates are all-rounder shoes for your younger daughter! You can get everything perfect in these skates at an inexpensive price. Durability, flexibility, comfortability, sharpened blade, fit size! What’s not included in this skate?
First, you will impress by the refreshing white design pattern of this skate. The stylized PVC sole and vinyl-coated upper makes it so perfect for comfort and durability. Again, the padded felt tongue delivers enough support and flexibility to feet.
This skate design with a Mark I blade and maintenance-free PVC sole ensures enough security to reduce the risk of falling or injury.
Pros.
Advanced beginner techniques like swizzles and backward skating are easily done.
Very sturdy and comfortable.
Fits and adjusts well.
Provide enough security.
Cons.
Some users feel less support & stability compared to other skates.
Another big blast announced the Riedell brand while they introduced such perfect skates for the youth generation. Soar youth ice skates are so well made that you’ll not take your eyes off them. These skates have stunning looks with pink or onyx colours.
You don’t have to worry about comfortable skating as it has foam-backed velvet lining. These skates also added an extra padding lining cushion. So, you can feel warm and comfortable with this lining that contains 3M Thinsulate insulation.
There’s a lightweight PVC sole that gives stability & optimal support as well. You may also get the easy adjustment with velcro buckles at the top. And, there’s also a set of hooks to tighten the lace for ensuring ankle support. So, move your feet freely as you wish.
The versatile blade design helps to glide smoothly on the ice rinks as well as to do all types of recreational skating.
Pros.
Great ankle support
Give enough stability and warmth on your feet while skating on the ice rink.
A family package is all in one! Isn’t it great to listen? Like this one, Duwin also offers skates that are suitable for every age of your family members. From younger ages to older ones, everyone can enjoy basic skating exercises or techniques with these beginner skates.
In these skates, you’ll get extraordinary features that will create craziness to know more about this. The first thing I like most about the velvet lining which is well designed and has reasons for more comfort.
With this, you’ll get 3D-dimensional cold protection to keep your feet warm during skating on the ice rink.
The most complaint about traditional skates is that the size doesn’t match. Well, you don’t have to suffer anything like this with this pair of skates. As it has adjustable sizing features with a simple push button.
Security protection is also high. There’s the use of laces, a velcro strap and a high buckle system to give enough ankle support.
Pros.
Easy to adjust
Offers great ankle support
Easy Put-on and get-off
Great for durability and comfort
Cons
Some users having a problem with closing lace
9. Jackson Ultima Softec Vibe Women’s/Girls Adjustable Skate
If you’re a nervous beginner, then the Jackson ultima is perfect to purchase! Generally, it’s recommended for younger girls who have just begun to learn skating.
The better feature you’ll get from this skate is comfort. Here, this skate has an external skeleton structure that provides great support and comfort.
Well, you don’t need to worry about the perfect size for your girls. There’s a feature for adjusting the size of growing feet.
Moreover, these skates are so well designed that it’s very easy to put on and get off. A recreational blade is good for glide or moving smoothly in the ice rink.
Pros.
The soft boot is very comfortable
Very adjustable skates
Good choice for recreational skating
Offers great support to ankles
Cons.
Some users find the buckle system doesn’t work properly.
10. Bladerunner Ice by Rollerblade Igniter Women’s
Rollerblade offers masterpiece skates that perform well for recreational skating.
These skates are very comfy and lightweight as they are designed with an Igniter XT structure. The padded lining creates great comfort and warmth.
Well, the creatures have a cuff buckle power strap and a lace closure system that perfectly secures the feet.
Another good thing about this skate is to provide a stainless steel blade that holds the edge longer. Also, there’s no risk of rust. As a result, it lasts for longer and needs little maintenance.
Pros.
Offers great flexibility and forward flex for gliding.
Great ankle support
Superb comfy and lightweight
Easy to put on and get off.
Cons.
Some users find the tongue bit smaller
XT is difficult to adjustable.
How to Choose a Skate Shoe?
There’s more confusion when you think about purchasing skate shoes. Well, different brands offer different features and this makes you mad at once!
You need to take decisions depending on your needs. Like, durability, board feel, impact, comfortability, fit & style. Again, what types of skating do you do with the skate? What’s your skill? Are you a beginner or an expert?
Every little thing differs in the decision of buying skates for a particular person. Let’s get to the main point where you’ll get the entire answer to choosing the perfect skate shoe for you!
1. Sole:
The most important thing to select for a perfect skate shoe. Because the sole makes the skate comfortable and durable. Mainly, there’s a vulcanized sole & capsule used in skate shoes. A vulcanized sole is preferable for more comfort & durability than a cupsole.
Whereas the capsule is great for more impact in the midsole and outsole as it has better cushioning than a vulcanized sole.
Cupsole has a denser rubber compound on the outsole than the vulcanized shoe. This extends the lifespan of the bottom of the skate shoe. Gum rubber is also great for durability.
Vulcanized shoes get their support from their insole. So, make sure what material is used in the insole.
2. Uppers:
The material used for the uppers said how long-lasting the skate shoe will be! Suede is the most popular upper which gives the best durability and performance. Canvas is comparatively less durable.
Talking about the leather, it’s very smooth & comfortable. And, uppers which design with leather are long-lasting.
Although, you’ll have difficulties while practising flip tricks with leather skate shoes. But once you grab the flexibility on your shoes, this will be easier than ever to skate.
Synthetic textiles are also used in uppers of skate shoes. Although, rubber and TPU work well for long-lasting performance, knit and mesh don’t do!
3. Toe caps:
Rubber toe caps are great for durability and better grip for skating. Make sure, your shoe has a rubber underlayer on it for maximum durability.
And always choose a single-piece toe box to wear for a better lifespan of a shoe.
4. Board feel:
Board feel is a crucial thing you need to check before purchasing a skate shoe. Vulc shoes are thicker and the break-in period is much shorter.
So, you’ll get more board feel and control than cupsole. It’s great for manuals, ledges, and flat ground.
5. Fit & style:
The fitting of the skate is more important when you’re doing the flip and tricky skating. The shoe should feel like an extension of a shoe instead of extra rubber hanging on the toe.
Bootie-type skates give internal sleeves which works great for securing the fit.
Mid-top shoes offer mobility whereas high-top shoes offer most ankle support & protection. Skate shoe with a lace protector is a much better choice for securing feet.
How to wear ice skating shoes (Easy Steps)
Wearing ice skating shoes is simple but more tricky as well for better fitting. Before put-on, on the skate shoes, keep them in an oven for 3-4 minutes to soften. This will ensure good fitting as well.
First, put on the ice skating shoes on your feet and tap them back into the heel pocket to ensure they fit properly.
Next, it’s time to start the lace pattern. In this step, tighten the lace portion and then take up the slack.
Now, lace the top portion of your boot. If there’s a hook don’t forget to loop around the hook.
Tighten the area of the ankle with lace and then tighten up a knot.
How to ice skate good: (Step-by-step guideline for beginner)
Ice skating is more than excitement and fun! As a beginner, you will have excitement and little nervousness as well.
Falling on ice is the step that everyone experiences in their first ice skating. But, once you learn some basic ice skating techniques, you can enjoy every second of it! Let’s take a look at a few basic steps to enjoy ice skating as a beginner!
Step 1: Get ready with costumes and equipment
As a beginner, first, wear light costumes like a light jacket or sweater. Give your feet more flexibility with a comfortable pair of skating shoes. You can wear a pair of socks. You’re ready to get into the ice rinks.
Step 2: Learn March
The very first step is to learn to march on ice rinks. Marching is lifting your knees and walking on ice. Slowly try to march. You just need to steady and make balance while you’re learning to march.
Step 3: Practice falling
Falling is a part of sports and you don’t need to be afraid of it. Practicing falling in the right way is important to reduce injury while skating on ice. Here I follow the techniques of my favorite Coach Michelle Hong. She shares a simple way to practice falling!
If you ever feel like you’re falling then quickly try to put your arms out and grab your knees.
The next step is to learn how to get up from failing. The easiest way to get up is to stand up on both knees and do hands-on ice like exactly the “cat’s position”.
Now, put one knee up and set both hands on the knee. Then try to push yourself up.
Step 4: Check the balance on the two-foot gliding
This is the time to learn basic gliding to check the balance on the ice rink. It’s very simple. Just march forward two slides and try to push your body glide forward slightly.
Here, you’ve to put your feet together. Reversing the process and checking the balance on marching skill.
Step 5: Try one-foot gliding
If you’re already learning two feet gliding, then one-foot gliding will be very easy for you. It starts like two-foot gliding. Just pick up your feet against your ankle. It’s quite the same position as “Flamingo”.
Step 6: Learn Swizzles
To learn forward swizzle, you need to make the position of your feet like V and A. Start the swizzles by bending your knees and then push your heels to make a circle. This foot movement is simply defined as V to A position and then the A to V position back.
Step 7: Learn stop
In this step, you need to bend your knees and feet together and then push out as much as you can.l
My opinion and Study: Most comfortable ice skates
Skate comfort depends on the material & padding used on the shoes. I think the most comfortable ice skates are those which use foam velvet lining, PVC soles and extra padding in the design. These materials give enough warmth and comfort during the skates.
In direct words, I will suggest some comfortable skates-
which use foam velvet lining & extra padding for superb quality.
Jackson ultima also offers comfortable skates in the present day. They are more popular for good quality design with super comfortability. These skates are made with stylized PVC soles & vinyl coated upper which is lightweight & comfortable to wear. You can choose Jackson Ultima Finesse.
Best Ice Skates for Beginners
There are so many reliable brands that offer good quality ice skates for beginners. But, I think Jackson ultima and lake placid are the best they offer well-designed, durable and comfortable ice skates for beginners.
Beginners always need extra security protection for their feet as there’s a risk of falls. Again, they need more impact, and flexibility in their skates. Skates for beginners should be more comfortable, which is a very important factor.
Lake Placid Summit Boy’s Adjustable Ice Skate is another skate that provides an auto-adjustment system for securing the feet. And this skate uses Deluxe comfort padding & waterproof sole which is super comfortable for kids and beginners.
FAQ:
What skates do Olympic skaters use?
Almost all Olympic skaters use Edea skates. Edea skates are very professional skates for their lightweight, revolutionary technology and thin sole.
What kind of ice skates do professionals use?
The reliable brand that professional use is Edea, Jackson Ultima, & Riedell ice skates. These are more popular among national champion ice skaters.
What brand of skates do figure skaters wear?
Most figure skaters use Edea, Jackson and Riedell skates. Figure skating experts also recommend this brand.
How much do Olympic skates cost?
The cost of Olympic skates varies depending on what types of skates you’ll buy! Stock boots and custom boots have different costs.
Most of the Olympic custom skates cost $600-$2000. Again, most popular skates like Jackson and Riedel cost about $75.
youtube.com/watch?v=NefXXMIL6tE
How much do pro figure skates cost?
Professional figure skates usually cost up to $700. If you buy custom-made boots they will cost about $800-$1000. The extra cost of the blades will be $1000.
How long do ice skates last?
Ice skates can last up to 2-15 years. It depends on the skate’s quality, maintenance and how often you use it.
Why ice skating is the hardest sport?
Ice skating is the hardest sport as it requires a lot of strength and balance to do several skating techniques in a thin ice rink. Also, one needs to accurately do the toughest activities without falling in an ice rink.
What are the disadvantages of ice skating?
Although, Ice skating has advantages it has slight disadvantages too. It can cause head injury, hand injury, stress on muscles & body, and ankle sprains, especially for a beginner ice skater.
Final words
Every foot has its comfort! So, it’s better to decide to choose ice skates according to your present needs.
In my opinion, you should choose between Jackson Ultima and Riedell skates. Experts recommend this brand. These skates are best for their quality, design, boots, blades, durability and most importantly comfortable.
Jackson Ultima and Riedell offer a particular design according to specific skating, age, and skill level. Or, you can go with Lake placid for its superb comfortability, auto-adjusted system, and Prep sharpens blade which is great for beginners.
Hopefully, you already take a clear decision. Don’t forget to share it with me in the comment section. That’s the end for today!
Maintaining a healthy lifestyle starts with understanding your body’s needs. Many people often wonder, “What is the ideal height and weight chart for men and women?” This information is essential for setting achievable health and fitness goals.
As the old saying goes, “Health is the greatest wealth.” By focusing on a balanced diet and regular exercise, you can improve your overall well-being. Knowing the ideal height and weight for your gender and age helps you monitor progress effectively and create a sustainable plan for long-term health.
If you’re searching for a standard guide to align with your fitness journey, this chart will provide the insights you need. Read on to learn how to use these measurements to stay fit and lead a healthier lifestyle.
What is the Ideal Height And Weight Chart For Men And Women
The ideal weight for men and women depends on their height. If you know your height, you can easily calculate your ideal weight.
The Divine method
is the most appropriate and acceptable method for calculating weight. Doctors use the divine method to calculate a patient’s ideal weight and prescribe medicine.
What Should My Weight Be For My Height And Age And Gender
Body weight depends on factors like height, body fat, etc. But age is not a factor when it comes to finding the ideal weight. An adult male should be 5’7”-5’10” and weigh approximately 60-80kg. You can easily find the right weight for you by using the divine method.
Weight And Height Chart Baby Girl
Weight and height chart for baby girls according to WHO
Age(months)
Height
Weight
0
45.6-52.7 cm
2.4-4.2 kg
1
50.0-57.4 cm
3.2-5.4 kg
2
53.2-60.9 cm
4.0-6.5 kg
3
55.8-63.8cm
4.6-7.4 kg
4
58.0-66.2cm
5.1-8.1 kg
5
59.9-68.2 cm
5.5-8.7 kg
6
61.5-70.6cm
5.8-9.2 kg
7
62.9-71.6 cm
6.1-9.6 kg
8
64.3-73.2 cm
6.3-10.0 kg
9
65.6-74.7 cm
6.6-10.4 kg
10
66.8-76.1 cm
6.8-10.7 kg
11
68.0-77.5 cm
7.0-11.0 kg
12
69.2-78.9 cm
7.1-11.3 kg
13
70.3-80.2 cm
7.3-11.6 kg
14
71.3-81.4 cm
7.5-11.9 kg
15
72.4-82.7 cm
7.7-12.2 kg
16
73.3-83.9 cm
7.8-12.5 kg
17
74.3-85.0 cm
8.0-12.7 kg
18
75.2-86.2 cm
8.2-13.0 kg
19
76.2-87.3 cm
8.3-13.3 kg
20
77.0-88.4 cm
8.5-13.5 kg
21
77.9-89.4 cm
8.7-13.8 kg
22
78.7-90.5cm
8.8-14.1 kg
23
79.6-91.5 cm
9.0-14.3 kg
24
80.3-92.5 cm
9.2-14.6 kg
Weight And Height Chart For Female In Kg
The female weight and height chart in kg added below depending on reports:
1. What is the ideal height and weight chart for men and women?
The ideal height and weight chart provides a standard reference to help individuals determine healthy body weight based on their height. This chart takes into account gender and age, offering a guideline for maintaining a balanced lifestyle and achieving fitness goals.
2. How accurate is the ideal height and weight chart?
While the chart offers a good general guideline, individual factors such as muscle mass, bone density, and overall body composition can influence accuracy. It’s best to use it as a reference and consult with a healthcare professional for personalized advice.
3. Why is it important to know the ideal height and weight for men and women?
Understanding your ideal height-to-weight ratio helps in setting realistic health and fitness goals. It also aids in tracking progress and maintaining a balanced diet and exercise plan for optimal well-being.
Conclusion
The ideal height and weight of a human depends on gender and the region the personnel born.But the average height and weight standards are set by WHO depending on research.
Another important fact is Body Mass Index(BMI). It is related to age, height, and weight. Body fitness heavily depends on BMI. The BMI of a regular person should be between 19-24.
But the weight and height of regular people around the world are almost the same and controlled by individuals’ needs. Now you know what’s perfect weight is depending on your height. Maintain your fitness for a beautiful life!
How to get out of a mental health slump? Getting out of a mental health slump may seem complicated, but it’s possible to get relief from this disorder.
Mental health is a crucial aspect of our overall well-being and can impact our daily lives significantly. Unfortunately, many individuals experience a mental health slump at some point in their lives, where feelings of sadness, anxiety, and stress seem to take over. If you have ever faced such a situation, I’m sure, you are seriously looking for ways to get out of a mental health slump.
Getting out of a mental health slump may seem complicated, but getting relief from this disorder. With the right approach, you can take control of your mental well-being and start feeling like yourself again. Some effective methods include physical activity, practicing mindfulness and self-care, and seeking professional help.
I will take you through the symptoms of a mental slump, technics to get rid of it, and more details to ensure your mental wellness. Keep reading.
What Does Feeling Slumped Mean?
Feeling “slumped” is a common experience for many people. It’s often described as being mentally and physically drained, where even the simplest tasks seem like a struggle. People report feeling like they’ve lost their motivation and energy and can sometimes experience low mood or sadness.
It’s like being stuck in a state of sluggishness, where you just can’t seem to get moving or get back to feeling like your usual self.
Think of it like a car running out of gas – everything just starts to slow down and you don’t have the power to get going again. But, just like filling up a car’s tank, taking some time to recharge and rejuvenate can help get you back on track and feeling like your old self again.
Here are some common signs that you may be in a slump, according to a blog post on Calendar.com:
1. Lack of energy: Feeling fatigued and lacking the energy to do things you normally enjoy can be a sign of a slump.
2. Decreased motivation: Struggling to find the motivation to complete even the simplest tasks can be a sign of a slump.
3. Low mood: Feeling down, sad, or just not like yourself can be a sign of a slump.
4. Difficulty concentrating: If you’re having trouble focusing and completing tasks, it could be a sign of a slump.
5. Changes in sleep patterns: Sleeping more or less than usual can signify a slump.
6. Negative self-talk: Feeling negative about yourself and your abilities could be a sign of a slump.
7. Difficulty making decisions: It could be a sign of a slump if you’re finding it hard to make decisions.
8. Increased stress levels: If you’re feeling more stressed than usual.
9. Avoiding social interactions: If you’re avoiding social interactions, it could be a sign of a slump.
10. Loss of interest in hobbies: If you’re losing interest in activities you normally enjoy, it could signify a slump.
11. Feelings of hopelessness: If you’re feeling hopeless or helpless, it could be a sign of a slump.
If you’re experiencing several of these symptoms, take a step back and find ways to recharge and get back on track. Slumps can happen to anyone, but the good news is that you can take steps to get back to feeling like yourself again!
A variety of factors can cause a mental slump, and what triggers a slump in one person may not be the same for another. However, some common causes include
1. Stress: Chronic stress and tension can take a toll on both your physical and mental health. Over time, this can lead to feelings of burnout, exhaustion, and a general sense of malaise.
2. Lack of sleep:Sleep is essential for physical and mental recovery, and a lack of restful sleep can lead to feelings of fatigue, irritability, and depression.
3. Poor nutrition: What you eat directly impacts your mood and energy levels. A diet that’s high in processed foods, sugar, and caffeine can lead to a roller coaster of ups and downs that can contribute to a mental slump.
4. Isolation: Humans are social animals, and being isolated from others for extended periods can lead to feelings of loneliness and depression.
5. Medical conditions: Certain medical conditions, such as depression, anxiety, and sleep disorders, can cause a mental slump. It’s important to seek help from a medical professional if you’re experiencing persistent sadness or anxiety.
6. Life events: Major life events, such as the loss of a loved one, a job change, or a relationship ending, can all contribute to a mental slump.
It’s important to address the root cause of a mental slump in order to overcome it effectively. This may involve changing your lifestyle, seeking help from a mental health professional, or a combination of both.
How To Get Out Of A Mental Health Slump
If you’re feeling stuck in a mental slump, it can feel overwhelming and impossible to break free. But don’t give up hope!
Here are several strategies that have been shown to be effective in lifting mood and improving overall mental well-being:
1. Practice gratitude: Take a moment every day to reflect on all the things you’re thankful for. By focusing on the positive, you’ll be able to shift your attention away from the negative and boost your mood.
2. Soak up some sunshine: Spending time in nature has been scientifically proven to reduce stress and improve your overall mood. So, why not go for a walk in the park, hit the hiking trails, or simply relax in your backyard and soak up some sunlight!
3. Pour your heart out on paper: Writing down your thoughts and feelings can be a therapeutic way of processing and gaining a fresh perspective. So, grab a pen and paper and let it all out! You’ll gain a new outlook and may even surprise yourself with newfound insights and clarity.
4. Exercise: Regular exercise has been shown to be a powerful mood booster and an effective way to manage symptoms of depression and anxiety. In fact, studies have shown that exercise can be as effective as medication for some individuals. Try incorporating physical activity into your daily routine, such as going for a walk, taking a yoga class, or hitting the gym.
5. Sleep: Getting enough restful sleep is essential for mental and physical health. Aim to get 7-9 hours of sleep each night and establish a consistent sleep schedule. If you’re having trouble sleeping, try relaxation techniques like deep breathing or meditation.
6. Eat well: Eating a healthy, balanced diet can help you maintain good physical and mental health. Focus on incorporating plenty of fruits, vegetables, whole grains, and lean proteins into your diet.
7. Connect with others: Spending time with friends, family, or a supportive community can help boost your mood and provide you with a sense of belonging. Try reaching out to someone you trust for a chat, or consider joining a support group or community activity.
8. Practice mindfulness: Mindfulness techniques, such as meditation, deep breathing, or yoga, can help you stay focused on the present moment and reduce feelings of stress and anxiety. There are many resources available to help you learn mindfulness, including apps, books, and online courses.
9. Set achievable goals and focus on progress:Setting achievable goals for yourself and concentrating on progress, rather than perfection, can help you feel a sense of accomplishment and increase your overall mood. Try breaking down large goals into smaller, more manageable tasks.
10. Seek professional help: If your mental slump persists, don’t hesitate to seek help from a mental health professional. They can provide you with additional strategies and support, as well as offer a fresh perspective on your situation.
Remember, getting out of a mental slump is a journey, not a destination. Be patient and kind to yourself, and don’t be afraid to seek help when you need it.
Many resources and support are available, including online support groups, self-help books, and mental health hotlines. With the right tools and support, you can overcome a mental slump and start feeling better.
Is Slump The Same As Depression?
No, a mental slump and depression are not the same thing. According to the National Center for Biotechnology Information (NCBI), depression is defined as a serious mental health condition characterized by persistent feelings of sadness, hopelessness, and loss of interest in activities that were once enjoyable.
It is typically accompanied by physical symptoms such as changes in sleep patterns and appetite, as well as difficulty concentrating and making decisions. Depression can be triggered by life events such as loss, trauma, or stress, and it can also be a symptom of an underlying medical condition.
On the other hand, a mental slump is a term used to describe a temporary dip in mood or motivation, often due to stress or burnout. It can be thought of as a milder form of depression and is not typically accompanied by the same level of intense symptoms. A mental slump can often be resolved with self-care, such as exercise, adequate sleep, and social support, or by taking a break from the source of stress.
Depression Vs Slump: Key Differences
Here is a table on key differences between depression and slump:
Feature
Depression
Mental Slump
Definition
A serious mental health condition characterized by persistent feelings of sadness, hopelessness, and loss of interest in activities that were once enjoyable.
A temporary dip in mood or motivation, often due to stress or burnout.
Symptoms
Persistent feelings of sadness, hopelessness, and loss of interest in activities that were once enjoyable; changes in sleep patterns and appetite; difficulty concentrating and making decisions.
A temporary dip in mood or motivation.
Duration
Long-lasting, often more than a few weeks.
Temporary, lasting less than a few weeks.
Severity
Intense and debilitating.
Milder, not as intense.
Treatment
Often requires professional treatment such as therapy or medication.
It can often be resolved with self-care, such as exercise, adequate sleep, and social support, or by taking a break from the source of stress.
FAQ:
How long can a slump last?
A mental slump, also known as a mental block or a period of decreased mental performance, can last anywhere from a few days to several weeks or even longer.
It’s challenging to provide a definite answer for the duration of a mental slump as it varies greatly from person to person and can also depend on various factors, such as the individual’s coping mechanisms, support system, and access to mental health resources.
Does depression shut down your brain?
Studies have shown that depression can impact brain structure and function, including reducing gray matter volume and altering the activity of certain brain regions and neurotransmitter levels. These changes can lead to symptoms such as decreased motivation, difficulty concentrating, and fatigue.
According to the World Health Organisation(WHO), depression is a common and extremely serious medical illness that affects your way of feeling, thinking, and acting toward something.
Conclusion
Feeling “slumped” is a common experience where one feels mentally and physically drained and lacks energy and motivation. It can be caused by factors such as stress, lack of sleep, poor nutrition, isolation, medical conditions, or life events.
To get out of a mental slump, one can practice gratitude, engage in physical activity, practice self-care, and seek professional help. Focus on the positive and take steps to improve your mental health to get back on track and feel better.
Don’t panic and you will overcome a mental slump by following the steps I mentioned here!
How to work weight Watchers scale? A weight watcher will give you accurate data about your body condition. These weight scales can remember up to 10 persons’ data.
The advanced features of the weight watcher scale are specially designed to help you maintain a healthy lifestyle. A weight watcher will give you accurate data about your body condition. These weight scales can remember up to 10 persons’ data. But it doesn’t function automatically so you have to set it manually to utilize the weight watcher’s weight scale.
You have to know how to function and use the weight watcher scale for simpler management. Here in this article, I will be providing useful data with a simplified guide for uttering the weight watcher scale. Keep reading if you are health conscious and want to sustain all the facilities of the weight watcher intelligent scales!
Weight Watchers Body Analysis Scale Review
A weight watcher bathroom scale will give you weight, age, BMI, body fat, body water, bone mass, muscle mass, subcutaneous, and some morefactual data about your body condition. With the help of high-quality sensors and electrode implementation, these machines pass a frail electric current through your body, and the voltage is recorded to determine body electric impedance.
Bio-impedance technology is proven accurate and makes weight watcher scales more trustworthy. You can weigh 0.2lb/100g to 400lb/180 kg and perhaps more with some updated weight watcher models. Weight watcher scale runs with AAA or AA batteries in a range between10-60 US dollars with a 1-year guarantee. A lot of happy consumers shared their happy experiences and suggested weight watcher scales.
How To Work Weight Watchers Scale:
If you have just purchased a weight watchers bathroom scale, you might be wondering how to work it. Here I include a simplified guide for you to understand how to work with different types of weight watcher scales.
A) Instruction On Using Weight Watchers Food/kitchen Scale
Using a weight watcher food scale is simple. Here is the user guide:
Unleash your food scale from the packaging, remove the plastic cover from the screen and turn the scale over.
Remove the battery cover and place a battery with the right alignment (positive and negative in the right spot). Replace the battery cover.
You need to unlock the weight watcher food scale before measuring foods. To unlock it, you will see a switch just under the battery area. Move its position and unlock your food scale.
Switch on the food scale and 0.00 will appear on the screen.
You can change the measurement unit to kg or lb with the button that says kg/lb.
Place the food scale on a flat and hard surface. Put the food in the middle of the scale and it will give the weight of your food.
If you want to weigh something with a dish or bowl, it needs a simpler step.
First, place the empty bowl in the scale and press the zero/on the button. It will neutralize the weight of the container.
Now put the food in it and the screen will display only the weight of the food.
To calculate the point plus value, you have to use the keypad of your food scale.
Write the food name. Press enter to save the data and scroll through the food you want to enter the point plus button to see the point plus value of the selected food item.
Hit CE if you are done measuring the food and willing to measure some other meals.
To determine the point plus value of packaged food, you need to take some more steps.
Press the input button and it will display “calculate points plus”
Enter the value of protein based on the nutrition facts panel.
Then, just input the numbers from the nutrition facts chart according to what the display asks and hit enter after inputting the data.
The fun fact about the weight watcher food scale is you can save up to 10 of your favorite foods. To save :
Place the food you want to save and determine the point plus value.
Now press input and input the food name by using the keypad.
Press enters to save the data and you can repeat the process for your next favorite item.
B) Instruction On Using Weight Watchers Glass Scale By Conair
Conair has brought many updated versions with various features but I am going to describe the working process of the Conair weight watcher basic glass scale. They can only measure your weight.
1. Remove the battery displacement tape and press the on button.
2. Put some weight on the scale and remove it.
3. Wait for 10-15 seconds till 0.00 pops up on the screen.
4. Now, step on the scale. Try to place your foot on the metal part as much as possible to have the most authentic data.
5. You can easily change the weight unit from kg to lb by moving the small switch placed back of your machine.
C) Instruction On Using Weight Watcher Body Analysis Bathroom Scales
These glass scales are specially designed to give further information on your body condition. They are way more advanced than digital weight scales. You have to know what a weight watcher body analysis scale will show and how to work with them.
1. Unbox the weight watcher body analysis scale and tap on the area mentioned “tap here” on the screen.
2. After a few seconds, 00.0 will be displayed on the digital glass scale screen.
3. Now you can step up on it and it will simply measure your weight.
2. Now press the setting/user button, and pick the section you want to store your data.Set your age and gender and step on the scale.
3. After showing weight, it will calculate BMI and other aspects. Don’t step down until it’s done.
4. If you choose the person in one section, it will save the data there and relate it with updated data for your improvement.
By following the same process, you can add up to 10 persons’ data based on weight watcher body analysis scale models.
D) Instruction On Using Weight Watcher Body Analysis Bluetooth Scale
These are advanced scales for maintaining your data through your phone. You can download the Conair app and connect it to your Bluetooth scale.
All the processes are the same and I have already described how to work with weight watcher scales. But here, I will be showing how you can sync Bluetooth.
It will attempt to communicate a Bluetooth signaleach time it is being utilized, regardless of whether you are not utilizing it with the application or your weight watcher gadget is out of reach. For the most part, you will see the accompanying in-scale show:
Bluetooth symbol flickering: Scale is attempting to speak with your shrewd gadget.
Bluetooth symbol stable (mark sign): Bluetooth the association has been laid out.
Bluetooth sign steady and X: Matching fizzled, no Bluetooth connection, no information is being sent.
Bluetooth sign not visible: The scale is in manual mode, no Bluetooth connection, and no information is being sent.
Tips And Caution
1. When you are dealing with weight watcher body analysis glass scales, remember not to overdo it. You shouldn’t use the scale more than 3 times per day.
2. If you have a physical condition and use a pacemaker avoid using weight watcher scales as it passes electric energy through the body for physical data.
3. Always lay the machine on a flat and hard surface. Minimize your movement for accurate data.
FAQ:
Types of weight watchers scale?
Weight watcher scales can be classified into major groups.
1. Weight watcher Food scale
2. Weight watcher Weighing scale
3. Weight watcher body analysis bathroom scale
How to reset the weight watchers scale?
Maybe as a new consumer, the resetting procedure isn’t something you are thinking about now. But there is a reset button back of your scale for erasing all the existing data.
Look closely and you will find a small hole for resetting your weight watcher scale. Use a wire or thick stick to tap the button and it will delete all the user information. The data will also have vanished from your phone app.
How to unlock the weight watchers scale?
The basic digital glass weight watchers scale has included an unlock button. Carefully look for the button back of your weight scale. It’s small and you can use a wire to push the button and unlock the weight watcher scale.
How to read the weight watchers scale?
If you are dealing with a weight watcher digital scale, you can easily read all the data as it appears on the screen. You will find signs like BM, and BF beside the number that appears on the screen.
BF-Body Fat
BW-Body Water
BM-Bone Mass
MM-Muscle Mass
BMI-Bone Mass Index
How to change weight watchers’ scale battery?
Find a smaller-size screwdriver and open the battery door. Take off the battery and dispose of them. Use AAA/AA batteries according to the scale requirements and set them in perfectly.
Look for the positive and negative signs both on the battery and battery house. Place correctly and close the door by putting the screws back. Now you can firmly tap on the screen with your foot to turn on your weight watcher scale.
Conclusion
Weight watcher scale has updated its features and grown into a high-end scale manufacturer. By analyzing data and reports, I suggest you have a body analysis weight scale.
They provide correct data on your body fat, water percentage, bone mass, and some more effective aspects. You can set your body goal and continue working on the measures for achieving your goals.
With a weight watcher food scale, a balanced healthy diet can be maintained as they can measure point plus by analyzing nutrition. You will know how much protein, sugar, or fat you’ve consumed and how much you need to sweat off.
A weight watcher scale can noticeably improve your lifestyle!
Gaining muscle can be a frustrating experience for skinny guys who want to bulk up and add definition to their physique. However, with the right approach, it is possible to achieve significant gains in a relatively short time. The question of “how to gain muscle fast for skinny guys?” is one that many people ask.
The answer involves a combination of diet, exercise, and consistency. You can build a stronger, more muscular body in no time by eating a calorie-dense diet, lifting heavy weights, and pushing your limits in the gym.
So, if you’re ready to take your physique to the next level, let’s get started and find out how you can gain muscle fast, even if you are a skinny guy!
Can Skinny People Build Muscles Fast?
Yes, skinny people can build muscle fast, but the rate at which they can build muscle depends on several factors, including diet, training, and genetics.
On average, a person can expect to gain about 1 to 2 pounds of muscle per month, but some people may experience faster results, especially in the beginning.
However, it’s important to remember that building muscle is a gradual process that requires consistency and patience to see long-term results.
Additionally, skinny people need to ensure that they are fueling their bodies with enough calories and nutrients to support muscle growth.
Is It Hard For Skinny Guys To Gain Muscle?
Yes, gaining muscle can be challenging for skinny guys, but possible. They often have a naturally fast metabolism and a lower starting point for muscle mass. With the right approach, overcoming these challenges and achieving significant muscle gains is possible.
One of the biggest obstacles for skinny guys is ensuring that they are consuming enough calories to support muscle growth. This can be difficult as they often have a fast metabolism and burn calories quickly.
As a result, they need to consume more calories than they are used to and ensure that those calories come from nutrient-dense sources such as lean protein, healthy fats, and complex carbohydrates.
How To Gain Muscle Fast For Skinny Guys At Home?
The key to success is to have a combination of a proper diet and exercise routine. Here is a step-by-step guide on how to gain muscle fast for skinny guys at home:
Start with compound exercises that work for multiple muscle groups at once, such as squats, deadlifts, and push-ups.
Incorporate resistance training with weights or resistance bands.
Focus on progressive overload by gradually increasing your weight for each exercise.
Aim for 3-4 weighttraining sessions per week, including upper and lower body exercises.
b) Diet
Consume a diet high in protein to support muscle growth. Good protein sources include chicken, fish, eggs, dairy, and legumes.
Increase your caloric intake to support muscle growth. Eating healthy snacks throughout the day, such as nuts or protein bars, can help boost your calorie intake.
Make sure to include complex carbohydrates in your diet, such as oatmeal, brown rice, and sweet potatoes, to provide energy for your workouts.
Stay hydrated by drinking plenty of water throughout the day.
c) Consistency:
is key to achieving your goals. Stick to your diet and exercise routine and don’t get discouraged by slow progress. Building muscle takes time and patience, but you will see results if you stick with it.
It is also important to focus on proper form and technique to avoid injury and maximize results. You can check out online videos for more details with practical experiences.
Can Vegetarians Build muscle Fast?
Yes, vegetarians can build muscle quickly with the right approach to diet and training. Muscle growth primarily depends on consuming enough protein, carbohydrates, and healthy fats, along with consistent resistance training. Vegetarians can rely on protein-rich plant-based foods like lentils, chickpeas, quinoa, tofu, tempeh, and seitan.
Including a variety of fruits, vegetables, whole grains, nuts, and seeds ensures adequate nutrient intake for muscle repair and recovery. Pairing protein sources with complementary amino acids, such as rice and beans, helps achieve a complete protein profile.
Additionally, plant-based protein powders like pea or brown rice protein can supplement dietary protein needs. Regular strength training combined with a nutrient-dense diet allows vegetarians to build muscle as effectively as non-vegetarians. Hydration and rest are also vital components for optimal muscle development.
6 Ways Skinny Vegetarians Can Gain Weight Fast:
Skinny vegetarians can effectively gain weight and muscle by following strategic dietary and fitness approaches tailored to their nutritional needs. Let’s explore the 6 best ways skinny vegetarians can gain weight fast:
1. Consume enough calories:
To build muscle, you need to be in a calorie surplus, which means consuming more calories than you burn. Aim to consume at least 250-500 calories more than your maintenance level each day.
2. Consume enough protein:
Protein is essential for muscle growth and repair. Aim to consume 1.6 to 2.2 grams of protein per kilogram of body weight per day from various vegetarian protein sources such as tofu, seitan, legumes, beans, lentils, dairy, and eggs.
3. Incorporate strength training:
Engage in regular strength training exercises such as weightlifting, bodyweight exercises, and resistance band exercises. Focus on progressive overload by gradually increasing the weight or resistance used in your exercises over time.
4. Eat enough carbohydrates:
Carbohydrates are important for providing energy to fuel your workouts and support muscle growth. Choose nutrient-dense carbohydrate sources such as whole grains, fruits, and vegetables.
5. Focus on nutrient density:
Consume a balanced diet that includes a variety of nutrient-dense foods to support overall health and recovery. Include sources of healthy fats such as nuts, seeds, and avocados.
6. Stay consistent and get enough rest:
Consistency is key in building muscle. Stay committed to your diet and training routine and get enough rest and recovery time to allow your muscles to heal and grow.
How To Gain Muscle Fast For Skinny Guys Exercise?
Here are some of the best exercises for skinny guys to gain muscle fast, along with sets, reps, and other specific details:
1. Squats:
3 sets of 8-10 reps using a barbell or Dumbbell:
This compound exercise targets the legs, glutes, and lower back. It is considered one of the best exercises for building overall muscle mass and strength.
2. Deadlifts:
3 sets of 8-10 reps using a Barbell or Dumbbells:
Deadlifts are full-body compound exercises that target the legs, back, and shoulders. They are considered one of the most effective exercises to build overall strength and muscle mass.
3. Bench Press
3 sets of 8-10 reps using a Barbell or Dumbbell:
The bench press is a classic chest exercise that targets the chest, triceps, and shoulders. It is one of the most effective exercises for building upper body strength and muscle mass.
4. Bent-Over Rows:
3 sets of 8-10 reps using a Barbell or Dumbbells:
Bent-over rows are a back exercise that targets the lats, rhomboids, and lower back. They are a great exercise for building upper body strength and muscle mass.
5. Lat Pulldowns
3 sets of 8-10 reps using a lat pulldown machine:
Lat pulldowns are a back exercise that targets the lats and upper back. They are excellent exercises for building upper body strength and muscle mass, especially for skinny guys with difficulty with pull-ups.
A Comparison chart of Supplements: for how to gain muscle fast for skinny guys:
Here is a supplementchart for skinny guys to gain muscle:
Supplement
Purpose
Whey Protein
To increase daily protein intake, which is crucial for muscle growth
Creatine
To enhance energy production and improve performance during high-intensity exercises
Beta-Alanine
To improve exercise performance and delay muscle fatigue
Branched-Chain Amino Acids (BCAAs)
To support muscle growth and reduce muscle soreness
Vitamin D
To aid in muscle growth and recovery
Glutamine
To support immune system function and aid in muscle recovery.
How Do Skinny Guys Get Chest Muscles?
Here’s what skinny guys can do to build chest muscles at home:
1. Push-Ups:
Push-ups are a classic exercise that can be done anywhere and require no equipment. Start with a few sets of push-ups and gradually increase the number of reps as you get stronger.
2. Dumbbell Bench Press:
This exercise uses a pair of dumbbells and a flat bench. Start with a light weight and gradually increase the resistance as you get stronger.
3. Dumbbell Fly:
Dumbbell flies are performed using a pair of dumbbells and a flat bench. Lie face up on the bench and lift the dumbbells to the sides while keeping your arms straight.
4. Cable Crossovers:
Cable crossovers are performed using cables attached to a high pulley. Stand in the middle of the cables and bring your arms together in front of you.
5. Dips:
Dips can be performed using parallel bars or the edge of a bench. Lower your body by bending your arms and then press back up to the starting position.
6. Incline Bench Press:
This exercise uses a barbell and an incline bench. Start with a light weight and gradually increase the resistance as you get stronger.
Remember to perform these exercises with proper form and technique to gradually increase the weight as you get stronger to continue challenging your muscles and promoting growth
And don’t forget about nutrition! As mentioned earlier, a balanced diet with adequate amounts of protein is essential for muscle growth. Good protein sources include chicken, fish, beef, eggs, and dairy products. Additionally, make sure you’re consuming enough calories to support muscle growth.
Gain Muscle Without Going To The Gym: Easy 4 ways for A Skinny Person
Building muscle without weights can be challenging, but it’s still possible with the right combination of nutrition and bodyweight exercises. Here’s what you can do:
1. Bodyweight Exercises:
Bodyweight exercises like push-ups, pull-ups, squats, and lunges are great for building muscle without weights. Start with a few sets of each exercise and gradually increase the number of reps as you get stronger.
2. Calisthenics:
Calisthenics is a workout that only uses bodyweight exercises. It helps you to build muscle and improve overall fitness. Examples include push-ups, squats, and lunges.
3. High-Intensity Interval Training (HIIT):
HIIT workouts are intense, full-body workouts that can be done without weights. They’re designed to be short but intense and can help build muscle and improve cardiovascular fitness.
4. Progressive Overload:
Progressive overload is gradually increasing the difficulty of your workouts over time to continue challenging your muscles and promoting growth. This can be done by adding more reps, sets, or bodyweight exercises to your routine.
FAQ:
1. Best time to work out for skinny guys:
The best time to work out is a matter of personal preference and schedule, but some general guidelines can help optimize your results.
For skinny guys looking to build muscle, it’s often recommended to work out in the afternoon or early evening. During these times, your body temperature and testosterone levels are naturally higher, which can help enhance your workout and promote muscle growth.
However, choosing a time that works for you and fits into your schedule consistently is also important.
For example, if you’re more likely to stick to a morning workout routine, that may be the best time. The most important factor is establishing a consistent routine and sticking to it, rather than focusing on a specific time of day.
Ultimately, the best time to work out is the one that allows you to exercise regularly, stay motivated, and see progress over time.
2. Meal plan for muscle gain
Meal plan for muscle gain
Here is a sample meal plan for muscle gain:
Meal 1 (Breakfast):
Whole grain toast or oatmeal with almond butter and banana
Scrambled eggs with veggies and cheese
Glass of low-fat milk or plant-based milk alternative
Meal 2 (Snack):
Greek yogurt with mixed berries and a handful of almonds
Peanut butter and jelly sandwich on whole grain bread
Protein smoothie with banana, berries, and whey protein powder
Meal 3 (Lunch):
Grilled chicken breast or tofu with quinoa and steamed vegetables
Turkey or tuna sandwich on whole grain bread with avocado and veggies
Lentil soup with a side salad and whole grain crackers
Meal 4 (Snack):
Rice cakes with hummus and veggies
Apple slices with peanut butter
Protein bar
Meal 5 (Dinner):
Grilled salmon or grass-fed beef with sweet potato and steamed greens
Baked chicken with brown rice and mixed veggies
Vegetable stir-fry with tofu and brown rice
Meal 6 (Before Bed Snack):
Casein protein shake
Cottage cheese with fruit
Whole grain crackers with almond butter
It’s important to keep in mind that this is a sample meal plan and should be adjusted based on your calorie and macronutrient needs. To build muscle, you should consume enough protein, carbohydrates, and healthy fats to support your training and recovery. Additionally, drink plenty of water throughout the day to stay hydrated.
3. Is milk good for skinny guys?
Milk can be a good source of protein, carbohydrates, vitamins, and minerals for skinny guys looking to build muscle.
It contains whey and casein, high-quality proteins for muscle growth and repair, carbohydrates for energy, and vitamins and minerals for bone health.
However, some people may have difficulty digesting lactose and need to limit their intake or avoid dairy products altogether.
4. What foods are highest in protein?
Here are some of the highest protein foods:
Chicken breast: One skinless, boneless chicken breast (100 grams) contains 31 grams of protein.
Eggs: One large egg contains 6 grams of protein.
Greek yogurt: One cup (245 grams) of plain Greek yogurt contains around 23 grams of protein.
Salmon: One filet (154 grams) of salmon contains around 39 grams of protein.
Beef: One 3-ounce (85-gram) serving of sirloin steak contains 26 grams of protein.
Peanut butter: Two tablespoons (32 grams) of peanut butter contain 8 grams of protein.
5. Is whey protein good for skinny guys?
Yes, whey protein can be a good supplement for skinny guys looking to build muscle. It is a high-quality source of protein that can help increase daily protein intake, which is crucial for muscle growth.
It is also absorbed by the body, making it a convenient option for those who struggle to get enough protein through food alone.
Note: However, it’s important to remember that supplements should never replace a balanced diet and a consistent strength training program.
6. How to start a gym for skinny guys?
Starting a gym routine for skinny guys requires the following things:
Setting clear goals
Consulting a doctor
Getting a professional assessment
Choosing the right gym
Creating a workout plan
Warming up and cooling down
Staying consistent and
Eating a balanced diet with adequate protein and carbohydrates.
My Opinion (Best Exercise for skinny guys)
Skinny guys should focus on exercises targeting multiple muscle groups to build muscle effectively. Some of the best exercises for building muscle include squats, deadlifts, barbell rows, bench presses, and bicep curls.
Squats work the lower body and are great for building overall strength. Deadlifts target the back, glutes, and legs and are a compound exercise that is highly effective for building muscle. Barbell rows target the back, biceps, and shoulders, while bench presses work the chest, triceps, and shoulders.
Bicep curls target the biceps and are an effective exercise for building arm muscle. The most effective exercise for skinny guys will depend on their individual goals and fitness levels.
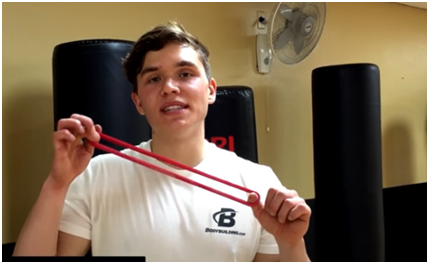
Is all resistance bands are the same? Do you see different sizes of resistance bands? There are several sizes of resistance bands that are developed for different purposes. You can use specific resistance bands for different muscles target to strengthen your specific body parts.
Have you seen the long loop resistance bands? But you do not know how to use them to get most of them? You will wonder how flexible these long loop resistance bands are. Stay with me to know about how to use long loop resistance bands.
How to use long loop resistance bands
Grab your favorite resistance bands and stay connected with your personal fitness. Resistance bands can help you with a low-cost instrument exercise and you have to need only know how to use long loop resistance bands. Let see how is it work:
Easy ways to use long loop resistance bands for a full-body workout
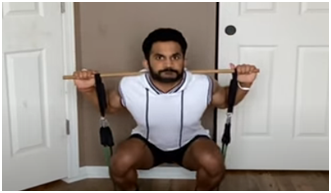
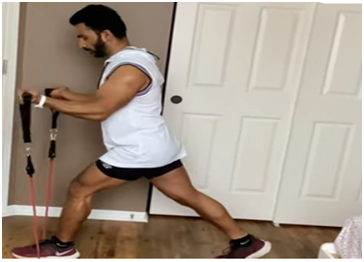
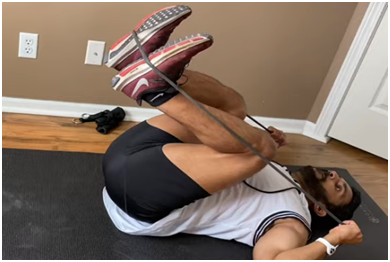
There are many simple ways to target your upper and lower body parts with long loop resistance bands. I will share a simple ten-minute exercise with a long loop resistance band that could be a great complete body workout plan.
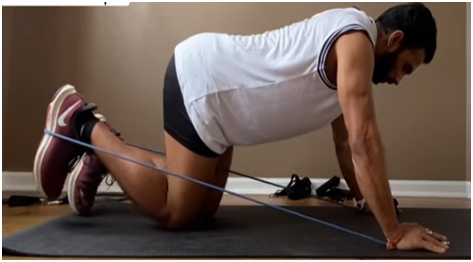
Single-Leg Hamstring Curl
Single-Leg Hamstring Curl is a straightforward exercise that can prove long loop bands as the best resistance for glutes development. It is straightforward to practice.
Take a long loop resistance band and stick its one end with your sofa front leg, or you can also use a door or any other support for that purpose.
Wrap bands next end around your ankle and lay down on the floor on the flat mat in a face-down position.
Now smoothly bend your leg and then straighten it again; practice this for 60 seconds.
Once you have done that, switch the band to your next leg and practice in the same for 60 seconds.
Hip Thrust Slow
Hip thrust slow is an excellent idea if you look for the best resistance band exercises for belly fat and glutes.
Take a long loop resistance band, wrap it’s both ends around your feet. Try to keep your feet at a distance from each other as much as possible.
After that, lay down on the sofa by placing only your shoulders, pull the loop resistance band, and place it in the middle of your body; it will increase the tension.
Keep both your hands under your head and start your exercise. Gently move your hips ups and down; try to take your hips lower as much as possible. Practice it for 90 seconds and after that take 30 seconds break.
Shoulder press
The shoulder press is easy with long loop resistance bands to strengthen your upper body muscles such as belly, chest, and especially shoulders.
Place your one leg before and a resistance band under your front foot.
Wrap a resistance band around your arms and by holding the middle of the band in both hands. Raise your hands as much as possible. Keep your posture straight; once raised, then gently take back to the start position.
Practice it for 60 seconds for one leg; after that, switch for the next leg and practice for another 60 seconds with the next leg in the same way.
Diamond Press
Diamond Press exercise could be the best exercise idea to strengthen your chest, shoulders, and overall arm muscles.
Lay down on the exercise mat on a flat floor, keeping your legs bent.
Wrap the long loop resistance band around your chest from the below side. After that, hold the resistance band on both ends in your hands. Raise both hands as much as possible.
Practice it gently for 90 seconds and then take 30 seconds to break to cool down.
Rear Delt Raise
Rear delt raise with long loop bands is a good resistance band muscle-building workout that may help you to target belly, chest, shoulder, and arms muscles.
Stay straight on the flat floor and hold both ends of the long loop resistance bands in both hands. Maintain your posture correctly and ensure enough distance between your feet.
Now pull both ends in opposite directions. Try to pull them in the opposite direction as much as you can. It will put more stress when you pull it away on opposite sides.
It is very tough to practice so, practice it for 60 seconds and go for the last step.
Lat Pull Down
Lat pull-down exercise with a long loop resistance band is a good exercise in the end that will relax your legs muscle, put stress on your glutes muscles, and will also target your chest, shoulders, and especially legs muscles.
Stuck the oneend of the long resistance band with one leg of the sofa for support and lay down on the mat facing down.
Hold the resistance band in both your hands and try to pull it towards your body; while pulling, keep your head raised.
Practice it for 60 seconds; while practicing, practice gently; fast pulling could cause muscle contraction.
Once completed, relax; you have completed a ten-minute full-body workout with long loop resistance bands.
FAQ:
Can you build muscles with resistance band?
If you ask me a question, can you build muscle with resistance band, then my answer is yes, you can. Resistance bands show excellent muscle-building results. You can easily target any of your body muscles with resistance bands. You have various choices to make your workout stressful to get quick results.
Do resistance bands build muscle in legs?
The answer is yes. Exercising many legs with resistance bands will help you build glutes and leg muscles.
Do resistance bands help lose thigh fat?
When you practice resistance band exercise for legs, they burn the fat that causes thigh fat reduction. Your muscles need stress for burning fats that you can easily do with resistance bands.
Is bodybuilding with resistance bands only possible?
Bodybuilders use different gym equipment for stress to their body muscles. You can do that with resistance bands. Even resistance bands alone can help you in bodybuilding, but you may see results slower. If you want quick results, increase the stress level and practice for more hours.
Conclusion
Long loop resistance bands are very flexible to target whole body muscles. But knowing how to use long loop resistance bands is essential for good results. We have also shared several ideas that may help you target all of your body muscles with long loop resistance bands.
The Samsung Galaxy Watch is a pretty sweet smartwatch. It has the ability to track your steps, control music, and even monitor your heart rate. But did you know it can use GPS? You might be thinking about how to use gps on galaxy 3 smartwatch and how it will work. Also, think about how this feature would drain battery life fast but if you follow these simple instructions then you’ll have no problems at all! The process is very intuitive so there’s really nothing to worry about!
The process requires you to go into the Samsung Health app on your phone and turn on the use of GPS. From there, you just need to wait for a couple of seconds and then open up your great new Galaxy Watch! You’ll notice it started tracking with the help of GPS in no time flat, allowing you to move around without needing to carry your phone with you!
Galaxy Watch 3 Is Better For Running?
The Samsung GPS watch is the best for running. I have tried different running watches in past but this is the best one for me. it also has a heart rate monitor with GPS so you can track your distance, speed, and more things.
The watch is available in different colors too that means it looks great no matter what bands you are wearing.
Now you have a new way to track your run. You can use GPS on galaxy watch 3 and enjoy the best smartwatch! The process is very simple so don’t worry about it, just follow these steps to get started.
All you need to use is Wi-Fi for this method to work properly. Once you download the Samsung Health app, go ahead and sign in to it using your Samsung account. After that’s done, go ahead and start tracking any activity that doesn’t require GPS or anything like that. Go outside where there’s good reception (Wi-Fi) and let the app connect with your phone. If you’re using an older model of the phone then go ahead and open up Google Maps. Start walking or running around until you get the blue dot to the exact spot where you are. If it doesn’t show up then move around a bit and wait a few seconds for it to appear. Once there, go ahead and switch back over to your app! Your good old smartwatch is now ready to track with GPS just like any other high-end running watch out there. Plus, it’s going to be great for trips too! Just take off into town and use Android Pay using this bad boy on your wrist!
How Can I Change The Clock Face On My Galaxy Watch 3
Samsung galaxy watch also has lots of features along with GPS. It can perform all basic features of watches plus it will help you in tracking activities during fitness sessions time after time again.
There are several types of clock faces available for this smartwatch which you can change anytime. If you want to switch the clock face then first, you need to download that particular type of clock face on your device. You can visit the galaxy apps store where lots of watch dials are available including analog and digital dials. Also, there are bright clock faces available with different colors like black, green, pink, etc… After downloading the app select it from the list and tap on the apply button.
If you don’t find any type of watch dial or clock face which you like then go to the settings option whereby the default Analog dial is selected (and grey in color). Now, tap on the Digital icon (which is at the bottom right corner) to switch to the digital clock face. Here you’ll find several types of digital dials and colors that are you can select and apply. If the watch has stopped responding or not reacting then restart your device and try again.
How To Use Gps On Galaxy 3 Smartwatch
The Samsung Galaxy Watch is the best smartwatch available for android users which can perform various functions like tracking activities during fitness sessions, messaging via messages apps (like WhatsApp), Hands-free calling option, controlling music, also allows tracking location using the GPS system.
It has lots of features plus a built-in GPS system so you can enjoy using this smart device everywhere to track your location around the whole day. First of all download any suitable app from the play store which uses a lot of batteries like Google Maps, etc… or you can use any other app which uses a GPS system. Once installed go ahead and tap on the start button for tracking your location continuously.
Now switch over to the Samsung Galaxy Watch available on your wrist (make sure it’s connected with your phone). After that open up the settings option where you’ll find the “sport” option by default. Tap on this particular option then chooses exercise tracking. Here select continuous heart rate tracking + GPS to enable both features at once.
That’s it! Now enjoy running/walking/hiking/trekking without worrying about carrying your phone in hand anymore because now you can track all activities using your smartwatch only. Also, check how to stop galaxy watch 3 notification sounds.
Some Useful Tips And Tricks For Samsung Galaxy Watch 3:
Enable MST on Galaxy Watch 3 if credit/debit card not working Enable Always On Display on ACTIVE models Keep your device always updated via OTA (over the air) service Disable Peeking notification feature on Samsung Galaxy Watch Run S-Voice on Samsung Galaxy Watches Optimize battery life on Galaxy Watch 3. Let’s check some tips and tricks:
1. Download Songs:
Smartwatch’s features are in many ways related to smartphones. If you’re using one, then there’s no need to download songs on your smartphone and transfer them for listening offline. You can use your smartwatch to play music directly from your smartphone without any hassle.
2. Connecting with the device:
If you’ve connected Galaxy Watch 3 with an android phone via Bluetooth, then you can easily manage notifications without carrying your smartphone all the time. You don’t have to pick up your phone from those moments when you receive a call, text message, or WhatsApp notification.
3. Charging:
If your Galaxy Watch 3 is running low on battery then there’s no need to use any charging pad or dock as it comes with a standard USB charger that can be attached directly to a charging source. You can just use your regular USB data cable to charge your smartwatch without any issue.
4. Samsung Health App:
This is an amazing app with many useful features for keeping a check on the overall fitness level of your body. In order to use this particular application, you have to install it from the play store and then set your Samsung account. After that, you can use all the features available in this app on your smartwatch without any hassle.
5. Volume management:
Adjusting volume levels is easy with Galaxy Watch 3 as it provides a separate option for managing volume for media, ringtones, calls, and notifications separately from the main settings menu. Just swipe down from the top of the watch face and then tap on the Settings icon to access all those options.
6. Heart Rate Sensor:
This Galaxy Watch 3 comes with a heart rate sensor at the back of this smartwatch which helps you to keep a check on your heart conditions during workouts or any other physical activity. The sensor allows you to measure Pulse – O2 saturation ratio & heart rate.
7. Samsung Pay on Galaxy Watch 3:
If you want to make payments without any hassle while shopping then makes sure that your smartwatch is updated with the Samsung Pay app which allows you to store credit, debit, and some other types of cards for making payments directly from your smartphone. You can use this feature on this watch in case if all other payment methods are not working properly.
This app is available on the Google play store for all Samsung smartwatch users which allows you to sync your device status, notifications, and activities with other apps installed on your smartphone. It’s a great application that provides many useful features for keeping a check on the overall health of your body.
8. Samsung Pay:
If you want to make payments without any hassle then you can use Samsung pay which allows users to store credit, debit, and some other types of cards for making payments directly from your smartphone. You can use this feature on this watch in case if all other payment methods are not working properly.
9. Lenovo Compatible:
If you’re using a Lenovo smartphone then you can easily connect your smartwatch with it via Bluetooth. After a successful connection between the devices, you can get all notifications on Galaxy Watch 3 without touching your smartphone constantly.
10. Samsung Gear apps:
There are some amazing apps that are installed by default on this watch for keeping a check on various elements of fitness including workouts, heart rate monitoring, and sleep monitoring. These apps are also available on the play store for download which can be installed on your smartwatch later on for managing workouts without any hassle.
Samsung Galaxy Watch 3 Specifications:
The Samsung Galaxy Watch 3 is a premium smartwatch designed to track health and fitness efficiently while providing a seamless connection to your Android smartphone. Below is a detailed breakdown of its specifications and features:
Specifications
Model Variants
Frontier LTE/Exynos 42 mm
Frontier LTE/Exynos 46 mm
Display
Size: 1.3″ (33mm)
Type: Circular Super AMOLED
Resolution: 360 x 360 pixels
Processor
Exynos 9110 Dual-core
Clock Speed: 1.15 GHz
Memory and Storage
RAM: 768 MB
Internal Storage: 4 GB
Expandable Storage: Up to 512 GB with microSD
Battery
42 mm Variant: 270 mAh
46 mm Variant: 430 mAh
Connectivity
Wi-Fi: 802.11 b/g/n
Bluetooth: 4.2 Low Energy
NFC: Yes (Frontier only)
4G LTE Support: Yes (Octa-band)
SIM Type: Nano-SIM
Sensors
Heart Rate Monitor (HRM)
Accelerometer
Gyroscope
Barometer
Ambient Light Sensor
Operating System
Tizen-Based Wear OS
Build and Dimensions
42 mm Variant: 32.5 x 49 x 14.1 mm
46 mm Variant: 39 x 49 x 13.6 mm
Strap Material: Horween Leather
Other Features
GPS Systems: GPS, GLONASS, Galileo, BeiDou
Operating Distance: Up to 98 feet (30 m)
Speakers: Stereo
Charging: USB Type-C charging port
Key Features
Comprehensive Health Tracking
Monitor your heart rate and sleep patterns with accurate sensors, even during intense workouts or under harsh conditions.
Broad Compatibility
Compatible with most Android smartphones, ensuring a smooth and hassle-free connection for all users.
Smart Notifications
Stay connected with notifications displayed directly on your watch when connected to Wi-Fi or cellular networks. Handle calls, messages, and tasks easily without needing your smartphone.
Fitness and Activity Management
Use the Galaxy Watch 3’s built-in fitness apps to record workouts, track heart rate, and monitor sleep. Daily activity summaries are accessible via the S Health app, available on Google Play Store.
Third-Party App Integration
Connect with additional smart devices such as Bluetooth speakers, headphones, or other wearables for enhanced functionality.
How To Use Samsung Pay With Galaxy Watch 3
The Samsung Galaxy Watch is one of the amazing smartwatches available for android users which performs various functions like tracking activities during fitness sessions, messaging via messages apps (like WhatsApp), Hands-free calling option, controlling music. So, you can get and find the answer about how to use gps on galaxy 3 smartwatch payment.
How To Use Galaxy Watch 3 With Non-samsung Phones
The Samsung Galaxy Watch is one of the amazing smartwatches available for android users which performs various functions like tracking activities during fitness sessions, messaging via messages apps (like WhatsApp), Hands-free calling option, controlling music, etc… Here’s how you can use the Samsung pay on your smartwatch:
Firstly download and install the Samsung Pay app from the play store. Then add all your credit/debit cards details in this app so that you can do secure transactions while shopping for what you want. After adding cards go ahead to the payment settings section where by default the NFC option is enabled (and grey). Now tap on this particular option and turning it off. will disable the NFC feature and enable MST feature
That’s it! Now you can shop from any retailer that accepts Samsung Pay as a payment method. Use the payment option instead of plastic cards or cash payments.
How To Read Messages On Galaxy Watch 3
The Samsung Galaxy Watch is one of the amazing smartwatches available for android users which performs various functions like tracking activities during fitness sessions, messaging via messages apps (like WhatsApp), Hands-free calling option, controlling music, etc… Here’s how you can receive and reply to messages directly from your wrist:
Firstly download and install the Google messenger app from the play store. After that open up this app on your phone and select all conversations you want to sync with your watch. Then wait for a few minutes until it gets synced completely. That’s it!
Now go ahead to your Galaxy Watch options then select the messages option where you’ll find the list of all messages which are being received in real-time directly from your smartwatch. You can either reply or ignore them accordingly by choosing different available options at hand depending upon message contents, etc…
How To Configure Galaxy Watch 3 Notifications
The Samsung Galaxy Watch is one of the amazing smartwatches available for android users which performs various functions like tracking activities during fitness sessions, messaging via messages apps (like WhatsApp), Hands-free calling option, controlling music, etc… Here’s how you can configure the notifications and alerts on your smartwatch:
Firstly download and install apps for WhatsApp, Email & sync all your Facebook app contacts with Galaxy watch. After that go ahead to the settings menu then select the notifications option where by default the “Notifications” toggle is turned ON (and blue). Now tap on this particular option and turn it off. will disable all notifications and alerts on your smartwatch.
That’s it! Now only phone calls will be displayed on your watch and nothing else irrespective of their appearance in the galaxy phone notification panel. Also, check How to stop galaxy watch 3 notification sounds.
How To Change Galaxy Watch 3 Watch Faces
The Samsung Watch is one of the amazing smartwatches available for android users which performs various functions like tracking activities during fitness sessions, messaging via messages apps (like WhatsApp), Hands-free calling option, controlling music, etc… Here’s how you can change watch faces on your smartwatch:
Firstly download and install the Watchmaker app from the play store. After that open up this app and tap on the “My Watchfaces” section where by default all installed watch faces will be displayed in front of you. Just choose any one of them which you want to apply to your smartwatch. You can also choose other additional options after clicking the cog wheel button on the right side of this particular watch face. These features are namely: Live preview – to check live previews different watch faces Modify – to get complete control over watch faces. Change background, get options for changing indicators, date & time formats, etc…
That’s it! you’ve successfully changed your Galaxy Watch 3 watch face to a new one that you want. If at any point in time you’re not satisfied with the look and feel of your current watch face just use this option to change them instantly without any hassle.
Conclusion:
I hope this information helps you find the necessary stuff on your new smartwatch. If still, you have any query/concern regarding the above-mentioned tips and tricks just feel free to leave us a comment. We’ll be happy to answer your queries as soon as possible…! Cheers!
You may not have intimate resistance bands as heavyweights equipment as you see in the gym, but still, resistance bands bring excellent results. Resistance bands are not just good for exercise, but they make your workouts easy too. You can exercise anywhere and can exercise for any part of your body.
When considering the use of resistance bands for legs, they bring better results and make your legs stronger. You can practice on your legs, even if you have stretched or sore muscles. But for better results, you should learn the correct way to use resistance bands for legs.
If you are searching for hacks about how to use resistance bands for legs, then stay here and learn about resistance bands’ benefits and ways to strengthen your legs.
Benefits Of Resistance Bands For Legs
Before explaining to you ways about how to use resistance bands for legs, I will explain to you some benefits of using resistance bands for legs.
Resistance bands are very beneficial for lower body parts such as legs and glutes because you can quickly produce force and pressure for lower body muscles with resistance bands.
They are proven to improve size, strength, and muscle functions and are helpful for early healing.
You can easily hit the targeted muscles.
Resistance bands provide similar and sometimes better results than weight training. The mechanism of the resistance band is very safe and produces a lower amount of force on joints but produces more stimuli. It brings more results but protects from injury to your legs muscles.
You have more exercise options; you can exercise at any angle or work for any specific muscle. You can efficiently perform the exercise in the vertical or horizontal plane, making it easier for you to exercise with more flexibility.
If you are injured and cannot work, resistance bands will help you heal your wounded muscles early.
You also have the flexibility for exercise; you can exercise anywhere in a room, garden, or any place that you find for training.
Resistance bands no doubt brings the same or better results for legs than gym equipment, but they are very inexpensive, and you can easily afford
You can continue your legs exercise activity even when travelling; you can keep a resistance band with you when you find time to exercise.
How To Measure Resistance Band Weight?
We all set some targets for muscles and want a better exercise facility for our muscles. We may remain in doubt until we do not know how much resistance our resistance bands offer. Resistance of a band is called resistance band weight.
You may think it is hard to measure the weight of your resistance bands, but I have found it easy to measure the resistance band’s weight.
Indeed you have different sizes of dumbbells in your house gym. Dumbbells can help you to measure your resistance bands’ weight.
Step 1:
Take various weight dumbbells; suppose you have taken 15 pounds, 20 pounds, and 25 pounds dumbbells.
Step 2:
Place the dumbbells on the floor and pull a 25 pounds dumbbell with your band; if you see it cannot move it up, let it and try for the next.
Step 3:
You have attempted a 20 pounds dumbbell, but it does not move up with your resistance bands.
Step 4:
Finally, when you try a resistance band to pull 15 pounds of dumbbell weight, it pulls it up. It means your resistance band’s weight is 15 pounds and is very close to 15 pounds.
When you exercise, this resistance band will provide 15 pounds of resistance to your legs muscles. You may also find other ways about how to measure resistance band weight. But it is a simple way to measure resistance bands’ weight.
How To Use Resistance Bands For Legs?
Resistance bands are a fantastic tool for strengthening and toning your legs. They are portable, versatile, and suitable for people of all fitness levels. By adding resistance bands to your leg workouts, you can target specific muscle groups effectively. Here, we’ll discuss the 10 best leg exercises with resistance bands to help you achieve amazing results.
You need to choose the correct resistance band that provides you enough stress to activate your legs’ muscles to grow them faster. Here we will choose a 50lb resistance band that could offer enough resistance to strengthen your legs muscles.
01. Squats
Squats is a most effective workout that could make your legs muscles more robust, and you can provide enough stress to your calves, quads, hamstrings, and glutes. Here are the steps of how to use a resistance bands for squats:
Step 1
Stand straight on the even surface in a balanced position and hold both ends of the resistance bands in your hands. Then place a resistance band below your feet but keep your feet at a proper distance according to the distance between your shoulders.
Step 2
After getting above position, sit down on your feet and raise both hands below your shoulders by holding the resistance band firmly.
Step 3
Then start to stand up and down gently, but keep your position at the same place and keep your feet distance maintained. If you want to add some more pressure, you can also increase the distance between the feet. Repeat that sit and down sets three times and 10 to 12 reps in each set.
Note:
· Make sure during the entire workout keep your back straight, core muscles engaged and when sitting down, sit as much as possible near to your feet.
· You can also make your grip more comfortable by using the stick instead of holding the resistance band in your hands. It will give you more control and also will increase your stress level.
02. Lunges
A lunge is a good practice for legs muscles; it will improve your overall legs muscles and help you improve your upper body parts. Here are the steps of how to use a resistance band for lunges:
Step 1
Stand straight on the even surface, and hold resistance band’s both ends in your hands firmly. Take your one leg forward and place a resistance band under your forwarded leg feet. Take back your second leg behind from your initial position at a distance as much as possible. Place back leg feet toe on the floor and ensure that you did not place full feet on the floor.
Step 2
Now slowly go down and then stand but do not allow your knee to touch the floor. Practice it for 10 to 15 reps for one leg.
Step 3
After that, change your leg and practice it for your next leg. Practice three sets for each leg.
Note:
· Do not practice it fast; otherwise, your legs muscles will contract, and you may feel pain.
· If you want to add stress to your workout, increase the distance between your feet and stay for a couple of seconds when you sit down
03. Leg Press
Leg press could be the best resistance band leg workout for mass that will make your quads and lunge muscles stronger. It is simple to practice, and you can efficiently perform that leg workout anywhere with a resistance band. Here are the steps of how to use a resistance band for Leg press workout:
Step 1
Sit down on the floor, keeping both your legs forward. Place your resistance band under your feet; make sure you have placed the resistance band in the middle of the toe; it will give you more grip and put more stress.
Step 2
Now pull the resistance bands to touch your hands with your shoulders and slowly lay down on the floor. But remember that in the starting position, your feet should not touch the floor and should remain in the air.
Step 3
Once you have got above position, slowly bend your legs backward towards your chest and make sure your knees should touch your chest or minimum with your belly.
Step 4
Gently straighten your legs, but maintain distance between both legs. It will not just add more stress but also make it easier to practice. Practice three sets of 10 to 12 reps for effective results.
Note
· You can make this practice easier by using different resistance bands such as repeat 12 reps with 40 lb resistance band, then eight reps with 50 lb, and six reps with 60 lb resistance band.
· You can increase the stress on muscles by an increasing distance between your feet and hands.
04. Donkey kick
Donkey kick is an effective leg workout if your target is quads, hamstrings, and glutes. You practice the best resistance band exercises for glutes that will strengthen your legs muscles and activate your shoulders and belly muscles. Here are the steps of how to use a resistance band for a donkey kick workout:
Step 1
Get a position by placing both your hands and knees on the floor and then place one of the 50 lb resistance bands under your foot. After that, stretch the resistance band with both hands and place both hands forward than your shoulders. But make sure your one foot around that you place the resistance band should remain in the air.
Step 2
After that, straight your one leg around that you place the resistance band and make sure your leg should go above your head level. Practice 10 to 12 reps for your first leg. It will strengthen your quad muscles.
Step 3
Next to that, repeat the same practice for your next leg. For better performance and early results, practice it in 3 sets of 10 to 12 reps in each step. But during the entire workout, make sure your moving leg knees should not touch the floor.
Note
· If you want to add tension to your workout, you can use a 60 or 70 lb resistance band and increase the distance between your hands.
· It is a perfect workout if your primary concern is to improve the shape of your glutes.
05. Leg Extension
Leg extension workout is best to choose for your quads muscles. For that workout, you will need a chair and an anchor. You will also need a firm spot to hold the anchor or place it in the bottom of a door.
Step 1
First, insert the resistance band along with the anchor and make sure the anchor is almost in the middle of the resistance band rope. It will make it easier to apply the same force for both legs. Put the anchor in your door bottom and sit on the chair. After that, place a resistance band on both handles in your feet.
Step 2
Now slightly move your chair forward to add some resistance to your workout. Once you have done this now slightly kick forward your legs as high as possible. It will assist you in activating your calves and quad muscles and will bring fast results.
Step 3
Divide your whole workout into three sets and perform 10 to 12 reps in each set.
Note
· You can add more tension to your workout by increasing the distance between the door and the chair.
· You can also increase or decrease resistance band weight to increase or decrease tension.
06. High-straight legged deadlift
High straight-legged deadlift could be the best resistance band leg workouts for heavyweight men. It is easy to practice, and you need a support and resistance band and can perform that exercise anywhere.
Step 1
Take an anchor and insert your resistance band in the anchor. Now place your anchor on the high angle with a door or any other firm post that holds it firmly. Then hold resistance band handles in hands and stay straight.
Step 2
No stretch your body and slowly bring resistance band handles down. It will activate your hamstrings and glute muscles.
Step 3
Now fully stretch your hamstrings, bring handles down towards your feet, and bring them down as much as possible without losing your body. It will add stress and create more tension in your workout. Manage proper distance between your feet to make your practice more challenging.
Step 4
Practice it in three sets and ten reps in each set. You should rest for a couple of minutes between each set; otherwise, it could be very tough for you.
Note
· If you want to make your workout challenging, you can increase resistance band weight or increase the distance between the door and you.
07. Middle skater Lunge
Middle skater Lunge is the best resistance band legs workout that is easy and brings the best results to activate your core muscles. You can not perform it in your home but also can make it more challenging.
Step 1
Place your resistance band anchor in the door at the middle angle, not much high or below. It is good to set it according to your shoulders height. You can place it three or five inches below your shoulders height level in the door.
Step 2
Turn on your side and start practice for one leg. Suppose you want to practice for the right leg, then first maintain a proper distance of 10 to 12 inches between your feet. Now slowly take back your right leg downside but make sure your knee should not touch the floor. Practice 12 to 15 reps for your right leg.
Step 3
Once you have completed reps for the right leg, then turn your side standing on the same position and start practicing as before but for the left leg. If you are tired, you can rest for a minute, but it is better to continue without a break. Workout 12 to 15 reps for the left leg, but keep your core muscles stretched.
Note
· You can add more challenges to exercise by increasing the distance between you and the door.
· Also, stay for a couple of seconds to give more stress to your core muscles when you take down your knee close to the floor at the lowest position but without touching.
08. Middle Alternative Reverse Lunge
Here is the best resistance band exercise for legs and glutes that will hit all muscles of your legs. Middle alternating reverse lunge will help you to practice for both legs simultaneously. For each rep, you will need to change your leg; let’s try it.
Step 1
Place your resistance band anchor in the middle of the door and stay straight two feet away from the door. It will add tension to the resistance band and will make your workout challenging. Also, maintain a distance of 10 to 12 inches between your feet.
Step 2
Once you have got above position, now gently take back your one leg. Place back feet just on the toe and take your knee down towards the floor as much as possible, but your knee should not touch the floor.
Then take back your leg on the initial position and take your next leg back on the feet. Do that exercise and alternate legs each time and perform 15 reps for each leg.
Note
· When taking back your leg takes it back as much as possible, it will increase the stress.
· Never touch your knee on the floor.
· Always try to remain in the same position when alternating legs; it will make your exercise consistent and fruitful.
09. Low Calf Squat
Low Calf squat is a unique exercise that will strengthen your core muscles, hamstrings, calves, and glutes and build your upper body muscles. It will also activate your chest, belly, and shoulders muscles. It brings fast results for leg exercise, and you can add more mass to your legs with consistent practice.
Step 1
Start with placing an anchor in the lower point of the door 10 to 12 inches above the floor. Now hold both handles in your hand and stand straight. Turn your side and pull the resistance band from the backside. Bring resistance band handles above your shoulders level from behind.
Step 2
Now sit down slowly but when you sit on your feet, raise your feet from behind and put all your weight on your fingers and then place back full feet on the floor and stand again. Repeat that practice 15 times continuously but in slow motion. It will be very challenging so practice it slowly in a gentle way.
Note
· Try to maximize the squeeze and stay for a couple of moments when you stand on your toes. It will add more stress and make your exercise more challenging.
10. Low Pull Through
The last one is an easy leg workout and is excellent for your overall legs muscles growth. It seems very easy, but you have several choices in it to make it more challenging. Low pull-through could be your best resistance band leg workout for mass if you practice it correctly.
Step 1
Mount your resistance band anchor at the lower point of your door and stand straight on the floor. Now turn your side and hold the resistance bands handle in your hands. Keep a resistance band between your legs from behind between your thighs.
Step 2
Next, go away from the door and maintain at least two feet of distance to add proper tension in the resistance band. Once you have reached the position, now start practice.
Takedown your upper body and make the resistance band relaxed when your head reaches your belly level, then pull the resistance band and raise your head straight. Pull the resistance band until you stand entirely straight. Practice it 12 to 15 times and repeat 3 sets.
Note
· You can make your workout more challenging by increasing the distance between your feet.
· It could be more beneficial if you change resistance band weight for each set, start at a lower weight and then gradually increase the weight to make your upcoming set more challenging.
How To Use Resistance Bands For Legs (FAQ)
Question No 1: Do resistance bands build muscle?
Answer: Resistance bands are found helpful for building muscles. You can deploy resistance bands for any muscle growth. It offers flexibility and adds tension to your workout to strengthen your muscles.
You may not get faster results when using resistance bands alone, but when combined with other gym equipment improve muscles fast. But using resistance band exercises for legs and glutes show mind-blowing results and also offer greater flexibility.
Question No 2: Do resistance bands burn your legs fats?
Answer: Your legs have a prominent role in your overall movement. If you have strong legs that are perfect, it will be easier to move and perform your routine activities. Thin or massive legs could create problems in movement. If you have heavy legs due to more fats, it will make your regular performance down. You can use resistance bands to burn the fat.
Whenever we give stress to any muscles, it will burn fats and make our muscles stronger. Resistance bands also generate enough stress and tension during a workout that causes fats to burn in our body and around our legs.
Question No 3: After how much time will I see resistance band workout results for my legs?
Answer: No matter what workout you are going to do, it takes time. Resistance bands bring good results to build muscles. But it is not magic, and you need consistency in your practice and time to see the results. You may start seeing resistance band workout results after 4 to 5 months of continuous workout for your legs.
It is affected by many factors such as your workout routine, stress, and your body weight also. If you want fast results, you can combine resistance bands with other gym equipment for leg workouts.
Question No 4: Can you strengthen your legs muscles at home with resistance bands?
Answer: When it comes to growing your leg muscles by using resistance bands at home, it is possible because resistance bands are manufactured to offer flexibility in exercises. You can give stress to any of the body muscles to grow muscles. You can quickly increase your leg muscles with a resistance band, such as calves, glutes, thighs, and above ankle muscles.
Question No 5: What should I need to strengthen my legs muscles with resistance bands?
Answer: There is no doubt resistance bands bring positive results for strengthening legs muscles. But for fast and required results, you should learn how to use resistance bands for legs. You also need consistency and proper workout stress for leg muscle growth.
Conclusion
Resistance bands are the easiest exercise solutions for busy people that offer greater flexibility to them. With resistance bands, one can exercise at home, parks, room, or anywhere. They are not just less expensive but also very effective muscle growth solutions. You can use resistance bands with other gym equipment to bring quick results.
Resistance bands are perfect to use for a full-body workout, but their results for legs are exceptions. You have hundreds of exercise ideas to choose from to activate your legs muscles and make them stronger and healthy. We have also shared some easy and helpful exercise ideas with a resistance band that may help you make your legs shape perfectly as you need.No matter what workout you have chosen, the way of using a resistance band is also essential. So we have also taught you about how to use a resistance band for your legs in detail for each workout.
Are you looking for ideas to build muscles? You may hear about the use of resistance bands to build muscles. But do resistance band build muscle or not?
Resistance bands work in the same ways as free weights to build muscles. They also create resistance for your muscles to fight against the resistance and then help them build muscles.
But you also need to learn the way to use the resistance bands for building muscles. With the right way, you can build muscles as fast as other gym equipment. Here we will provide you with complete information about do resistance bands work for building muscles and how they work.
Can You Build Muscle With Resistance Bands?
Yes, resistance bands can help you to build muscles. What your muscles need is tension, muscle adaptation, progressive overload, and then adequate recovery. When you add resistance bands with normal muscles building exercises, they increase the capacity of muscle growth.
You may find muscles building slower, but no need to worry because it is a time taking process. You need to remain dedicated, consistent, and determined to reach your muscles building goals.
Resistance bands may help build muscles by recruiting the stabilized muscle groups and adding extra intensity in another body-weight exercise to increase your exercises’ resistance, tension, and stress. It not just works for muscle growth but also improves your body focus, rehabilitation, and flexibility.
Resistance bands also create greater flexibility and ease for you to choose the exercises. You can easily stand on the bands, and after holding the ends, you can easily adjust your body at any angle with support. You can easily set your exercise at home, garden or in the park without much equipment.
How Do Resistance Bands Work To Grow Your Muscles?
What do your muscles need for growth during exercise? It is tension and stress on your muscles then recovery. Resistance bands offer enough tension that you can get in several ways better than the free weights and other body-weight exercises.
Due to greater flexibility and ease, it easily suits everyone to use resistance bands for muscle-building exercises. In the free weights mechanism, gravity and load are used to provide tension. When working on free weights, force is created downward by the weight. So in such a way, you need to position your body to ensure targeting of force on your muscles.
Suppose you want to target your chest muscles, then you should lie down parallel on the floor by facing up to put tension on your chest. If you want to hit muscles on your back, you will need to keep yourself bent. So you need to set yourself at different positions for targeting muscles with free weights.
Body Weights also work the same way you need to maintain the gravity for targeting the right muscles for growth. But in the case of resistance bands, you have some advantages.
While using resistance bands, force created by elastic tension. How forcefully you stretch the bands, more tension will create in the bands. It makes it easier for you to hit the right muscles from any position.
Suppose you want to hit your chest muscles, then you can perform the exercise for chest muscles in a standing position with resistance bands.
How To Choose The Best Resistance Bands?
You have plenty of brand options for choosing the resistance bands, but you need to choose the best resistance bands to get the most from resistance bands.
Resistance bands look like small loops and are manufactured with latex or rubber materials. Resistance bands come in color-coding options such as 4, 5, 6, or 8 that you can choose on your preference. Some of the features that may make resistance bands perfect for you.
1. Pick the high-quality brands.
Resistance bands are coded with colors according to the level of tension, such as light, medium, heavy, very heavy, etc. Please choose more than one because different color-coded resistance bands are suitable for different resistance levels.
When choosing never to go with a low-quality option, always ensure that you have picked the best resistance bands that can help you.
2. Choose comfortable bands
Resistance bands come with different options that make them suitable for different uses. Suppose modern bands come with interchangeable handles that you can replace or off when required. You can set them as you feel comfortable using them.
So while picking the resistance bands, try to choose the band that offers plenty of features that make them versatile and comfortable to use. With friendly to use resistance bands, you can get more from your bands.
3. Get accessories with bands.
There are many accessories available that make it possible for you to attach the bands in different ways. If you have a sturdy pole or stair rail, you may not need extra accessories with bands.
But if there are no such facilities at your home, then you need the door attachment accessories. Some accessories such as ankle cuffs, handles, and many other accessories may help you properly attach the resistance bands for exercises.
4. Choose the simple options.
You may find a variety of resistance bands designs but always go with simple options. Try the simple long tube with handles bands initially, but you can choose other designs such as circular and double bands when you have learned.
Do Resistance Bands Build Glutes?
If you want to develop glutes for better performance in sports or aesthetics, then resistance bands can help you. Resistance bands are one of the most accessible options and are simple to deploy in your workout.
Resistance bands are easy to fit for any muscle’s growth, so if you have the best resistance bands for glutes, you can get most with a resistance band.
How Do Resistance Bands Work For Glutes?
When it comes to choosing the best bands for glutes, then latex bands are good options. They are 12 inches long, making it easier to engage hips and glutes simultaneously during the exercise of your lower body
using resistance; you can stimulate your glutes muscle. You can put stress on them for a better workout. By regular exercise, you can add muscles to your glutes. Resistance bands for glutes come in different widths and strengths according to your required resistance levels.
If you want to get early development of glutes, then you should prefer the higher resistance bands for a more challenging workout.
How To Use The Resistance Bands For Developing Glutes?
If you are struggling to develop glutes, you should place the resistance bands around your glutes, calves, ankles, arms, shoulders, and feet. These bands are added for more stressed workouts to offer more resistance to lower body parts exercises such as squats, slides, and lunges.
You get faster results when you add more resistance to your workout by adding bands in your workout. Using resistance bands fat around your glutes burn adds flexibility, tone the lower body, and make your glutes stronger.
Why Do Resistance Bands Help In Developing Glutes?
We want solid glutes for that; we try heavy workouts for developing glutes. But for developing stronger glutes, you need to exercise at the right angle; it is tough to get the right angle for exercise with other equipment.
A resistance band has more accessible options for exercise, and you can get the right angle by putting pressure on your glutes perfectly. By perfect force implementation around glutes, your glutes muscles show early results that increase glutes muscles strength.
How To Measure Resistance Band Weight?
Resistance bands are an excellent tool for adding tension to your workouts, aiding muscle growth, and increasing strength. They provide versatile resistance similar to traditional weightlifting equipment. However, determining the resistance or “weight” of a band can sometimes be unclear. This guide will help you measure the resistance of your bands easily and accurately.
Why Measure Resistance Band Weight?
While it’s not always necessary to know the exact resistance level, understanding it can be beneficial if you’re:
Targeting specific strength goals.
Progressing in your fitness journey.
Tracking improvement over time.
By measuring resistance, you can tailor your workouts to meet specific fitness objectives.
Tools You’ll Need
Resistance bands: Choose the band you want to measure.
Fish weighing scale: A portable and accurate tool commonly used for measuring resistance.
Step-by-Step Guide to Measure Resistance Band Weight
Follow these simple steps to measure your resistance band’s weight accurately:
1. Define the Purpose and Stretch Point
Decide how you’ll use the band (e.g., for pull-ups, squats, or other exercises).
Identify the maximum stretch point—this is where the band provides its peak resistance.
Use a marker or tape to mark the stretch point.
2. Prepare the Fish Weighing Scale
Attach the hook or loop of the fish scale to one end of the resistance band.
Ensure the scale is set to zero for accurate readings.
3. Stretch the Band
Gradually pull the resistance band to the marked stretch point using the fish scale.
Stretch steadily to avoid sudden jerks, which may affect the reading.
4. Record the Resistance
Once the band reaches the marked point, check the reading on the scale.
Note the weight displayed—it represents the resistance provided by the band at that level of stretch.
Tips for Accuracy
Consistent Stretching: Always stretch the band to the same length for comparable readings.
Measure Multiple Times: Take at least three readings and calculate the average for the most accurate result.
Use Proper Tools: Invest in a reliable fish weighing scale for consistent measurements.
Understanding Resistance Band Variations
Resistance bands come in different types and strengths, typically categorized by color or thickness. The resistance level varies based on:
The material of the band.
Its length and thickness.
How far it’s stretched during use.
Benefits of Measuring Resistance Band Weight
Knowing the weight of your resistance band can help you:
Adjust your workouts for specific goals like hypertrophy, endurance, or flexibility.
Replace free weights with equivalent resistance bands during travel or at home.
Monitor your progress as you increase resistance over time.
Lastly, Measuring resistance band weight is a straightforward process that can help you optimize your fitness routine. By using a fish weighing scale and following this guide, you can accurately determine the resistance provided by your bands. Whether you’re a beginner or an advanced fitness enthusiast, understanding your resistance levels ensures you’re on the right path to achieving your goals.
Start measuring your bands today and take your workouts to the next level!
Do resistance band build muscle or tone?
Experts’ comments and experiment results show that training with resistance bands helps build muscles or tone. So everyone who wants fast results for muscle gain should add resistance bands training in exercise programs.
There are plenty of resistance band exercising programs to build muscles, such as weight lifting is one of the most popular ways. Resistance bands offer you greater flexibility for exercise; you are not bound to remain in the gym.
With resistance bands, you can exercise anywhere inside or outside. It also offers you the flexibility to exercise at different angles to apply the proper force level to specific muscles.
But if you are curious to know, do resistance band build muscles or tone? Then it depends on many factors. Resistance bands can help you grow your current lean muscle mass and help you tone the previous lean muscle mass.
It depends on factors such as how fit you are and from how much time you are doing exercise with resistance bands.
For the beginners, results will be prominent, and they also show quick results. But if you regularly exercise and your muscles are already strong enough, you may experience slow results.
But in both cases, you will see better results. You may see slow or fast results, but, indeed, you can build muscles or tone with resistance bands.
Resistance band muscle building workout
Resistance bands are no doubt the best and simple tools to train for building muscles. They offer greater flexibility for training, and you can adopt many workout programs for building muscles of different body parts. We will provide you with five best exercising ideas.
1. Squats
A squat is one of the best training methods with resistance bands to build muscles. You can exercise by squatting with parallel legs, bending your knees over the toes, and then drawing glutes down to the knee level.
Then you can double your band resistance for a better workout by holding each end of the band with straight arms at chest level. After that, begin pulling your legs up and down by drawing the band up overhead and down at chest level.
But keep your belly engaged and arms stronger during practice. But during all the practice, keep your knees bent and arms straight in line with your shoulders.
2. Banded Push-ups
Banded push-ups are good for building muscles around your chest, shoulders, core, and triceps. Experts say that adding resistance bands to this exercise will make it more effective, and you can build your muscles fast.
Using resistance bands is simple and makes it easy for you to maintain your weight balanced on your back.
You can practice that exercise by looping resistance bands around your back. Then grip the band ends in your hands and practice the push-up exercise as you regularly perform. What you will see, the thing that you will experience is more powerful.
Resistance bands will increase the tension in your workout, and you will apply more force than a routine. Just drive your hands into the ground, then press your body up in a locked position.
3. Band Plank with row
Band plank with a row is another option for practicing with resistance bands to build muscles. You can engage a better number of core muscles simultaneously with your biceps taxing. When you add bands in the regular weighted cable band it makes it tough to exercise.
It is pretty easy to practice, anchor the band to a firm post on your front and then choose a plank position with your core tight but keep glutes squeezed. Flatten your lower back and reach forward with one arm.
Hold the resistance band handles and row it to your rib cage and then back with reasonable control. But keep your body tense for more tension in your workout. It will ensure better results, and your muscles will build faster than routine.
4. Oblique Twists
Oblique twists exercise with resistance bands can be an excellent way to build muscles in your lower body portions. It is pretty simple to practice.
Stand straight with wider legs than your hips in a parallel position, and then hold the band in both hands in front of your chest with straight arms. Once you have got the correct position, then start the twists from side to side.
You can start the exercise from your waist, then belly squeeze and work on both sides of your belly. Try to repeat these movements 25 to 40 times for better results.
5. Band Bicep curls
Band bicep curls are a good exercise for building muscles around your biceps. Once you use resistance bands, you do need to exercise with a dumbbell for building biceps muscles. It will give you a tough time with extra resistance to make your workout harder.
You need to stand on the band and hold the resistance band with your underhand grip about your shoulders width apart. When curling the bands, try to curl it as much as possible until it aligns with the collar bone.
When your forearms start touching your biceps, it means you have got the correct position for the exercise. Repeat these movements 15 to 20 times or more.
Bodybuilding with resistance bands only
Resistance bands are becoming trendy due to their best features. Experts also recommend their use in your workout for building a more muscular body. Most of the experts and bodybuilders recommend resistance bands used for better and fast results.
But do resistance bands alone are effective for bodybuilding? The answer is yes; you can build a more muscular body with resistance bands.
Resistance bands offer greater flexibility and multiple easy options for you to practice training for each part of your body. You can use resistance bands for upper body and lower body parts workouts.
What do your muscles need for better growth? It is high tension, progressive overload, muscle adaptation, and adequate recovery. It is possible with resistance bands; you can allow all required facilities for each part of your body.
When you consistently give training to different parts of your body with resistance bands, they start improving. You may see results after some time, but it is proven that resistance bands alone can grow muscles and help you in bodybuilding without using other equipment.
FAQ
Do resistance band build muscle in legs?
Yes, resistance bands are one of the easiest ways to exercise and build muscles. You can use them for any part of your body. But for the legs, they are more suitable because resistance bands are more helpful for lower body parts.
Resistance bands force the user to move with a good form and create more power from the right muscles. You can easily set your body weight and balance by getting your position at a right angle.
How can you stop resistance bands from rolling?
If you choose the correct width and length of the bands, then there are scarce chances that bands will roll. Correct length and width bands remove the problems such as being too loose or too tight, making them stable and correct fit for exercise.
Do resistance band build muscle in massibly?
Yes, by using resistance bands and your body weight, you can build muscle mass. Bodyweight exercises are good for improving conditioning, balance, and muscle mass.
How many calories can I burn with a resistance band?
There is no exact answer to that question because it depends on many factors such as your weight and workout. If your body weight is heavy and you work out for more time, you can burn more calories.
But with lower body weight and a short time workout, you can burn only a few calories. An average calorie-burning for a 125-pound person is 150 calories with a 30 minutes workout.
Do resistance bands help in weight loss?
Of course, yes, because resistance bands burn calories. It is proven that any exercise that burns your calories also helps you in reducing weight. So you can also use resistance bands if you are struggling with heavy body size.
Why are resistance bands good for stretching exercises?
Resistance bands offer more elasticity, so due to higher elasticity, they are perfect for stretching exercises. You can add as much tension in stretching exercises by using resistance bands.
Conclusion
Resistance bands are one of the famous and easy options for flexible exercise. You can use resistance bands with other exercising equipment to make them more effective. Resistance bands are found helpful for building muscles when combining with other gym equipment.
They offer more flexibility for exercise, and you can practice your training anywhere with resistance bands. Resistance bands are so effective even you can benefit from them for bodybuilding without using any other equipment.
Resistance bands are less expensive, flexible, and offer versatile options to use. You can use resistance bands for building muscles and even for weight loss.