Best Treadmill Mats For Hardwood Floors In 2025

best treadmill mats for hardwood floors

In the fitness industry, the contribution of treadmills is undeniable. With its increased popularity, it has also started to dominate the fitness industry. Yet, the users must consider what type of mat will be useful for their floor type. A good treadmill mat provides enough durability that lasts for years. Apart from that, they come with good water absorption ability, sturdiness, and a flexible ability that can hold the machine in the right place. 

Depending upon the place where you want to place your treadmill, mat style varies. Apart from styling, the mat also protects your treadmill from pet waste, hair perhaps from moisture. With the right mat, you can reduce noise as well and extend the life of your mat. 

Placing a treadmill mat, you can allow your body to be flexible in various postures. The mat also comes with superior cushioning that gives you extreme comfortability when you are standing or running. 

If you are one of those indoor runners and looking for the best Treadmill Mats For Hardwood Floors, then this article is for you. Here top 10 choices are reviewed below, do you can find one as per your choice. 

🏃🏃 11 Best Treadmill for Walking– Top Guides And Reviews For 2025

Top 10 best Treadmill Mats For Hardwood Floors reviews: 

01. Sunny Health & Fitness Exercise Equipment Mat

Key Features:

  • High-density PVC Foam material. 
  • Non-slip design
  • Lightweight and water-resistant
  • Different size availability 

Sunny Health and Fitness Exercise Equipment Mat is an excellent choice for indoor cycling bikes, treadmills etc. This is a popular brand that has helped people to achieve their unique fitness goals for 19 years.

This brand provides high-quality fitness exercise equipment that ensures satisfaction for the users. This exercise mat helps you to protect your floors and carpet from damage by the Treadmill or any other exercise equipment.

This mat is made of high-density PVC foam material which provides higher durability and comfort. This mat is light in weight. You can carry it easily where you want. Just simply roll and put this mat under the bed or in the closet. Thus make the mat a space saver also. 

The other qualities of this mat are that it is non-slip, water-resistant and easy to clean. So you can clean it with any damp cloth. This mat also absorbs all the vibrations that ain’t distract you from your exercise. 

Pros

  • Easy to carry because of lightweight
  • This mat is a space saver.
  • Can be easily rolled and adjusted in the closet or under the bed.
  • Protect the floor from scratches.

Cons

  • This mat is micro-thin and not perfectly fits on many exercise bikes.
  • The size of this exercise mat is also not satisfying for many consumers.

02. ProsourceFit Treadmill & Exercise Equipment Mats

Key Features

  • Non-skid texture
  • Easy to clean PVC mat
  • Non-folding design
  • Noise reduction capability 

Prosource Fit Treadmill and Exercise Equipment Mat is an excellent mat for all indoor exercise equipment. Prosource Fit always provides us with high-quality gym equipment that strengthens muscles and is ideal for yoga and performances.

The equipment is made up of commercial-grade material which is budget-friendly for everyone. This mat is the best choice for the home gym, basement and fitness studio.

This ProsourceFit mat is perfect to keep your equipment in a perfect place and keep your wood floor, tiles and carpet safe from damage. This mat is made up of high-density PVC.

It absorbs all the noise and vibration either created while exercising or from outside.

This mat needs very low maintenance. You can use warm soapy water and soft clothes to clean the mat. The size of this mat is also large which is suitable for all the large size exercise equipment. 

Pros

  • This fitness mat is easy to clean.
  • A better choice for home gym and basement.
  • This mat protects the floor and carpet from damage.

Cons

  • Flexibility problem.

03. Gym Flooring Set – Interlocking EVA Soft Foam Floor Mat

Key Features:

  • 18 puzzle mats
  • Infinitely expandable mat
  • BPA Free Eva Foam
  • Water repellent surface

 The BeMaxx is an excellent choice for fitness conscious persons. The motto of BeMaxx is “with every heartbeat” it provides better quality equipment that helps to achieve your fitness goal.

 Bemaxx gym flooring set is an interlocking EVA soft foam floor mat. This gym flooring set is made of high quality, durable material. This set is best for your hardwood floor.

This mat is an interlocking EVA soft foam floor mat. It is an 18 piece puzzle rubber tile that protects the ground surface and it comes in an edge piece that fits in the floor perfectly and protects the floor from scratches, cold, sweats and other things that damage the floor.

This mat is completely BPA free which ensures your safety and well being. This mat is smaller in size with more flexibility. It is an environmentally friendly mat and comes with an anti-slip surface. This fitness mat is waterproof. It is easy to clean with soap and water. It’s easy to expand by increasing and fitting the puzzles.

Pros

  • This mat is environment friendly
  • Light in weight and absorb the sound which is created while exercising from equipment.
  • Small in size with more flexibility
  • Softer than a tiles floor

Cons

  • This mat separates far too easily from each other.
  • If we finish flooring the edges can be seen easily.

04. Amazon Basics High-Density Exercise Equipment and Treadmill Mat

Key features:

  • Durable and sturdy mat
  • High-density mat
  • Clean and smooth surface
  • Thick padded equipment mat

If you’re in search of a comfortable and durable exercise mat then the Amazon basics High-density Exercise mat is an excellent choice you can go. Amazon basics always come with a product that perfectly fits our needs. This is a mat made of high-density PVC( polyvinyl Chloride). This mat is the best choice for home gyming.

This exercise mat from Amazon basics is a thick padding mat. It can fit easily under heavy fitness equipment like an exercise bike, or rowing machine without damaging the floor and not even the mat. The durability of this mat is very great because it is made up of high-density PVC. 

This mat also provides more comfortable postures for the users while exercising as it equips soft cushioning. It helps in protecting the floor from heavy fitness equipment. This mat has a soft surface and is easy to clean. It’s ideal for placing in a home gym rowing machine or an exercise bike. It also provides a clean and optimal workout space.

Pros

  • The material is soft and protects the tiles and flooring
  • This mat doesn’t slip.it does move around.
  • This mat is cushiony and perfect in length and durable.

Cons

  • Quality could be better. 

05. Body-Solid Long Vinyl Floor Mat

Key features

  • Dense and thick material dampen vibration
  • Material: Super-tough, durable PVC
  • 1-year warranty
  • General aerobics mat

Body-Solid is a leading manufacturer and distributor of high-quality fitness equipment for home and commercial markets. This mat manufactured by Body-Solid is well-known for its durability. The product is loved and appreciated by all fitness freaks. If you are someone who loves to practice running and walking rather than hitting the gym, you can try the products from Body-Solid. 

This Floor Mat helps in protecting your flooring from getting damaged. Keeping this floor mat beneath the fitness equipment helps in safeguarding your floor from scratches and dents. The material of the mat is of premium quality so when you will be removing the equipment from the mat it will almost regain its original look. 

The bonus part about the mat is it has muffled noise which makes it easy for you because none around you will be there to disturb you while you exercise. Body-Solid offers a one-year warranty card along with the mat. It also controls floor and carpet dust from penetrating through the belts and mechanical parts of your workout equipment permit prolonging their life.

So what are you looking for? Buy this amazing mat to protect the flooring of your house and to retain its new look for a long time even after using heavy machines like treadmill mat. 

Pros

  • Protect the flooring
  • Damped noise
  • Regain its original structure.

Cons

  • Length is not proper. 

06. Goplus Thicken Treadmill Mat

Key features:

  • Non-slip design
  • Material: High-Density Waterproof PVC 
  • Shock absorption ability
  • Double-sided design

Goplus is one of the leading manufacturers of gym components that are rated highly by users. They have an impressive global ranking of #110 in Exercise Equipment Mats for selling high-quality items. Goplus have slowly gained the trust of buyers from all over the world. The high user ratings are definitive proof of that.

The Treadmill mat by goplus is made of high-density waterproof PVC and has no harmful components in it. Thus, making it safe for kids and pets. One of the best benefits of this mat is that it can be used with a variety of gym equipment. It can also prevent the equipment from scratches or dents and reduce the noise as well. With its high flexibility and strong build, it can prolong the life of your equipment.

One of the other notable features of the mat is that it has a textured non-skid surface that enhances the gripping feature and prevents slipping during workouts. It’s also water-resistant, thus making them super easy to clean with the help of a damp cloth. This mat also helps in reducing the vibrations and noise caused by wear between the floor and equipment.

Pros

  • It is reasonably priced.
  • Has Shock Absorption
  • Reduce Vibrations
  • Prolongs Equipment’s Life
  • Water and Non-slip Resistance

Cons

  • The thickness level could be more than usual. 

07. REALIKE Multi-Purpose Exercise Mat

Key features:

  • Interlocking tiles floor
  • High-Density EVA Foam
  • Seamless look and design
  • Easy to assemble

REALIKE is another trustworthy company that has garnered a lot of positive buyer ratings and has a solid customer base in recent years.  The mat offered by REALIKE provides safe cushioning for yoga, light fitness exercises and can be used as a comfortable anti-slip floor while camping or playing.

These mats are made from High-Density EVA Foam material that is long-lasting as well as nontoxic. This also makes it a lucrative choice for customers with children and pets in their homes. This High-Density EVA Foam also plays an active role in protecting the floor from scratches as well as reducing noise by absorbing the vibrations.

Lightweight interlocking foam tiles can be connected and disassembled easily. So it’s as easy as ever to set them up in the desired place of your choice. 

REALIKE Foam Mats are also designed with a non-slip pattern surface on one side and a flat surface on the other side that faces the floor so you can have peace of mind and exercise to your heart’s content. An additional feature of this mat is that it’s waterproof as well.

Pros

  • Non-Slip Surface
  • Easy Assembly
  • Shock-absorbing surface
  • Non-skid textured
  • Easy to clean as well.

Cons

  • It isn’t too much pricy 

08. TRANR Active Noise Reduction Equipment Mats

Key features:

  • Commercial-grade rubber mat
  • Impact-resistant mat
  • Durable rubber 
  • Safe for environment 

TRANR is a USA based brand that manufactures exceptional quality fitness equipment. It is a very popular and reliable brand. The mat introduced by TRANR is eco-friendly as well. TRANR mats are special because they are made from rescue tires. Thus, helping the environment from toxic wastes.

These Recycled Mats are of very good quality and will not compress, indent or even curl like the foam mats do after a while. Because these are made of rescue tyres, the mats are very robust and very durable as well as dense. Thus, they can survive heavy use for a long time.

Due to the commercial-grade rubber matting, it features active noise cancellation, impact resistance as well as highly shock absorbency. These mats also work on protecting your gym equipment from dust as well, thus effectively increasing the lifespan of the same.  The rubber in the mats is durable as well so it won’t rip or tear.

Pros

  • Active noise reduction
  • impact resistant
  • Shock absorbing commercial grade rubber matting
  • Durable rubber won’t rip or tear
  • Made in the USA from rescued tires

Cons

  • Release the rubber smell. 

09. Gxmmat Large Yoga Mat Non-Slip

Key features:

  • Fold to fit equipment mat
  • Tough design absorb
  • Suits for all equipment
  • Textured non-slip pebble structure 

Gxmmat is a very popular and reputable brand well known for its quality product.  GxmMat is made from Polyvinyl Chloride Foam which is highly durable and long-lasting. It doesn’t rip easily as well. The mat is made from completely non-toxic material so it’s child and pet friendly.

Another feature of this mat is its extra length & width. It is very ideal for home yoga and gym setup. The mat also includes double-sided non-skid surfaces for enhanced traction and superior grip which is a plus in this product.  It provides support for your body and prevents the mat from skidding on the floors. 

The mat is  9mm thick memory foam which is a huge plus in cushioning, stability as well as comfort. This in turn also protects your knees, elbows, and floor during any workouts. Another huge benefit from purchasing any product from Gxmmat is that they are confident of their product quality and also provide lifetime services on their products.

Pros

  • Extra-long & wide for all-purpose fitness
  • Double-sided non-skid surfaces
  • The padded mat provides the body with great support and extra comfort.

Cons

  • Slightly expensive

Best Treadmill Mat For Hardwood Floor Buying Guide

Now you have a list of top treadmill mats for the hardwood floor. If  you are still in confusion to buy the most suitable one, then check the buying guide below:

  • Material

There are different materials used for making treadmill mats. Rubber and plastic are most common in them. Rubber is always better than plastic as this is a great absorber of shock vibration. Other materials used for making treadmill mats include PVC, recycled rubber, foam, etc. 

The PVC treadmill mats are sturdy, waterproof and less flexible. The rubber mats tend to damage in water but offer great softness and convenience. The rubberized vinyl mats are considered the ideal one as they offer durability and water resistance power. 

  • The thickness of the Mat

Thicker mats can not be an ideal choice for you, especially when you need one for a hardwood floor. In Particular, you should not expect extra thickness when the mat is made of inferior plastic. In that case, it can put extra weight on your product which can negate its benefit listings. 

But a rubber mat with extra thickness is always a better choice. The recommended thickness for your rubber mat is good, especially when the user is a heavyweight and irregular runner.

If you are planning for intensive usage of your treadmill mat, then one-fifth inch is recommended for you for high-density PVC mats. 

  • Mat Size

You must consider the size of your treadmill mat. Purchasing a mat smaller than the treadmill is simply a waste of your money. The 36′′x 78′′ is considered as enough to accommodate the majority of treadmill machines. 

But if you have a large treadmill, then buy one that is significantly larger than the regular size. In that case, you can measure the dimension to determine the size of the treadmill mat. It could help you to buy one with the right size mat. Buy one mat that is larger than the treadmill. 

  • Absorption ability

Everyone sweats during a workout. Even if they don’t sweat, at least spill liquid from the water bottle. In that case, you should come up with a mat that can absorb any type of liquid like sweat and water. 

Otherwise, it may cause dangerous issues. The ability to repelsture will not only prevent your floor from being damaged, but it will balance your body when trying any difficult posture. 

  • Non-slip Design

Treadmill slipping damages the floor and it can also make you imbalanced. As a result, you can fall from the machine during the run. You can find a mat that has a gripping feature and can hold the treadmill mat in place. 

You can also get reviews about its potential slippage problem from the user reviews. Almost every flooring mar advertises to have slippage protection, but they don’t. So, don’t forget to check it before you place an order. 

  • Density

Density is another most important issue that you can’t avoid while buying one. Most of the mats are ¼ inch thick, some of them are ⅜ inch thick. A thicker one will be the top choice for delicate flooring. For hardwood floors, you can also come up with thicker mats. 

The density of the mat also has importance on minimizing the noise level. The foam mats are generally ¼ inch thick that works well for minimising noise. 

  • Warranty of the Mat

Many good branded mats provide a decent warranty for defects and damage along with their product. But most of them don’t. So, you should choose one that comes with a warranty. 

These all are some of the important considerations that you can think of when buying a treadmill mat for your hardwood floor. 

Conclusion

In the end of the article, we talked about the Best Treadmill Mats For Hardwood Floors as per our choice. Among all, the TRANR Active Noise Reduction Equipment Mats is our best choice. Though it costs a bit high, you don’t have to compromise with the quality. 

For the budget seeker, the Gxmmat Large Yoga Mat Non-Slip can be an ideal choice. The product also offers you the latest features that others do in this list. 

The Gxmmat Large Yoga Mat Non-Slip is also a great choice for those who are looking for a treadmill mat for a large area. 

I hope the above guide will help you to choose the best one as per your requirement. So, why wait? Follow the recommendations and buy the bat treadmill mat for your hardwood floor, nothing can distract you from your favourite exercise.

Can You Build Muscle With Resistance Band

can you build muscle with resistance band

Muscle-building target is not a nightmare; it is the game of patience, consistency, the use of the right tools, and practices. Bodybuilders practice for long hours with free weights to build muscles in the gym. But modern resistance bands are also supposed to be good alternatives to the gym equipment and free weights.

Resistances bands help build the muscles by offering extra intensity and stabilizing the muscle groups. They offer flexibilities to train at home, work, outside, or during traveling to build muscles.

Resistances bands seem like lightweight rubber ropes that may not satisfy you. But many trainers recommend a resistance band for building muscles. So before choosing resistance bands for muscles building, the question arises in your mind can you build muscle with resistance band?

Stay with me to know if resistance bands for muscle-building are effective and how to build strong muscles with resistance bands.

Can you build muscle with resistance band?

Building muscles with resistance bands is not just possible but also very effective and easy. You can find hundreds of ways to train for building any muscles in your body. It comes with excellent ideas to target your lower or upper body. 

Your muscles need tension, good recovery, adaptation, and progressive overload that is pretty easy to facilitate with resistance bands. You may take some more time to see progress when bodybuilding with resistance bands only. 

But combining resistance bands with other gym equipment could increase your muscle-building capacity. You can fasten your muscle-building process with the use of resistance bands.

What do you need to build muscles with resistance bands?

Before answering the question “can you build muscle with resistance band”, you need know what things you need. Well, your muscles require four main things to build muscles with resistance bands. 

So ensure you have provided the required things to give your muscles a chance to build and grow with resistance bands exercises. Your muscles are building with resistance bands’ needs.

  • Tensions and overload
  • Good recovery
  • Adaptation and progressive overload
  • Protein-rich diet

Tension and overload

Your muscles need resistance to create a stimulus for growth, so you need to apply resistance in the form of tension. It is what we say, stressing your muscles for growth. You have plenty of ways to put tension on your muscles with a resistance band.  Tension is the first muscle-building phase, so find the right resistance band practices to ensure muscle tension.

Adequate Recovery

After tension, the next step for muscles growth is recovery. Muscles recovery means you should sleep, take plenty of water, rest and eat well to ensure maximum muscles growth. 

  • Good muscles recovery needs 7 to 9 hours of sleep because your muscles recover rapidly when you sleep. It leads to a hypertrophy process that helps to gain muscles.
  • Water is essential for muscle building; sufficient water in your body provides a friendly environment for protein synthesis. It will promote protein synthesis and flush out the wastes and all fats loss.
  • Not just sleep, you also need rest when you are awaking, so set a schedule when you relax your muscles.

Adaptation and progressive overload

Your muscles need progressive overload with adaptation with the previous one. Once your muscles become habitual load, the harder workout becomes easier for them with growth. So, you need to increase the load with your muscles growth for fast growth.

If you stop increasing the load on your muscles, then it means your muscles will stop growing because of the same load, same intensity, and same resistance level. This happens too fast when your muscles grow, so you need to increase the load for building muscles continuously.

Amount of resistance, time under tension, the volume of training, and rest between times under tension are the major factors related to muscle overloading.

Protein-rich diet

Your muscles also need enough protein to gain energy and mass with exercise. You have two means of energy: carbs and proteins, but protein is safe and better for health. Protein also has a major role in constructing new muscles and maintaining older muscles.

So intake a protein-rich diet to ensure fast muscles growth; you need 1g of protein for 1 pound weight body weight per day to gain muscles. Bodybuilders also recommend a protein-rich diet to enhance muscle growth with a resistance band muscle building workout. 

You can add protein-rich diets such as meat, eggs, milk, pulses, grains, and protein supplements for fast muscles growth.

How to build muscles with resistance bands?

Resistance bands could strengthen and tone muscles in all body areas, making muscles with a resistance band possible. But first, you need to identify the resistance bands exercises that effectively challenge your body. So to build muscles with resistance bands, you must follow the below tips before selecting any exercises.

Set exercise schedule

You need to develop your workout schedule to meet your daily and weekly requirements. Set a flexible and easy workout schedule at the start and then make changes in the schedule over time. You should include two days a week for upper body muscles to strengthen and two days for lower body muscles.

Your whole schedule of exercises should not be less than 4 to 5 days in a week and thirty minutes a day with resistance bands to get quick results. 

Choose the right tension level.

Choosing high tension could improve your muscles fast, but it does not mean choosing more than your capacity. First, choose the tension level of the resistance band and perform repetitions; if you could easily perform ten repetitions or more than ten, you should increase the tension.

But if you feel too much fatigue and cannot perform 7 to 8 repetitions, you should try the lower tension level. So always ensure the correct tension level by increasing or decreasing tension level for quick and smooth muscles development.

Must include exercises for upper body

Your resistance band exercise should include the best resistance band exercise ideas for your shoulders, biceps, chest, and triceps. To get a beautiful muscular body shape, you must perform resistance band exercises for belly fat for stronger belly muscles.

Must include exercises for lower body

You also need to strengthen your lower body muscles. You can try many leg workouts for glutes, cores, thighs, ankles, and even the feet. For the lower body muscles, such as glutes, you do not just need to have the best resistance band for glutes but also the best exercise for glutes development.

Consistency

Whether you perform the best resistance band muscle building workout, you will never reach your goals until you consistently follow your workout. Only sincere and consistent efforts are the key to success. So ensure consistent muscle-building activities to get quick and fast results.

Helpful tips

Although resistance bands can assist you in building larger muscle groups, you will see results after a significant amount of time. You need patience and consistency when struggling with bodybuilding with resistance bands only.

You should set your short-term goals and assess your short-term goals; if you reach your short-term goals, then it means your exercises are fruitful and keep it continued. But if you do not find any positive results after three to four weeks, then it means you should change your workout and find a better idea to build muscles.

Resistance band muscle building workout 

I will teach you how resistance bands hit every muscle and how to exercise with resistance bands to build muscles. There are five major muscle groups in our body if we do not consider the core. It includes our chest, our back, our shoulders, our arms, and our legs. 

How to use resistance bands for legs

Legs are one of the largest groups of muscles in our body. So I will teach you two different leg exercises with resistance bands because I think we need more emphasis on our legs than all other small muscle groups.

Resistance Squats

Some people recommend simple bodyweight squats to build legs muscles. But it is not enough to get better muscles building results. Using resistance bands for squats adds resistance and ensures tension for glutes, core, and overall legs muscles.

  • Step one

Take a long loop resistance band and hold both of its handles in your hands.

  • Step two

Stay straight on the floor and place the resistance band under your feet; try to keep your legs equal, and the length of the resistance band should be the same on both sides.

0VQuEL4c7FqxiB4n7fVdC60sdkQGg12MKbrz 6mrWKSyYCRfLqiHwp ql3LeM0X3tFiMKvRJ2Z0ugaynBknLz8iWE2bslrdvt 2rWtFrXGoPlgKzLDUSVApZRfcYnd2Dw0dEuCz
  • Step Three

Now pull the resistance band by placing your hands on the back of your shoulder. Try to raise your hands from the back at maximum height.

Pl2Qnww KBHenzD1bFB6sfEVWDfW3GkAPQ2 xQNTpfTxS fWmwPgqvdOTLtSaOeXUS M4T cwNsyblOmk3PWGSxCc1sdu9t RuB9iyq2p Gho
  • Step four

After that, perform squats 10 to 15 repetitions are enough for one set of squats. When performing, do not go so deeper; medium height is better. Do not bend your ass and try to keep your hips straight.

Chest Flys

Chest Flys could be the best resistance band exercise for building chest muscles and improving your arms, shoulders, and belly muscles. 

  • Step one

You will need support in the lower door to firmly hold the resistance band handles. You can use an additional handle to hold the resistance band from the middle in the door lower side. Try to manage equal length on both sides for balances movement.

u8XxNeE7ZIB4nJ0RykPuN5ESpPoKNllrG2Y4 VYcbHh1u
  • Step two

Stay straight, keep the door on behind and hold resistance band handles in your hands. Ensure a proper distance of one to two feet away from the anchor. It will add tension to make your workout challenging.

BcSOvZcGj4cYDR2vyfvNTYYaCppNuFWe6KaVVVttv9axh7q9A3kXCBEl8BQ4zilyLrJlulI2aXrI0MIRT8vRQ4nz56QFDgGR Bd6uGoXv9TAbrTkuaq6 zA3s0hR1f UesweWswR
  • Step three

When maintaining balance, pull the resistance band by pulling both hands in front of your face around your face. Make movements in the same way like you are hugging a giant person.

  • Step four

Perform ten to fifteen repetitions; you could increase the number of reps if you feel easier. When performing reps, do not keep your knees straight; try to keep your elbows a little bent to increase tension.

O9RhEbMFOH4QAdlclEHTDuOoa1WcBeBmDnbh 3d7v7smaeuc6OuFe0jJi6lt Vheu ACS85mPCDosd7jWlMjUJderJ9CUzc QeEDoR2kEPFdK FpmYosYDlwVScKcgY S4PZRs0

Back Rows

Back Rows is my second resistance band exercise for legs that is a great and easier exercise for your back muscles. I will try some lower back rows reps to damage the back muscles; when they recover again will be stronger than before and will become stronger and stronger with every week.

  • Step one

You do not need to remove the resistance band; leave it in the same position as the chest fly’s workout. You need to change your position. Stay two or three feet ways from the anchor by facing the door in a bend body position. It will put pressure on your back muscles and strengthen your back muscles.

IHQrdz y fxVqUK7xiSjpr bXcD97jbv2sHaV0uf9a6tg440a0ZtFYWdtUrlKaMDnirKO90oQl2CQkQ99cdRCakhLrAj9sS8FgGcO SUoQZ6nTbY wqLQzJpBZyWqPP esePpeVV
  • Step two

Keep your ass straight, do not lose it, and try to pull the resistance bands. Try to pull as much as possible, at least to your belly level.

8bd4SaepFnM yXFYkHUhScvK1Guef49xU SoCqtWx8KF7SiGCkybEFItDCzC9QB4RlHF6z7nfoKYIpYUiyhpxQDB4WE6y3ArBDnvW BLu7Fr5XZyb3yhkRiBBIkcGpm5ltPEI9ep
  • Step three

Do not worry about your hands; focus on your elbows and try to squeeze your shoulders when pulling resistance bands. Practice ten to fifteen reps but make sure you keep your position well maintained.

3q mlXZhwfenQakxynMaCgMoYdKW6H3e wuVsB7g MItKtwD9nE5bSzDqhYiAWC60ORpRjE9nkR052KU19O1sX85LzOD79 yF5s8yds2aXZmX43dZX9fmp2BM5g6JpbjTj4Z0sWG

Push down

Now we move to our fourth muscle that is the arms and shoulders. There are triceps and biceps; pushdowns are perfect for the triceps muscles. Pushdowns are easier to practice, and you can practice anywhere with ease.

  • Step One

To perform that exercise, remove your resistance band anchor from the lower door and stick the anchor in the upper of the door.

pT8r6ioIu
  • Step two

Stay in bent body position three to four feet away from the door facing towards the door. Keep your hips straight, but do not go in a deeper position because you need sufficient space for your biceps training. 

wdLzx4nG2aofBE8qZ1hkLPT M KSWTatMlA6Mr35BmwDpN2K13MH2yFRWpaRjoEau7SGudbA45pv6ifAKEMkVEXEVsQpSI4AhG Ju3rteGBSLtiragtxjxdnawzHeuCfyig a5AT
  • Step Three

Once you get the above position, pull the resistance band and pull them until your arms are straight.  But without losing your hips muscles to ensure a good tension level.

fC0isBIErAqoKiTp8VLHITR0yF6INsujOjdrYefDNrBX4RqdInRyD f
  • Step Four

You will feel burning your muscles if you do that correctly. It is a tough practice, and ten reps may be enough for you.  When you straighten your arms squeeze your arms and stay for one or two seconds and then move for another rep.

kpI9sY9N8 XN8d5OkMi8mJK2Czfl8ZQ MPvGakYMgZASlQ

Concentration Curls

Concentration curls are the best resistance band exercise for building bicep muscles. It is easy to practice but offers you greater resistance to build your muscles faster. 

It does not just benefit your arms muscles. Still, it is also a good exercise for the belly because it equally hits the belly muscles and is also recommended as the best resistance band exercise for belly fat.

  • Step one

Hold resistance band both handles in your one hand and loop the setup around your one foot. Folding will increase the tension; you will need more resistance to practice concentration curls. But I will teach you for one arm and then for the other.

uc2Jl ACrFxo6 PHt1dYdVXnygxzAFbRcK3hab9FOPwbR6KfX48fN4k9GN8u9tbodGZPavCNMWaVHPpqOjO6Osfl0qj5IE1LRUWkbnG VyddubPYbJX29dnOQoNrwho3vga1QbtK
  • Step two

Now place your opposite arm on your belly; your hand should be under your elbow to support your arm. It will also make your movement smoother due to the hard space supporting your arms.

gh9BzWZmrjPsXeUy9CVH8ptTJhZuFOW4xObhGveLMw FoLc4cFknF75HS5rPe4wVcIKfDdfr2MtQTLbau3ruMTSTmpoPLJ ZP7vqA VVsTKNJVag3rUELJFLSuHHFUrdgG 6LnVt
  • Step three

Start your practice once you get the above position; pull your resistance band up to your face level without pulling your foot. It is tough to practice but make sure you do not disturb your posture.

oObbnDcYrQRIP4jinhmalYnQEC3fPoVye7EHOAjK2Xa7tXSVSRnh1obckhxT39zBBSp6mtlc7OprKmBYOr 9rtmuLXDUvPpAI3Gfv
  • Step four

Ten reps are enough because it is a stressful workout, and you may feel quick fatigue.

HT5nIIzNuQbvttMLYsB9MNEa 4WGzFFHANVXmu4qlJdEhG VK6XZdBR6JGikKPal9ogvwtPmyRq0MGBNt 985rwwyFR1YkBwOCFwIy2
  • Step five

Once you have completed the ten reps for your one arm, get the same position but for the opposite side and perform ten more reps. 

iHyn3RcMU WQSTnhDw35 1jlaLkiOeMPA6Y2UtbrPK5ZDQu9dzi1pKtYxiWFPflhZEn

Lateral Raise

Indeed your shoulders muscles are one of the biggest muscles groups, and everyone wants to give it the best shape for a good body posture. Lateral raise is one of the best resistance band exercises for shoulders muscles. It strengthens your shoulders and improves your chest and arms muscles.

  • Step one

Stay straight by holding the resistance band on both handles in your hands; loop the resistance band under your feet to get the balanced position. Make sure there is one 6 to 9 inches distance between your feet to make your workout more stressful.

  • Step two

Slowly raise your hands on both sides keep your arms straight on the sides up to your shoulders level. Do not lose your body posture; keep your hips, legs, and chest muscles straight. If you feel hard, you can also little bent elbows for easy movement.

P7fQK2 nQqmAWUUfYqpiR
  • Step Three

Perform 20 reps in 2 sets to make your workout easier. You will quickly build strong and larger muscles around your shoulders if you perform it correctly. But take a rest of one or two minutes between two sets.

P7fQK2 nQqmAWUUfYqpiR

Wood Chopper

Wood Chopper is my last exercise for your core muscles. I will teach you two sets of ten reps for both sides to target your core muscles.

  • Step one

Take a short resistance band, attach it with an anchor, and attach both ends with one handle on the opposite side. Attach the anchor to the door’s upper side and hold the handle in both hands. Stay in a sideways position. Make sure there are more than 12 inches of distance between your feet.

fCEMNX26y1Qv6VKf5BVa9em8NDVUVbcPOLOIPg4uGAL3HMKXfu4kwK5vT7kVh211o5gqOY4LOuVNExSpDu MdiX3jwDuB fIQznnzZy BzCVaYZrvF7 CA toI5M842waAlqJ9DR
  • Step two

Now gently pull the resistance band to the lowest position and move back to the up position. Complete ten reps for your one side.

xFR4LrX40bBfFkjqaAszUebYN oM3FzDmDozR1DcbYynnUk1Qt4 XFkqrEaHmmS 7Ekoc6WWs6YwxF3qDKUeU9rgQE7kg8zpqmkKqg9D3Z2wl5ZeIX0lv0 v5roVCCn4uIYXLfoH
  • Step three

Stay in the same position but for the other side and perform ten reps for that side. You have done your full-body muscle-building workout with a resistance band. 

H k Df6j Hhjs5Y308CYOlK4APFFZIFg NL4D4zbkSAmhSODf UF0K8w0zqyjyR dJx8Ay0wff EnEr7Nw tV ee8W cLVqIkyCmn1rgHspFPA5gJiJo4Ch0aKeQV 6ofc93vgh

Frequently Asked Questions: 

How long to see results from resistance bands?

There is no doubt resistance bands are modern and lightweight workout tools that may assist you in building muscles. You can build any of your muscles with resistance bands. But it takes time to see its results; you can set your short-term goals on two to three weeks tenure for checking the performance.

But its real results will start seeing after three months, after six months you will see a significant change in your body. You will get your required results after six months if you practice correctly. So be patient and consistent to see results from resistance band exercises.

Do resistance bands help to lose thigh fat?

Your muscles need tension and stress to burn fats; whether you have fats in the belly or around your thighs, resistance bands effectively lose fats. There are many leg workout ideas with resistance bands that can assist you in loose thigh fats.

Do resistance bands build muscles in the legs?

Of course, you can use resistance bands to strengthen your legs muscles; squats and many other resistance bands exercising ideas are available that can easily grow your legs muscles.

Do resistance bands build glutes?

Yes, resistance bands also help to develop glutes. You can find several resistance band exercises to build your glutes. Push down is also the best resistance band exercise to develop glutes and strengthen your back muscles.

Is bodybuilding with resistance bands only possible?

When it comes to bodybuilding with resistance bands only, you may see results a little later than using free weights and other metal gym equipment. But it is quite possible to build the muscles with resistance bands. 

If you want quick results, you can use a resistance band with your other gym equipment to make your workout more challenging and productive.

Are resistance bands are better than free weights?

If you compare them to rewards, free weights are better than resistance bands because you can put more stress on your muscles to build muscles fast. There are risks in using resistance bands because they can hurt you. 

Resistance bands, due to some flexibility such as you can train anywhere, anytime, lightweight and safer to use, and satisfactory results make them a better choice than free weights for most people.

Conclusion

Hope, you will get the answer of the qustion,  “can you build muscle with resistance band”. Stronger muscles are a sign of a healthy body, and they do not just develop a good body but also improve our performance in routine life. You have many ways to build muscles, but using resistance bands is an easier, safe, and productive way to build muscles.

After learning the right resistance bands muscles building workout, you can train anywhere, anytime, to get your required results. But you need some patience, consistency, proper rest, diet, and sleep to build muscles with resistance bands.

Resistance Band Exercises For Belly Fat

resistance band exercises for belly fat

It looks very odd and disgusting when you have a big belly. The most affected body area of every fat person is the belly. When fats accumulate around your belly, it doesn’t look good; everyone wants to keep their belly flat and smarter.

People use different belly belts and medicines and get training in the gym to lose belly fat, but everything needs time. You will wonder if there are easier and very effective ways to lose belly fat with resistance bands.

Indeed, you have understood; I will tell you some of the best resistance band exercises for belly fat. Stay here to learn the best ways to use resistance bands for losing belly fat.

Top Reasons for Belly Fat Accumulation

People assume that belly fats are due to overeating, but many other reasons cause belly fat. Some of the common reasons for belly fats could be as below.

Poor dietary plans– poor diet is one of the most occurring reasons for belly fat. People who do not care about their diet and eat sugary and rich carbs and fats suffer from belly fats.

Alcohol– Alcohol is also one of the causes of belly fats, overuse of alcohol causes liver and inflammation diseases that also increase the chances of belly fat accumulation.

Lack of physical activities– People who are lazy or do not pay attention to exercise also face belly fat issues because they do not have enough physical activities to burn fats that cause accumulation of fats.

Genetically problem- the genetic problem is also one of the reasons for belly fat; if it happens due to genetic inheritance, it is tough to get rid of it.

Poor Sleeping- Poor sleeping also causes belly fats because it disturbs overall health and especially the digestive system that causes belly fats.

How Dangerous is Belly Fat for Your Health?

Belly fat is not just a cosmetic concern that affects confidence; it poses significant health risks that can lead to severe and life-threatening conditions.

Excess abdominal fat, especially visceral fat (fat stored around internal organs), is linked to numerous health complications. It increases the risk of:

  • Cardiovascular Issues: Belly fat is a major contributor to heart disease, including heart attacks, heart failure, and high blood pressure.
  • Stroke: Excess fat around the abdomen can raise cholesterol levels and cause blockages in arteries, leading to strokes.
  • Type 2 Diabetes: Belly fat disrupts insulin function, increasing the risk of insulin resistance and Type 2 diabetes.
  • Respiratory Problems: It can worsen conditions like asthma and sleep apnea due to added pressure on the diaphragm and lungs.
  • Cancer: Research links abdominal fat to an increased risk of breast, colon, and other cancers due to chronic inflammation and hormonal imbalances.
  • Liver Diseases: Belly fat is associated with non-alcoholic fatty liver disease, which can lead to liver damage over time.
  • Cognitive Decline: Visceral fat has been linked to conditions such as dementia and Alzheimer’s disease.

Why It’s Critical to Address Belly Fat

Belly fat is not only about appearance but also about long-term health. It acts as a marker for metabolic syndrome, a cluster of conditions like high blood pressure, high blood sugar, and abnormal cholesterol levels that significantly elevate the risk of chronic diseases.

Take Action

To reduce belly fat, focus on maintaining a balanced diet, regular physical activity, adequate sleep, and managing stress levels. Early interventions can prevent these dangerous health complications and lead to a healthier, longer life.

Best Resistance Band Exercises for Belly Fat

Learn the most straightforward resistance band exercises for belly fat. You can lose your belly fat with greater flexibility without practicing in the gym. Here are the list of resistance band for exercises:

01. Hanging Knees In

Hanging Knees In with a resistance band could be very effective for losing belly fat. It is easy to train and does not need enough space to exercise; you can practice in a small room or anywhere you feel comfortable.

Step one: Stick your resistance band with support; you can hang the resistance band with a pole, or your door or any other suitable support to keep it high to hang your knees. Hang the resistance band at a moderate height of four to five feet is enough.

Step two: Wrap both ends of the resistance bands around your ankles and turn your side in a downward-facing position. Put your body weight on your arms, palms, and arms.

Step three: Straight your legs behind and make a space between the floor and your body. Keep your legs high that they do not touch the floor. You will feel pressure on your core, belly, arms, shoulders, and hands. It will increase stress in all areas that will lose fat and build muscles.

Step four: Once you adapt to the above position, start pulling your legs towards you and away in forth and back movement. You will need 25 reps; practice it gently; do not go for fast reps. You may quickly tired, keep counting.

Step five: After completing 25 reps, do not quit; stop but in hanging position. Keep your legs straight but suspended with a resistance band to relax. Remain in that position for five to ten seconds to rest.

02. Hanging Pikes

Hanging Pikes is not just the best exercise for belly fat, but it could be the best exercise for bodybuilding with a resistance band only. It strengthens your belly, legs, shoulders, and overall body muscles.

Step One: After five to ten seconds, rest, start 25 reps for hanging pikes, pull up your hips, remaining in the same position. When you pull your hips ups and downs, it will burn the belly fat and be a good exercise for glutes.

Step Two: If you feel it is too stressful, you can also switch to folded arms position and continue your reps. It will relax your arms, but you will not distract your target.

Step Three: You can also keep switching your position on hands or folded arms after every five reps, but you could go with any choice as you think better. But ensure keep your ass and cores tight and stretched to increase the force on your belly. Once complete, stop and relaxes in the hanged legs but bent legs position for five seconds before going for the next exercise.

03. Lying Restricted Oblique Crunches

Lying Restricted oblique crunches are not just effective as belly fat losing exercise with resistance bands. Still, this exercise will also relax you after the above two challenging and stressful exercises.

Step One: Take a medium size resistance band and attach it with the previous long loop resistance band, and lay down straight on the mat on one side. You will need 50s reps, 25 reps for each side. Suppose you lay down on the exercise mat in the right side position.

Step Two: Once lays down, keep both your legs stretched and touch your resistance band handles with the opposite arm’s fingers. It will stress your belly, but your other body parts will relax with that exercise. Complete 25 reps for your right side.

Step Three: After completing 25 reps, turn your side, lay down in the left-side position, and practice the same way. But avoid bending your legs; it will increase stress on the belly and legs. After 25 reps, stop and relax for ten seconds to go for the next exercise.

04. Restricted Oblique Twists

Restricted oblique Twists is a simple but effective resistance band exercise to reduce belly fat. It is a perfect exercise for everyone, no matter how fat you are. This exercise will also increase your arms and chest muscles strength.

Step One: Stay on your knees at a maximum distance by pulling resistance as much as possible. Once you sit on your knees, gently twist your waist on the opposite side of the resistance band.

Step Two: You will need 25 gentle twists for each side. First complete twenty-five reps for one side; suppose you do 25 reps for the right side. Keep the resistance band fully stretched to increase stress on your belly muscles when twisting your body.

Step Three: After completing 25 reps for the right side, turn your side, sit in the same position but on the opposite side, and practice 25 reps for the left side in a gentle way. Once done, take a breath and rest for 5 to 10 seconds to relax.

05. Resisted Kneeling AB crunch

Resisted Kneeling AB crunch exercise is an excellent resistance band exercise that is beneficial for your belly fat reduction and strengthens your upper body parts like shoulders and neck muscles. It is pretty easy to train anywhere.

Step One: Remove the small resistance band connected with the long loop resistance band. Hold the long loop resistance band in your hands and sit down on the floor. Make sure the resistance band stretches to maximum level. If needed, you can increase its height to make your training stressful.

Step Two: After that, raise your hands to your temple and touch both hands to forehead; pull the resistance band down as much as you can to touch the floor. Complete 25 reps in that training; keep breathing and do all reps slowly when practicing. When you go to a lower position, stay there for one or two seconds before raising your body.

06. Crunch legs with resistance band

Crunch legs with resistance band exercise are the best belly fat reducing activity with short bands. You will not just lose your belly fat, but it will also strengthen your bootie, core, lower legs, arms, shoulders, and neck muscles. In this exercise, you will almost target one or two parts from all levels of your body.

Only one-step exercise is very effective and easy to train.

Lay down on a flat exercise mat in support of your elbows. Please take a short resistance band and wrap it around both feet. After wrapping a resistance band around your feet, raise your legs and take away both of your feet; try apart your feet as much as possible to increase stress.

You can practice 50s reps in two sets 25 reps, first set by keeping right leg before and next 25 reps by keeping left leg before.

Precautions and tips

I hope you have understood it well, but I will mention some precautions to make your exercise more effective to get quick results.

  • Choose the best resistance band for better results keeping in mind your target, gender, and weight. Long loop resistance bands are mostly found effective for belly fat exercises, so if you choose a long loop, then first learn how to use long loop resistance bands for belly fat.
  • When practicing, in each exercise, keep your movement slow but steady to remain relaxed.
  • Ensure a proper diet plan and consistency in exercise to get the best results.

Frequently Asked Questions:

Do resistance bands effective for belly fat exercises?

Of course, yes, because you need to burn your calories to reduce the amount of fat in your body. You need to put pressure on your targeted body to burn calories, so resistance bands are very influential and flexible to stress belly muscles to burn fats.

How to measure resistance band weight?

There are many ways to know the resistance band weight, such as you can read on the packing or read from the resistance band side. You can also measure resistance band weight with weights. Pull the different weights with your resistance band; the maximum weight that your resistance band could pull is the weight of the resistance band.

Is resistance band muscle building workout effective for belly muscles strength?

Yes, resistance band muscle building workout for belly, not just reduce your belly fat. But also strengthen your belly muscles. Bodybuilders essentially include such belly workouts to shape their tummy to get nice look matching to their overall body.

Do resistance bands build muscles in legs when I use them for belly fat?

Yes, most belly fat losing exercises also build muscles in your legs. Most of the above-shared practices also increase your leg muscles strength, such as making your glutes, core, and overall legs.

How long to see results from resistance bands for belly fat?

Resistance bands are very effective for losing belly fat, but their results timespan depends on many factors that could affect resistance bands’ performance. Some of the most affecting factors for belly fat results are age, gender, target, amount of fat, and intensity of your exercises.

Usually, after two to three months, you start seeing results of belly fat exercises with a resistance band. After six months of consistent practice, most of your desired results come.

But if you want quick results, you should increase your workout stress and time and set a helpful diet plan to see desired results fast.

Conclusion

Belly fat creates many problems such as losing your confidence, damaging your body shape, and many serious health issues. So, immediate actions are needed to control belly fat to avoid untoward instances in the future. There are many ways to reduce belly fat, such as changing diet plans, wearing a tummy belt, taking medicines, and exercising.

Among all these resistance band exercises for belly fat are safe and fruitful. There are hundreds of choices for belly fat exercise with a resistance band, but the above six are very easy but very effective.

Keep fit health blog YouTube channel.

How Long To See Results From Resistance Bands

how long to see results from resistance bands

Resistance bands are highly effective for achieving fitness goals due to their versatility and ease of use. They are recommended by experts for building strength, improving flexibility, and toning muscles.

A common question among beginners is, “How long does it take to see results from resistance bands?” While results vary based on consistency, intensity, and individual goals, you can typically notice improvements in strength and muscle tone within 3-4 weeks of regular use.

Keep reading to explore the factors that influence your progress and tips for maximizing results with resistance band workouts!

How Long To See Results From Resistance Bands Workouts?

There is no exact timeframe to see results from resistance band workouts, as outcomes depend on various factors such as workout intensity, consistency, and personal fitness goals. Factors like your starting fitness level, diet, recovery, and overall health also play a significant role.

For beginners, noticeable improvements in strength, endurance, and flexibility can be seen within 2-4 weeks with regular workouts. Visible muscle toning may take 6-8 weeks, depending on your effort and commitment.

The type of exercises you perform also matters. High-intensity workouts targeting multiple muscle groups often yield faster results. Incorporating progressive resistance—gradually increasing the band tension—further accelerates your progress.

To maximize benefits, ensure you maintain a balanced routine, focus on proper form, and combine resistance band exercises with a healthy diet and adequate rest. Consistency is key to achieving sustainable results!

What Factors Affect The Resistance Bands’ Exercise Results?

How quickly you will see results from your resistance bands exercises depends on many factors, but some more common are below.

# Your fitness target

Results of each fitness target are not the same; time varies from target to target. Suppose you want to lose belly fat results time will differ from losing overall body fat. It also depends on your target, such as how much fat you want to lose or muscles you want to gain.

# Consistency

Consistency is also an essential factor to consider; if you are consistent with your workout schedule, you will see excellent and quick results. Whether you have the best resistance bands for glutes development, you will not see good results until you follow the consistency.

# Workout intensity

How intensive is your workout? It also affects the time of resistance bands exercises results. If your workout schedule is stressful and you use high-stressed resistance bands, you will see quick results compared to average resistance band weights.

# Trainee bio

Your body structure, such as age, fat, height, and gender, also affect the results. Suppose you want to lose fats, but you have average weight, then you will see late results compared to a massive person. Men see quick results as compared to women.

#Trainee skills

How skillful a trainee has also affected the results of resistance band exercise. Suppose you want to use long loop resistance bands to lose belly fat, then it is not only enough to know the best resistance band exercises for belly fat. 

It is also essential to know how to use long loop resistance bands for belly fat. An experienced person learns and exercises better than a newbie, so skills also affect the results timespan.

# Nutrition

Nutrition is also a significant factor to consider because you need specific nutrition according to your fitness target when you are exercising. Suppose you want to lose fat, but you do not control your diet, then you will see late results compared to a person who sacrifices his meals. If you do not set any nutritional plan, you may see results later than expected.

Time For Resistance Band Exercises Results

As explained, how much time it will take to show your targeted fitness results varies depending on various factors. But there are some timelines set by the experts to see resistance band exercise results.

# Timeline for resistance band exercises

First month- Starting period

Third Month- Mid time, the start of seeing results

Six Months- time to see targeted results

# First Month

The first month of your resistance band exercise schedule is very crucial. It is the time when you are struggling to stick with your workout schedules, you feel more fatigued, and you also set your nutrition. We can say it is the initial time when you pass through experiments to choose the best one to get quick results.

# Third Month

It is the mid-time when you start seeing the results of your efforts. You see a decrease in your weight and fat loss and feel that your body is strengthening. You feel more competent, fitter, and better in all ways. It is the time when you become habitual, and you can also increase your workout schedule or exercises to make your training more challenging for better and quick results.

# Six Month

Six months are enough to see the results of your resistance bands exercises. It is the time when you get your required size and shape. After six months you will have a lot of changes such as a lot decrease in your body fat, stronger muscles and more power in your body than six months before. It is the time of the reward of your efforts with resistance bands.

FAQ

How to measure resistance band weight?

A measuring resistance band is unnecessary because you will find it on the resistance band. But if it is missing, you can pull different weights with your resistance bands to know your resistance band weight.

Do resistance bands build muscle in the legs?

Resistance bands exercises are equally effective for all parts of your body. So do not worry about what your target you will get satisfactory results is. Many long loops and short size resistance bands can build your leg’s muscles.

As a beginner, how many times a week should I train with a resistance band?

It is tough to exercise for more time with resistance bands when you are a newbie. So set a moderate workout frequency in a week to make you habitual if you are a beginner, then never train more than three times a week.

How could I get quick results from resistance bands for legs muscles?

If you want to see fast outcomes results from resistance bands, increase your workout frequency and get training from the experts to learn how to use resistance bands for legs. You can also make your exercise challenging by adding higher weights and practicing faster reps.

Conclusion

Resistance bands are excellent and inexpensive solutions to gym equipment. You have more flexibility to exercise. But does it work or how long you will need to exercise with resistance bands to get desired results depends on several factors.

You should remember that results from resistance bands exercises are also slower and may take 5 to 6 months to reach your fitness goals. But you can get quick results by knowing the proper techniques, high-intensity exercise, and consistency.

Home Pro Gym Resistance Bands Review [Ultimate Buyers’ Guide]

home pro gym resistance bands review

Welcome to our home pro gym resistance bands review guide. The resistance band is one of the most versatile strength training accessories that are less expensive and portable. Yet, from your home, you can easily enhance your strength using a gym resistance band without paying a high on gym monthly subscription. 

The home pro gym resistance bands are mainly available as a set that can help you do different exercise programs. 

Besides, you will find these bands available in different colours, shapes and styles. Now you don’t have to put effort into researching the best resistance band. 

Here we will share our top 12 home pro gym resistance bands review. This list is curated based on the function, performance, number of pieces, resistance level, etc.  Hope you will find one best as per your choice. 

Top 12 Home Pro Gym Resistance Bands Review:

The resistance bands are lightweight, portable and a great alternative to dumbbells as well. 

Here are the 12 best resistance band reviews given below. 

1. 150LB Resistance Bands Set for Home Workouts-great choice for all time gym lovers

Key features:

  • Stackable up to 150 Lbs
  • Big Metal Carabiner
  • Foot ankle straps
  • Exercise for full body
  • Latex quality ropes

The Resistance Bands Set for Home Workouts is a complete set of workout bands that make your home workout easy. This band is ideal for yoga, bodybuilding, muscle strengthening, etc. Besides, you can consider this one as one of the best resistance bands for glutes. 

The resistance band is designed to ensure maximum safety during workouts. It has reinforced lock and double layer fabric, which make the product safe to use. Apart from that, the stainless steel framed eyelet reduces snapping chance. 

The resistance band is small and lightweight. So, you can take it anywhere. The colour-code individually labelled band is absolutely easy to use and the perfect choice for beginners. 

150LB Resistance Bands Set for Home Workouts

Pros

  • Five exercise bands in a pack. 
  • Two cushioned handle
  • Made with natural latex
  • CIt can suit many exercises as well

Cons

  • Latex quality could be better. 

2. EELLISON Resistance Band Kit

Key features:

  • 6 color resistance band
  • Maximum LBS is 210
  • Anti-slip foam handle
  • Nylon sleeve double protection
  • Durable metal carabiner

Whether you are looking for a premium quality resistance band, then this one can be a perfect option for you.  The metal hook and carabiner ring make it ideal to withstand intense tension. 

The band is designed with a protective nylon cover and anti-said sleeve that add convenience to your exercise. The pack is designed with other accessories such as a lock, ankle strap that allows you to do a variety of exercises. 

It comes with 6 resistance bands that can meet your variety of exercise needs.  The connector hook is heavy duty with a larger and stronger clip that ensures a secure connection. 

The carabiner can easily take 210 Lbs of weight. The pack is equipped with a larger and softer ankle strap to help you do a variety of exercises at the same time.

EELLISONResistance Band Kit

Pros

  • Keep you sturdy even during a heavy workout. 
  • Lightweight and portable.
  • Double layered extra nylon sleeves.
  • An anti-slip body prevents slipping due to sweating. 

Cons

  • Some users have reported its hindrance to workout. 

3. Resistance Exercise Bands Set

Key features:

  • Industrial grade TPR material
  • Soft grip is used
  • high-density foam
  • QINWEIKOO fitness resistance band
  • Lightweight and easy to carry

 The industrial-grade TPE material has made it ideal for use in home gyms for beginners and seasoned users. This is one of the best resistance bands on our list that allows you to do various activities such as glute, hip activation, and other activities that include yoga, pilates etc. 

Using the band, you can exercise your whole body parts, including back muscle, abdomen, hips and legs. The band can be an ideal option for physical therapy and other medicated exercise. 

The material of the band is made with high-quality material that prevents premature wear and tear. The door anchor can be hooked with a door to give it a gym set-up. You can also carry it because it is extremely lightweight. 

Resistance Exercise Bands Set

Pros

  • Heavy-duty and odor-free TPR material.
  • Easy to set and use.
  • The pack comes with three resistance band tube
  • Skin-friendly item.

Cons

  • Not ideal for intermediate or expert users. 

4. Adnutrix Gym Bands

Key features:

  • 150 LBS full stackable
  • 5 level resistance band
  • Full body exercise
  • Made to last for years

  The Adnutrix Resistance Bands Set can be a premium choice if you are looking for a heavy-duty resistance band. Made with 100% natural latex material, it ensures a great workout experience every time.

Whether you want to be trained for harder or better, the 5fivecolourful resistance band can match your different intensity levels when doing practice. 

The stackable design of the resistance band can take up to 150 LBS. Another perk of buying this resistance band is getting a guidebook to guide you in your exercise. 

Adnutrix Gym Bands

Pros

  • Design is multifunctional
  • Premium quality material
  • Cones with a guidebook different colour packs indicate an individual’s sole purpose. 

Cons

  • No cons to this product. 

5. ADSDIA 12 Pack Resistance Bands

Key features:

  • Lightweight and portable
  • Cat effective choice
  • Durable and elastic resistance band
  • Different colour adjustable brand
  • Multifunction and portable

The ADSDIA Resistance Bands are one of the most affordable choices on our list. The product is lightweight and can suit any fitness exercise. The pack of ADSDIA Resistance Bands come with a guidebook that you can follow to exercise in the best way possible. 

The natural, high-quality latex material is durable and odourless. Most of the time, some low-quality latex gets deformed, dried out. But this type of natural latex will not be like these cheap quality products. Many users have also appreciated its elastic quality that holds its tightness for a long time. 

You can use this band for multiple types of exercise. The lightweight feature and convenient travel pouch Make it ideal for carrying anywhere. Each tube of this band is designed in such a way so it can resist snapping and breaking. 

ADSDIA 12 Pack Resistance Bands

Pros

  • Made with high-quality latex.
  • Hold tight for a long time. 
  • Lightweight and easy to carry
  • Available with guidebook

Cons

  • Recommended for only experts who know about using resistance bands. 

6. Chmlsl Resistance Bands Set

Key features

  • 5 band with 150 LBS capacity
  • Natural Latex material
  • Thick sponge ankle strap
  • Thicker and wider handle
  • 100% natural latex
Chmlsl Resistance Bands Set

The Chmlsl Resistance Bands Set can be an ideal piece of fitness equipment that you can use at your home. Being one of the most durable and convenient bands, it can be one of the most popular resistance bands in our list. 

with 100% natural latex, it provides you with an extensive level of support even when doing vigorous exercise. The most interesting part of this band is its handle that is made of a protective fabric cover. 

It uses a thickened and widened handle that makes the grip more stable. The band is connected with a stainless steel carabiner that makes an impressive sturdiness for the same product. 

It can take resistance up to 150 LBS making it ideal for experts and beginners. The present duct can be an ideal choice for your fitness goals like muscle training and fat burning. 

7. Bodylastics Resistance Bands Set

Key features:

  • Max Tension level 96/Lbs
  • kid-resistant grip
  • top-rated door anchor
  • Patented slip guard technology
  • Inner cord safety system

This is another best resistance band that you need for full-body fitness. The Bodylastics Resistance Bands Set comes with important attachments such as handles, ankle straps, and door anchor. The maximum resistance level of this band is 404 pounds. 

 Every tube of this kit has an internal cord that protects the band from breakage. The whole package comes in not more than 5 pounds that are easy to carry anywhere. 

The handles are designed in a fantastic size that fits anyone and suits any exercise. The handle also poses an absolute grippy feature that makes you safe even when your hands are sweaty. 

Another best feature of this band is its anti-snapping feature. It allows anyone to prevent overstretching and snapping, though. Apart from that, the ankle straps are padded that provides comfort during your exercise. 

Pros

  • Premium quality latex makes it durable.
  • Comes with inner cord safety
  • Safe for using

Cons

  • Price is a bit high

8. BONAME Exercise Handles for Cable Machine Resistance Band

Key features:

  • Upgraded strong nylon webbing
  • Camouflage military style
  • Super strong nylon strap
  • Brand large D ring
  • Two stainless steel carabiner

Resistance bands with handles are an exceptional choice for doing any exercise. It provides a sturdy grip that makes you safe during the workout. The BONAME Exercise resistance band comes with a low amount of resistance that can accommodate any seated workout. 

This band can be especially handy if you practice the types of chair yoga. The instruction guide, along with the package, will guide you in performing your workout. The strong D rings and  two stainless steel hooks can take up to 120 pounds. 

Made of high-quality nylon, it safeguards your workout posture with its super sturdiness. The material is waterproof, so you don’t need to worry about slippage due to sweat. 

The experts recommend this band if you don’t like foam exercise handles. The high-quality nylon ensures no unpleasant wearing even after using it for a long time. Another advantage of this nylon material is that it is super easier to clean rather than rubber. 

Pros

  • Strong D rings ensure safety during workouts. 
  • Nylon is wide and thick. 
  • Heavy-duty solid grip prevents injuries.
  • Design is exclusive

Cons

  • Not suitable for vigorous exercise

9. VEICK Resistance Bands Set

Key Features:

  • Full body workout equipment
  • Strong metal carabiner
  • Made of natural latex
  • Can take up to 150 Lbs

The VEICK Resistance Bands Set is another best resistance band set on our list. It comes with an easy to follow guidebook that makes it easy to use. The exercise band is suitable for almost every type of exercise. 

The colour-coded system Is given here to remove your confusion regarding packing the right one. Whether you want to build your muscle or want to lose weight, this resistance belt can be one of the ideal bands for you. 

This resistance band is lightweight and comes with a pouch that makes the product easy to store and carry. The resistance tubes are made of high-quality latex material that is easy to stretch and provides safety. The metal cabinet has made it easy to move, though. 

Pros

  • Made with a high-quality latex material. 
  • Suitable for both men and women. 
  • It can suit every type of exercise. 
  • Adjustable resistance level

Cons

  • It could be more durable

10. KITFit Resistance Band Set

Key features:

  • Combine up to 100 pounds
  • Strong metal carabiner
  • Latex loop band
  • Lightweight and portable
  • Instruction Manual guide

If you are looking for a classic resistance band set, you should not miss the deal. It comes with five pieces of 100% latex quality resistance loop thick, durable and comfortable on your skin. The resistance level of the bands varies between 10 and 39 IBS. So, you don’t have to be worried if you are a beginner. 

Apart from that, different colour indicators come, so you don’t miss mixing them up. The pack of KITFit Resistance Band sets is lightweight, so you can start working out anywhere. 

You can use the band for various fitness exercises such as yoga, rehab, Muscle building, toning your body, etc. The core sliders have different fabrics on top of it to use from both surfaces. The high quality 100% natural latex also ensures its durability and safety when doing moderate to high exercise. 

Pros

  • Material is durable. 
  • Low to high resistance level suits both beginner and expert. 
  • Given with padding to ensure comfort. 

Cons

  • None

11. GoFit Ultimate ProGym

Key features:

  • Seven resistance level
  • Training DVD from expert
  • Attachable handles
  • Thick, durable door anchor

As you know, buying a set of resistance bands is one of the most affordable options for those who want to maintain their fitness. It comes with three resistance levels: 20, 30 and 40 pounds. The package comes with one ankle strap, door anchor, attachable handles, which provide you with an amazing experience working at home gym. 

The products come with a manual guide that tells about the usage of the following items. The storage bag is also great for you where you can carry it anywhere. Connecting the four resistance bands, you can get 140 LBS of tension level effective for an extensive workout.

As the pack comes with four different resistance levels. So beginners, as well as experts, can benefit from it. The handles are provided with powerful grips that prevent you from slipping even when the hand is sweaty. 

Pros

  • Four different levels of resistance.
  • High-quality material
  • Best rated for beginners.
  • Suit for a variety of exercises.

Cons

  • Some users have reported about its lifeline. 

12. Fit Simplify Pull Up Assist Band

Key features:

  • High-quality band
  • Versatile exercise option
  • Easy to carry and portable
  • Pull up assist band

Fit Pull Up Assist Band is another best selling set of bands in an inexpensive range. It comes with four intensity levels of this band, ideal for beginners as well as for experts. 

You can use this resistance band for almost every type of exercise. The harder you will pull, the harder you will work. The whole package of Fit Pull Up Assist comes with an easy to carry pouch. 

The resistance band is made with premium quality latex that makes it durable and resistant to tearing. It can be a great alternative to going to the gym. The package of this resistance band set comes with some important attachments that you can use for various types of exercise. 

Pros

  • Durable and lightweight
  • Affordable
  • Comes in a small package
  • Comes with an instruction manual

Cons

  • The tension level is a bit low

Buying Guide For home pro gym resistance bands 

Buying a home gym band depends on a lot of factors. These factors are discussed below. So, you can choose the best as per your need. 

  • Type  

There are different types of resistance brands in the market. The most popular types of bands are loop band, tube band, circle band, etc. If you practice bicep curl and tricep extension, then you should look for a tube band. Depending upon your type of exercise, you should choose your resistance band. 

  • Length

It will help you choose the perfect length for your resistance band as per your body weight and shape. If you want a band for a whole body workout and pull up assistance, then the more extended resistance band will be an ideal choice. 

The shorter one is also available, but it works for the hip and thigh region. One drawback with longer bands is its portability. 

  • Material

One of the best quality materials used for making premium quality resistance bands is 100% latex rubber. Some brands claim their product to be made of latex rubber. 

But actually, they use TPE material which tends to snap anytime. Safety is a significant thing to consider when choosing a resistance band. So always go for premium quality.

  • Tension Level

The tension level is another crucial thing that you should look for when choosing a resistance band. The tension level varies between 5 to 150 Lbs. 

The beginner should choose a lower resistance level. The medium one is ideal for intermediate practitioners. The tension level is often identified with colour comes that allows the user to select accordingly. 

  • Size

Depending on your exercise, you should choose the right size of your resistance band. You will get options for various sized resistance bands. In that case, make sure you have selected the right one that suits your purpose. 

  • Comfort

Make sure to buy a resistance band that is comfortable and easy to use. There is an interchangeable band also available online that makes it easy to take off and use another round. It would also help if you did not buy a band that causes pain while using. 

  • Simplicity

As a beginner, you should always choose resistance band sets that offer simplicity. The band that has fabric on its top feels excellent to touch. 

These types of bands are also slip-resistant. However, some are also available with anchor and detachable handles, which offers flexibility and versatility. 

  • Accessories

If you’re looking for a resistance band for a full-body workout, choose a pack that consists of handles, door, ankle strap, etc. Look for a band that comes with a carabiner. Sometimes you may need a carabiner for attaching the anchor points. 

  • Safety

You must look for safety features when choosing resistance bands for workouts. If the door handles are not designed properly, it can cause injury to the user. 

For some bands especially pull up assist, you should be aware of its safety. Look for a brand of standard quality. 

These all are some important factors that you should consider for buying a gym resistance band to give a perfect home pro gym setup.  

FAQs: home pro gym resistance bands review

Q: How to measure resistance band weight?

There are different ways to measure resistance band weight. One of the most common ways to weigh is to use a fish weighing scale. First, set up the band in the way you intend to use it. Let the fish scale pull the ban to its maximum point. This way, you can measure resistance band weight. 

Q: Do resistance band build muscle?

Yes, you can build muscle using resistance bands. In that case, using a resistance band, your muscle can grow its tension level. Through proper training and usage, you can easily build your muscle 

Q: How to use long loop resistance bands? 

First, loop the band beneath your foot. Put your both feet on a resistance band. Take the band facing forward. Lift the arm towards your shoulder. It makes a great contraction on your bicep. Gold the position for a few seconds and then get returned to the position from where you had started. 

Conclusion

That’s all for today about home pro gym resistance bands review guide. Hope, you got an idea about choosing the best resistance bands bodybuilding. However, don’t be confused with the best 12 products mentioned above. For a quick guide, we would like to share our editor’s choice. 

Suppose you’re looking for the best resistance band from the list, then go for bodylastics resistance bands Set. It may cost you a bit more than others, but the product will surely meet your satisfaction. 

Some people also want to buy a quality product on a standard budget. In that case, they can go for  Fit Simplify Pull Up Assist Band as this is the best selling pull up assistance band from our list. 

For beginners, the Fit Simplify Pull Up Assist Band can be ideal as it comes with lower tension levels that aren’t the exercise type of a beginner. 

The above recommendation will help you to pick the best one for you. Never miss following the guidelines in the instruction manual that ensures you safe exercise every time.

Simple Ice Skating Techniques for Beginners

Simple Ice Skating Techniques for Beginners

The ice skating season is getting underway and whether you’re a beginner or an experienced skater, there are some simple techniques to help get the most out of your skating. In this blog post, I’ll be discussing some basic moves with simple ice skating techniques that will work for everyone from beginners to advanced! 

In addition, I’ll also share tips on how to properly maintain your skates so they last longer and don’t cause injury. So if you’re interested in learning about these topics then keep reading!

First off, a little bit about me. I learned to skate when I was four years old and absolutely loved it. As a matter of fact, skating has been one of my favorite sports for as long as I can remember! There’s nothing better than gliding across the ice with the wind in your face – 

That’s me at 8 years old with my first coach.

I became a competitive figure skater at the age of 12. I had won several regional championships and competed internationally for Puerto Rico in countries like Brazil, France, Spain, Switzerland, etc… My amateur career eventually ended after 10 years but ever since then I have continued to skate both recreationally and for fitness.  These days I usually practice 2 to 3 times a week or more if I’m training for an upcoming competition.

Skating is actually part of Crossfit!

Even though I’ve been skating for over 20 years, I still love to learn new moves and refine my techniques – it’s something that never gets old to me. From time to time I find myself thinking back on moves that I haven’t done for years and then deciding to go out on the ice just to see if I still have it. At one point, people who saw me skating probably thought I was crazy because they probably couldn’t believe how old I am! It really doesn’t matter what age you are – you can always learn new things and get better at skating. The only limit is the one that you set for yourself.

Best Ice Skates For Beginners – Unbiased and Ultimate Guides And Reviews

Simple Ice Skating Techniques For Beginners

Now I am going to talk about some simple steps for starting skate on ice. I will discuss some tips and steps that you should follow. These may sound kind of basic, but it is very important to emphasize these points because they will help keep you safe and make your skating experience a lot better:

1) Protect yourself first: 

It’s important to first protect yourself with the proper gear like helmets, wrist guards, knee pads, etc… It doesn’t matter how good of a skater you are, falls happen. But by wearing the proper gear, you can help reduce possible injuries. This is the first way to save yourself for the step of simple ice skating techniques.

2) Wear the proper clothing: 

Make sure to wear clothes that are heavy enough for your activity level but light enough to allow your body to stay warm. Also, make sure that your clothes are not too loose. Loose clothing can cause you to trip and fall so make sure your clothing fits properly. 

3) Pay attention: 

If you’re skating with other people, then pay attention to what they are doing and how they are skating. Skating with other people is fun but it’s important that everyone follows the same rules.

4) Always hold on to the barrier: 

If you feel unstable for any reason, then always hold on to the barrier. This will help keep your balance and prevent falls. 

5) Keep your blades sharpened:

If you want your skates to work properly, then it’s important that your blades are sharpened by a professional skate technician or yourself if you know how to do it. It is common for beginners not to be able to sharpen their own skates but once you learn how you’ll save lots of money in the long run! There are many places where they offer this service at reasonable prices or even free depending on what type of skate they are servicing.  

6) Properly lace up your skates: 

This is very important! If your skates are not tied tightly enough, it can cause falls or even injury. Also, make sure that the laces are not too tight because they might force your feet to go forward when you really don’t want them to.

Some common mistakes when ice skating:

One of the most common is leaning back after pushing off with your legs because it will cause you to lose stability and make it harder for you to balance yourself on your blades. You should also try and keep your upper body as straight as possible and lean forward slightly instead (almost like a ski jump) if this is something we typically do in sports such as skiing or snowboarding.

FAQ

⚫ What is the easiest way to ice skate?

The easiest way to ice skate is by going with someone who already knows how to skate and holding on to them while they lead you. If you are skating alone, then the best thing for beginners is to use a rope or leash because it will allow you to maintain some connection with your instructor without having your hands occupied. There are also skates that have two blades connected together at the front of the boot making it harder for new skaters to fall since there is no free foot in case they lose their balance.

⚫ What equipment do I need?

If you’re just starting out, then all you really need is something comfortable that will keep your feet warm and prevent injuries if you fall – this means wearing gear like helmets, wrist guards, knee pads, etc…

⚫ Do most people start on ice skates?

No, but it is what I would recommend. If you already know how to roller skate then it will be easy for you to learn to ice skate because skating on solid ground is similar to skating on ice with the exception that slipping usually does not happen in roller skating. That’s why I think somebody who knows how to roller skate should use ice skates when they are teaching somebody else. Otherwise using regular sneakers might be more convenient if your rink offers rentals or if you have old skates at home. However, choosing between starting on ice or inline skates really depends on an individual’s preference so it doesn’t matter too much which one you choose as long as you know how to skate on your chosen method!

⚫ I want to learn more about roller skating, what should I do?

First, make sure you properly lace up your skates. Next, make sure that you adjust the length of your toe stops for stability and control. You can then practice pushing off with one leg until you are comfortable gliding across the rink floor. After that, try pushing off with both feet at the same time until you are ready to move forward. Last but not least, hold on to the barrier if needed while making sure that you keep your feet under yourself so you don’t fall or lose balance.

⚫ How do I stop on ice skates?

When you are first learning how to skate, then it’s important that you simply continue practicing until you become more familiar with the movements. If you need to slide to a stop at some point, then make sure your weight is evenly distributed over both of your blades and bend your knees slightly. It might take some time but eventually, you will get used to it!

⚫ Can beginners play hockey?

Yes, absolutely! There are many benefits for beginning ice skates vs inline skates, so I recommend checking out one of my articles about Whether Ice Skating or Roller Skating Is Better if this is something you want to consider participating in later down the road.

⚫ Is there any way I can improve my ice skating skills quicker?

As I mentioned earlier, you can hold on to the barrier while gliding around the rink floor until you feel comfortable putting your weight on one foot at a time. Some rinks also have skates that are designed for new skaters which will prevent you from falling since they have two blades instead of just one! You can always ask an instructor about these special skates if this is something that interests you.

⚫ What are some common ice skating injuries?

Some of the most common injuries are sprained ankles, falls, and collisions with other people or objects/equipment. Since no matter how well-trained or experienced someone is, each person has their own abilities and limitations (no matter what type of skating you are doing).

⚫ Do ice skates have to fit tightly?

It’s important that your blades are sharp. You should also loosen your laces so that the top of the skate fits snug against your ankle but not too tight where it hampers your movement. Make sure that there is about one finger width between the front of your foot and the inside of the skate. If you need more than that then it might be a good idea to get in contact with a professional who can help you out!

⚫ Can children ice skate without parents?

This really depends on how mature and responsible you think your child is when they’re skating by themselves. Certain rinks might require parents to stay nearby just in case something happens whereas others might allow kids to skate by themselves after they have completed a certain amount of lessons. Either way, you can always contact the rink ahead of time so that you don’t have to worry about anything unexpectedly occurring.

⚫ How should I adjust my equipment if I keep falling?

If you’re having trouble staying on your skates then it might be a good idea to practice push-ups or squats until you feel more comfortable. You should also make sure that your skates are sharpened regularly to make sure they are cutting into the ice properly. Additionally, you can always ask someone at the rink if they have any suggestions for helping you improve your balance!

⚫ Do I need to wear gloves when ice skating?

It’s never a bad idea since it will help keep your hands warm and dry which will help prevent any type of injury from occurring. It also helps with gripping onto the barrier to stay balanced which is definitely something that beginners need!

⚫ How many lessons do I need before I stop falling so much?

You should continue practicing as often as you can in order to become better at your form. You should also try to take lessons with an instructor if you feel that you are having too much trouble since they might be able to give critique on how you can improve your balance and stability!

⚫ How common are injuries when ice skating?

There are a fair amount of injuries but it’s important to make sure that you wear proper protection such as helmets, knee pads, wrist guards, elbow pads, etc. without these essential pieces of equipment it will put you at risk for getting hurt which is why I highly recommend wearing them whenever possible!

⚫ Do skates have heels?

No, not typically however there are certain types of skates that do have shorter blades than others so they look like figure skaters. Either way, you should always make sure that your blades are sharpened regularly since it will make skating easier and safer!

⚫ What do I need to start ice skating?

For starters nothing (if you can borrow some skates or rent them for just a few hours), however, if you’re serious about learning how to skate then I would suggest buying your own equipment so they don’t have to be shared by just anyone. You might also want to purchase knee pads, elbow pads, wrist guards, etc. since these items are very cheap compared to the cost of renting skates every time you go out on the ice!

⚫ How fast does ice melt in the sun?

Since ice is basically frozen water it is anywhere between 32 degrees Fahrenheit and 0 degrees Fahrenheit which are the coldest and warmest temperatures that it can be! It usually melts around 50 degrees Fahrenheit so if you live somewhere with a lot of sunlight then there’s a good chance that your ice rink will have one of these conditions within a few hours. If not, then it likely won’t start to melt until much later in the day.

⚫ How does ice form?

Ice is basically frozen water molecules since they fuse together due to their attraction towards each other when they are extremely cold. Ice is most commonly found on objects that are exposed to sub-zero temperatures either above or below the surface of the earth although there are certain types of bacteria that are able to bring water down to sub-zero temperatures as well!

Conclusion

So there you have it! Just by following these simple steps, you will be well on your way to learning how to safely skate on ice. We all started out as beginners at some point, so just remember that if you fall down, then get right back up and keep trying again until you get the hang of things. When in doubt ask someone for help – most people would love to assist you with whatever problems you may encounter while practicing your skating skills.  So get out there and get practicing your skating moves. Soon you’ll be impressing everyone on the rink with your skills!

I hope you learned something new from this article about ice skating techniques for beginners, please remember to share it with friends and family if you think they will benefit from learning some of these simple steps. Thanks for reading my posts! 🙂

Cardio Alternatives to Running at Home

Cardio Alternatives to Running at Home

Running is an excellent calorie-burning activity because it requires rapid movements of the legs. It also works the upper body, because you have to use your arms for balance and to propel yourself forward.

“Running has many physical benefits including weight loss, injury prevention, increased endurance, cardiovascular health, and improved mood,” says Mayo Clinic.

But you don’t have to run if you do not want to. There are a number of cardio alternatives to running at home that will give you the same level of calorie burn and impact cardiovascular health.

Most accurate running watch 2025 [Exclusive guides & reviews]

Cardio Alternatives to Running at Home

Take a look at some low-impact alternative exercises:

Swimming is a good aerobic workout, which means it gets your heart pumping and improves circulation throughout the body. Swimming can be done in any body of water from a lake or ocean to a swimming pool or hot tub. Exercising in water provides excellent resistance training for all areas of the body while reducing strain on joints.

Water aerobics classes are also an option; they are on strength training through slow movements in the water. Water aerobics is often done in warm water to reduce the impact on joints, which is great for older people or those with joint pain.

If you don’t have access to a pool, there are other ways you can work out in the water:

01- Stand up paddling(SUP): 

SUP uses elements of surfing and kayaking to give you an upper-body workout. You can also do yoga or Pilates poses while on your board.

Stand-up paddling is a great way to get in shape, find balance, and relieve stress. This water sport uses parts of surfing and kayaking so you’ll use your whole body as well as tone your muscles. Stand-up paddling is also incredibly peaceful on the water. You can take some time to reflect or even do yoga poses while remaining calm with the soft sound of lapping waves all around you. 

It’s an exercise for both young people looking for adventure and seniors who need something more relaxing than running!

02- Swimming: 

The same as above but without having to use equipment such as floatation belts and vests; just jump in and go! Check your local council’s website for public outdoor pools near you, which will be cheaper than visiting a private pool.

03- Aqua jogging: 

As seen at the Olympics, aqua jogging is running in ankle-deep water. Great for those who want to get a workout but with reduced impact on legs and joints.

If you’re looking to get in shape while keeping your joints and muscles happy, aqua running might be the perfect thing for you. 

With this innovative new product on sale at our store, you can work out without the bumps and bruises that come with regular running or jogging. Who wouldn’t want that?

04- Cycling: 

Cycling is another great cardio alternative to running at home because it works all of the major muscle groups in both your upper and lower body. Cycling outside or inside in the fresh home ground air provides excellent cardiovascular benefits and gets you closer to nature.

05- Burpees: 

Burpees are a great calisthenics exercise for improving strength, cardio, and endurance. You can do burpees anywhere, there is no equipment needed.

06- Jump Rope:  

Jumping rope is a great cardio workout at home because it’s easy to do, inexpensive and you can even do it in your living room. If you are jumping rope outside, make sure you wear comfortable shoes.

Kick some major booty with this lung-busting workout. Get lean, mean, and tuned up in time for summer! Sure it may seem like hard work right now, but after a few weeks on the ropes, you’ll be joking jumper’ like an old pro. You can take your jump rope with you any time; just squish that sucker into your pocket or backpack! Intensity levels are low impact so no need to worry about keeling over while getting fitter than ever before. Give up the expensive gym membership (and the constant judgment!) and get rope-tastic at home!

07- Jumping Jacks:  

Jumping Jacks are a low-impact cardio workout that you can do at home. They are great for your arms and legs and also improve your endurance and speed.

Imagine the ground coming at you and running away from you as if it were dropping to reveal stars below. Never was there a sight so beautiful – until now. 

Your face represents that of a cheetah on the prowl, your strides those of one whose time is precious because they’ll soon be outdone by another kind: death.

The Jumping Jacks will send them packing, however, with six basic movements performed without rest for 15 minutes after which whatever muscles haven’t been sufficiently engaged yet may take a worthwhile break. No, but seriously this shit kicks ass and if anyone tries to sell you anything else please punch them in their stupid-ass faces.”

08- Swinging Kettlebells:

Kettlebells improve strength in the lower body, core, and upper body muscles. They tone muscle while improving cardiovascular health.

Improve your fitness and cardiovascular health with these kettlebells. The easy-grip vessel eliminates the need to switch hands while swinging, meaning you’ll be that much better at improving coordination. Swing away and reap the benefits!

Conclusion:

All are the best eight cardio alternatives to running at home. This is a very important part of any person who wants to exercise on daily basis. Choose a cardiovascular exercise and start to keep fit health with a home workout.

Running VS Walking Which Is Better For Fitness

running vs walking which one is better

If you are aiming for a healthier lifestyle, running and walking are excellent options to consider. While both activities promote physical fitness and overall health, they differ in intensity, calorie burn, and impact on your body. Running is a high-intensity activity that burns more calories in less time, but it can be harder on the joints. Walking, on the other hand, is low-impact and gentle on your body while still providing significant health benefits.

Let’s explore the benefits of each to help you decide which is better for your fitness goals.

Running VS Walking Which Is Better For Fitness

For Running

What running can do for you

Running, done at a good intensity level, can provide several benefits. It’s very effective in burning calories and improving aerobic endurance. Running also helps strengthen your heart and blood vessels by increasing the capacity of your lungs and increasing the amount of blood that your heart pumps each minute. Furthermore, studies show that running is associated with a lower risk of coronary heart disease and stroke, as well as Type 2 diabetes.

Benefits of Running

Running offers numerous physical and mental health advantages, especially for those looking for a more intense workout.

  • Burns More Calories: Running burns approximately 10–12 calories per minute for an average adult, depending on speed, weight, and fitness level.
  • Improves Cardiovascular Health: It strengthens your heart, improves lung capacity, and enhances blood circulation. Regular running can lower your risk of heart disease, stroke, and high blood pressure.
  • Builds Endurance and Strength: Running engages your core, lower body, and cardiovascular system, helping to build endurance and muscle tone.
  • Supports Mental Well-Being: It triggers the release of endorphins, reducing stress and improving mood, often referred to as the “runner’s high.”
  • Aids in Weight Management: Running is one of the most effective ways to shed calories and manage weight.

❣ Running With Bad Knees What Shoe Is The Best? Facts You Should Know

For Walking

What walking can do for you

Walking is also an effective way to burn calories and strengthen your heart. It’s one of the most common forms of physical activity among adults or younger in the United States, so if you’re just starting out it’s easy to find like-minded individuals. You can burn up to twice as many calories per minute than sitting, and walking for at least 30 minutes a day can lower your risk of heart disease and increase your life expectancy.

Whether you prefer running or walking is largely a matter of personal preference.

Benefits of Walking

Walking is a versatile and beginner-friendly activity that provides significant health benefits without the stress of high-impact movements.

  • Gentle on Joints: Walking is low-impact, making it suitable for people with joint issues or those recovering from injuries.
  • Burns Calories Steadily: Walking at a brisk pace can burn around 5–7 calories per minute, helping you manage weight and improve overall fitness.
  • Enhances Heart Health: Walking regularly improves cardiovascular health, lowers blood pressure, and reduces the risk of heart disease.
  • Boosts Mental Health: Like running, walking can also enhance mood, reduce anxiety, and improve sleep.
  • Increases Longevity: Studies have shown that walking for at least 30 minutes a day can significantly increase life expectancy.

Calories Burned: Running vs. Walking

The number of calories burned depends on factors like weight, pace, distance, and duration.

  • Running: A 155-pound person running at a moderate pace (8-minute mile) can burn approximately 600–700 calories in 30 minutes.
  • Walking: The same person walking briskly (4 mph) can burn about 250–300 calories in the same duration.

While running burns more calories in less time, walking is sustainable for longer periods and easier to incorporate into daily routines.

Which Is Better for You?

The choice between running and walking depends on your fitness level, goals, and preferences:

  • Choose Running if You:
    • Want a high-intensity workout and faster calorie burn.
    • Aim to improve endurance and cardiovascular health rapidly.
    • Are comfortable with higher-impact exercises.
  • Choose Walking if You:
    • Are new to exercise or prefer low-impact activities.
    • Have joint issues or want a gentler workout.
    • Enjoy a slower pace that allows you to incorporate fitness into daily activities.

Tips for Getting Started

  • For Running: Invest in good-quality running shoes to minimize joint impact. Start slow with intervals of running and walking to build stamina.
  • For Walking: Gradually increase your pace and distance over time. Add variety to your routine with incline walking or intervals of brisk and slow walking.

Conclusion

Both running and walking are excellent ways to improve fitness, support mental health, and enhance your overall well-being. Whether you prefer the intensity of running or the simplicity of walking, the key is consistency. Choose the activity that aligns with your goals and keeps you motivated for the long term.

Remember, any movement is better than none. So, lace up your shoes and take a step—whether it’s a brisk walk or a steady run—toward a healthier you!

How Fast Should I Walk a Mile for My Age

How Fast Should I Walk a Mile for My Age

One of the most powerful ways to stay fit and to maintain a healthy heart rate is walking. While walking is incredibly beneficial for every aged person, how fast should i walk a mile for my age? 

Speed walking is also referred to as power walking. Walking is undoubtedly an enjoyable physical exercise for anyone who doesn’t have time for other physical activities. 

However, a report says that people who walk faster have a low risk of cardiovascular disease. Walking is an ideal way for burning fat. If you want to know how fast you should walk and what is Brisk walking, then read the article. 

Top 11 Best Treadmill for Senior Walking to Stay Fit Forever: [A-To-Z Buyer’s Guide] – Keep Fit Health

What Are The Benefits Of Speed Walking

There are several benefits of speed walking. Let see what the experts say about speed walking:

Maintains Healthy Weight: Power walking uses muscles on its intense working resulting in exaggerated movement in the whole body. 

Walking at the speed of 4kmph can quickly burn calories up to 345 calories depending upon the exercise. This makes it an efficient way to keep the unexpected calories at the side. 

Improve Health Function: Regular exercise like power walking can keep unexpected diseases and illnesses away from your body. This is one of the best ways to level up the good cholesterol in the body and bad cholesterol out of the body. 

It also helps in lowering blood pressure levels and recycling the risk of diabetes. The report has shown that people who do power walking are less likely to get specific health issues like cancer and stroke. 

Keeps Bones Healthy: Aerobic activity like speed walking builds new bone cells and improves the mineral density in bones. Apart from that, it saves a good impact in straightening the muscles. 

Work as a stress buster: People can’t escape from their troubles. But there are some healthy ways to manage stress levels in the body. 

Going outside for walking in a quiet environment works as a mood booster. Let the power walk to manage your stress rather than letting it get control over you. 

How To Measure Walking Speed

Before knowing how fast should i walk a mile for my age, we should know the process to measure the speed. This is important to know how fast you are walking. 

In that case, you can use walking and running applications or GPS monitors. Apart from that, the easiest way to measure your walking speed is using a walking pace calculation. 

The walking pace calculation is the average walking speed in km. Follow the below sum to measure your walking speed easily. 

Pace = Time\Distance

As an example, if you walk 6 miles in 2 hours, then your walking pace will be 2 hours or 120 minutes/6. The average walking speed in miles per hour results in 20 minutes per mile. 

How Fast Should You Walk As Per Your Age

Let follow the below chart to be clear about how fast you should walk as per your age. 

The walking speed tells a lot about your health. However, several variables make individual differences in walking, such as age, sex and height.

 How fast you Can walk depends on many things such as fitness level, terrain type, and effort that you have provided. 

Generally, the walking speed tends to decrease as your age increases. Research says that you are likely to reduce your walking speed at the rate of 1.2 minutes slower in every kilometre. Follow the table below to know more about your walking speed as per the age. 

AgeMeters/SecondMiles/Hour
20-291.34 to 1.363.0 to 3.4
30-391.34 to 1.433.0 to 3.2
40-491.39 to 1.433.11 to 3.2
50-591.31 to 1.432.93 to 3.2
60-691.24 to 1.342.77 to 3.0
70-791.13 to 1.262.53 to 2.82
80-89.94 to .972.10 to 2.17

What is brisk walking?

A healthy adult can choose a walking pace of 2.8 miles an hour. but the pace is identified by the metabolism rate that your body uses to access fat in your body. While brisk walking refers to walking at moderate intensity speed walking. It accounts for 100 steps per minute. 

Brisk walking is a type of aerobic moderate-intensity yactivity. In  brisk walking, the walking speed should be 4.5 miles per hour. If you have a weight loss goal, you should aim to brisk walk at least 30 minutes a day. 

What Are The Things That Decide Your Walking Speed

During the brisk walk, you should feel the noticeable breath and should have the capability of speaking complete sentences. Make sure you have a walking pace of 20 minutes. This is considered a moderate to intensity exercise. 

Heart Rate Zones Decide Your Walking Speed

For first time doers, it is recommended to wear a fitness tracker or heart rate monitor to show the heart rate. You should check the following things through your heart rate monitor such as:

  • Healthy Heart Zone: Make sure your heart rate stays between 50%-60%. This heart rate is considered an e and comfortable exercise zone, and you will be able to carry an entire nation. 
  • Fitness Zone: When the heart rate varies between 64%-74%, this is considered moderate-intensity exercise. This is ideal for people who aim to lose weight.
  • Aerobic Zone: At 77%-93%, you will breathe very hard and can only communicate with short phases—phrases are a vigorous-intensity

How To Do Fast Walking

You can only derive the maximum benefit of power walking when you can do it in the right way. Here is a guideline that you can follow for power walking:

  • Watch Your Posture

Posture plays an important part in power walking. The correct posture of power walking includes keeping the eyes forward and head upright. 

The belly button should be toward your spine. As it engages the core muscles when doing exercise. If you have any tension, then relax. Without good posture, you can’t power walk in the right way. 
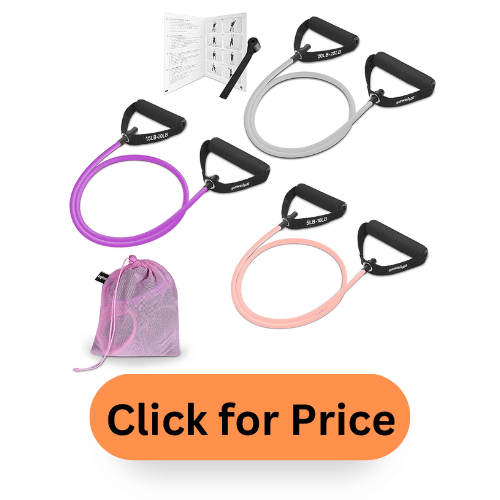
  • Pick Up The Pace

Try to double the pace. Two miles per hour is considered a low-intensity but crank your speed to four miles per hour. It should be moderate speed for everyone. 

  • Pump The Arms

Pumping the arms may look slightly silly. But this is beneficial for propelling the body forward and to reviving heart rate. Apart from that, it also does toning action for the upper part of your body. You are recommended to keep your arms bent at least 90° and to pump forward and back. 

  • Maintain Your Stride

When you are doing exercise and taking longer strides, thinking that it will help you cover the mile quickly, this doesn’t make a proper strategy for power walking speed.  By doing the opposite, you can better achieve results. 

In that case, you can mix up your average walking speed km by age. It adds variety and challenges your body every moment, making a good result on your walk speed.

  • Invest In Walking Shoes

There are a lot of differences between walking shoes and running shoes. Without the right shoes, you can’t be comfortable during the exercise. Your shoes should be capable of taking your weight. 

Apart from that, the right cushioning is also essential for making you comfortable during walking. 

  • Increase Your Distance Gradually

Don’t be limited by partial certainty. Try to increase it gradually. Beginners will not be able to cover 6 miles long in one hour. Instead, give it sometimes.  

If you walk two miles an hour on a first date, then ma at least 2.5 miles. This way, you will be able to cover 6 miles a day.

You should not force your body to make more movement. Instead, it takes pretty long so that it adjusts the activity. 

  • Take Intervals

Try to take intervals several times. At a 20-30 walking speed, you should take several intervals. Once you get comfortable with it, then in the interval time or make it within 10-15 minutes. Remember that the breaks make your body and mind relaxed and prepare yourself for the next task. 

These all are the tips to help you in walking. Your shorts will help if you make it speedy. Otherwise, you won’t be able to get its critical benefits. 

How Do I Keep From Getting Hurt While Power Walking?

Some specific rules can prevent injuries during walking. Apart from that, the walking speed for seniors can vary as per physician guidelines.  Here are some ways that can help you from getting hurt during power walking. 

  • Warm Up Yourself

Your shorts would help if you did not walk at full speed. Somewhat, Instead of a leisurely pace. Give your body time so it can adjust itself from a state motion. 

  • Stretch

You short would help if you made numbered up before doing any strenuous job. Before you start strenuous, give focus on calves and feet. Until your muscles feel listened to, you will not be ready to go. 

  • Track Distance and Adjust

Did you know the ten per cent rule of walking? Try to increase 10% of walking more than the previous week. So, in fast walking, do not double the mile or speed the next day as it may lead to burnout. 

How To Get Started On Your Way

Before you start your walking problem, make sure to talk with your healthcare provider. Without your physician’s advice, you should not consider anything. 

Primarily this is recommended for you when you are taking medicines for specific health problems. Otherwise, you may face several harmful effects such as feeling dizzy, faint or short of breathing. You should immediately contact your doctor if you are facing an issue with your upper body part. 

First, set a goal and then try to attain it. You can also look for the walking communities in your area. Connect with them and get essential guidance for your exercises. 

Frequently Asked Questions (FAQs): How fast should I walk a mile for my age

1. How fast should I walk a mile to lose weight?

If you are walking to lose weight, then make sure to keep the pace at 3 miles/ hour or 120 steps per minute. This is standard for senior aged people. But the adult can make it 4 miles per hour or 135 steps per hour. 

2. Is walking a 14-minute mile fast?

Brisk walking pace varies between 13-20 minutes per mile. At this pace, you will breathe harder than normal and be able to speak a full sentence. This is considered a low -moderate intensity walk. Fast walking space is considered 20 miles an hour or more than it. 

3. How far should a 60-year-old be able to walk?

If the older adult is in good physical condition, they can walk between 2000-9000 steps daily. These steps are counted as the 4-½ distance of walking. For the old aged people, it is better to ask a doctor for their exercises. 

4. Is it better to walk faster or longer?

Brisk walking or walking faster is better than walking longer. Walking with your maximum effort burns calories more than longer but slow walking. 

5. How long does it take the average person to walk a mile?

An average person takes around 15-22 minutes to walk a mile. However, it depends on the walking speed of the person. 

6. Is walking a mile in 16 minutes good?

Yes, walking 16 minutes a mile is good. Brisk walking is effective and ideal for reducing weight. But make sure your doctor recommends you to walk at the following speed. 

7. Is walking a mile in 19 minutes good?

The optimal speed of walking varies with the age, fitness level of the same people. Below 20 minutes of walking pace, it is considered average. But below 18 minutes per hour is considered brisk walking. 

8. Is walking one mile a day enough?

Walking a mile per day is enough for older adults. But for others, this is recommended to have 150 minutes per week that calculates more than 1 mile a day. 

9. How long does it take the average woman to walk a mile?

The average woman with a healthy body weight takes between 14-21 minutes to walk a mile. As per age, normal 20-29 aged women take 14-15 minutes. But for women between 40-49 age takes 15-17 minutes. 

10. How much should I walk for my age?

The chart of walking as per the age is given below:

AgeMeters/SecondMiles/Hour
20-291.34 to 1.363.0 to 3.4
30-391.34 to 1.433.0 to 3.2
40-491.39 to 1.433.11 to 3.2
50-591.31 to 1.432.93 to 3.2
60-691.24 to 1.342.77 to 3.0
70-791.13 to 1.262.53 to 2.82
80-89.94 to .972.10 to 2.17

11. Is walking 2 miles a day enough?

Yes, walking 2 miles a day is enough for you. How much you will work depends on your age, weight and health. So, you are recommended to consult a fitness expert to get a full discussion about this. 

The Bottom Line

At least 3-4 km average treadmill speed by age walking speeds per mile is enough for most people. But remember how fast you will walk depends on so many essential things such as fitness level, overall health and age of the person. Try to include walking as an important story of your life to live longer with good health. 

Apart from that, understanding how fast you will walk will help you keep your health in shape. Make a practice of walking 30-60 minutes every day. I  Hope this schedule mentioned above will help you to enjoy working out and to stay fit.

Top 10 Best Treadmill Mats For Reducing Noise

best treadmill mats for reducing noise

It is quite difficult to use a treadmill without noise, especially when you are in an apartment. However, nowadays various workout machines are selling in the market to prevent this noise. But did you know that the best noise reduction treadmill mat that can minimize the vibration due to treadmill operation? 

A treadmill mat is a protective surface that is used on the floor to prevent the flooring from wear and tear. Apart from that, there are various treadmill mats used for specific purposes. 

But if you want to reduce the noise level, then choosing the best treadmill mats for reducing noise could be a great solution. Let’s review our best choices. 

☕Have a sit with a cup of coffee: Best Fold up Treadmill for Seniors – Keep Fit Health

A Quick Comparison Chart: Best Treadmill Mats for Reducing Noise

Product nameThicknessWeightMaterialWarrantyProduct link
BalanceFrom Puzzle Exercise Mat1/2 inch13.9 kgEva Foam2 yearsAmazon Price
BestXD Treadmill Mat1/2 inch4.9 kgRubberLifetimeAmazon Price
SuperMats High-Density MatNot known5.15 kgSolid vinyl1 yearAmazon Price
Sunny Health & Fitness Exercise Equipment Mat0.16 inches0.18 kgPVC1 yearAmazon Price
BalanceFrom High-Density MatNot known4.19 kgPVC2 yearAmazon Price
Prosource Puzzle Exercise Mat1/2 inch2.27 kgEVA FoamNot KnownAmazon Price
RevTime Treadmill Mat0.13 inch6.1 kgRubberNot knownAmazon Price
Velotas Pro Series High-Density mat0.15 inch4.35 kgPVCNot KnownAmazon Price
TRANR Active matNot known14.6 kgRubberNot KnownAmazon Price

Note: [Price and warranty may change any time due to manufacturing facts and features]

A Guide to Treadmill Mats For Noise Reduction:

A treadmill mat not only protects your floor and reduces noise level. But also they make your workout safe with their waterproof and anti-slip feature. In that case, you should be a little choosy to find the right treadmill mat for your home use. 

To make your research effortless, here top noise reducing exercise mat along with a handy buying guide is given below. Stay muted and read the article until it ends. 

Top 10 Treadmill Mats For Noise Reduction: Guides and Reviews

There are several products in the market to keep your floor protected from the wear and tear of treadmills. Here we have given about the nine best treadmill mat reduce noise for you. 

We had focused on some important features like shock absorption, heavy duty treadmill mat, waterproof anti-slip surface, environmentally friendly material, the thickness of the mat, etc. Hope, you will find the best one from our list as per your need. 

1. BalanceFrom Puzzle Exercise Mat with EVA Foam Interlocking Tiles

The BalanceFrom Puzzle Exercise Mat with EVA Foam Interlocking Tiles come with some exciting features that make the product stand out on the list. The size range of this treadmill mat reduce noise apartment may vary between half-inch thick square to three quarters and one-inch size. 

The pack of this model comes with six tiles and twelve border pieces. The number of pieces may vary according to the size. But you can expect textured Eva Foam on both sides that make it skid-proof. 

You will get attractive three colours of this best noise reducing exercise mat for apartment to spice up your workout areas. The colour of this treadmill mat includes black, darkish grey and electric blue. However, the electric blue interlocking tile is eye soothing. 

Key features:

  • ½ inch sold thickness
  • Non-slip traction
  • Interlocking facility
  • High-density EVA foam material

Pros

  • 24 inch six interlocking tiles. 
  • Skidproof design
  • Moisture resistance makes it easy to clean.
  • Serve multiple purposes.

Cons

  • The number of pieces varies as per the sizing. So make sure you have ordered the right size. 

2. BestXD Treadmill Mat, Exercise Equipment Mat with High-Density Rubber

The BestXD Treadmill Mat is not a mat. These are made up of small square tiles that specifically fit your treadmill feet. 

The item is small but can save you a lot more than buying a full-size mat. If you are planning to buy this treadmill mat for only treadmill use, then this will be a great choice for you. 

The high-density rubber can effectively increase friction and reduce vibration. Available in small size making it easy to fit anywhere and saving a lot of space. 

It comes with a lifetime warranty. So, you don’t need to worry about any manufacturing defect or any type of manufacturing fault in future. The brand claims customer satisfaction as their priority and claims to serve like this. 

Key features:

  • Non-slip design
  • Made with eco-friendly material
  • 0.5-inch thickness
  • High-density rubber
  • Weighs only 1100 lbs

Pros

  • The BestXD Treadmill Mat is strong and durable. 
  • Made with high-density rubber. 
  • The brand provides a lifetime warranty and utmost customer satisfaction. 
  • The anti-slip design makes your practice safe. 

Cons

  • Some users have reported it for its sizing defect.

3. SuperMats High-Density Commercial Grade Solid Equipment Mat

The SuperMats High-Density Commercial Grade Solid Equipment Mat is another best noise reducing mat on our list. The product is made in the USA. The ingredients don’t contain any harmful chemical that makes it safe for both humans and the environment. 

The floor is ¼ inch thick which protects the floor from damage and absorbs shock. You can use this mat for almost every type of floor such as carpet, hardwood or tile. 

The mat is made with high-quality material that makes it highly durable and long-lasting. Like the cheap models, it will not stink making it the right choice for both indoor and outdoor. 

The product is solid commercial graded and large enough for your Elliptical Machine, rolling machine and treadmill. The mat is the perfect choice to match your need for design and performance. 

Key Features:

  • Commercial grade construction
  • Fits indoor equipment
  • Easy to clean
  • Safe for children and pets

Pros

  • High dense and thick 
  • Environmental friendly components. 
  • Size is enough large
  • Looks very nice

Cons

  • A bit heavier than others on the list. 

4. Sunny Health & Fitness Exercise Equipment Mat

Sunny Health & Fitness is one of the most preferred brands for fitness lovers. If you are looking for good quality and affordable treadmill mat, then this can be a good choice for you. 

The Sunny Health & Fitness Exercise Equipment Mat is available in three different sizes making it ideal for every floor size. The mat is made with EVA foam and is about 0.16 inches thick which is durable and can last along. 

Be it carpet or any hard flooring, the Sunny Health & Fitness Exercise Equipment Mat can be used for every floor type.   

Key features:

  • The high-density PVC foam material
  • Convenient sizing
  • Ergonomic and space-saving
  • Available in three different sizing

Pros

  • Super soft and easy to store.
  • The high-quality EVA foam makes it durable.
  • The surface is non-slip.

Cons

  • It could be thicker. 

5. BalanceFrom High-Density Treadmill Exercise Bike Equipment Mat

The BalanceFoam High-Density Treadmill Exercise mat is a perfect choice for people who want an outdoor treadmill mat. The product size is 3×6.5 that makes it easy to fit for every floor type. 

The product is ideal for you to do large exercises. The products also ensure hygiene as cleaning is too easy to do. It just needs a wipe with a damp cloth to clean the surface of it. 

The product is available as foldable also. So, if anyone needs this feature, they can go for foldable also. 

Key features:

  • Anti-slip design
  • Suits both indoor and outdoor 
  • High-density material
  • Easy to clean

Pros

  •  Highly dense and durable. 
  • Non-slip surface.
  • Extended machine life 

Cons

  • Sizing may make you confused. 

6. Prosource Puzzle Exercise Mat ½”, EVA Foam Interlocking Tiles

The first thing to tell about this treadmill mat is its larger size. The extra large treadmill mat has made it versatile. The thicker treadmill mat is a great option to protect your tiles and floor from being damaged. 

The high impact PVC material has made the product durable. The surface is equipped with a non-slip base which ensures the stability of the machine during your workout. 

You can convert it in any area easily as the interlocking has made it easy to assemble and remove. Its duper dense and textured foam provides the perfect base for any type of gym activity. 

Key features:

  • ½ inch thick Eva Foam Material
  • Non-skid protective surface
  • Easy to assemble and water-resistant
  • Suits versatile workout machines

Pros

  • Durable product
  • Easy for cleaning and requires less maintenance.
  • The size is enough large
  • High thickness and density reduce noises efficiently. 

Cons

  • Holes can be visible after using them for a few weeks.

7. RevTime Treadmill Heavy Duty Fitness Equipment Rubber Mat

The RevTime Treadmill mat is another top featured treadmill mat on our list. It suits most exercise machines. Apart from that, the design is specifically made to suit almost everyone on the floor.

This treadmill mat is made using SBR Or EPDM that do a great job in shock absorbing. The surface is given with an anti-slip protection shield that ensures no movement during a workout. 

If your main concern for buying a treadmill is reducing noise, then this is a great choice for you. The 3m thick mat absorbs vibration easily and makes it best as the best treadmill mat for noise reduction. 

Three different sizes of this treadmill mat are available which makes it convenient to choose for a particular one. 

Key features:

  • Roll up feature has made the product easy to store.
  • SBR and EPDM rubber mat
  • Anti-slip design
  • Multi-purpose exercise mat
  • Weighs only 13.5Lbs

Pros

  • Looks very nice for the prints over the mat.
  • The materials of this mat are heavy duty and durable. 
  • Skip resistant protection over the surface. 
  • 3M thicker mat absorbs shock efficiently. 

Cons

  • The user has reported that the mat stinks a lot. 

8. SuperMats Heavy Duty Equipment Mat Exercise Equipment

As the name implies, the SuperMats Heavy Duty Equipment can provide you with some excellent features. The first thing to tell about this machine is its durability. The heavy-duty vinyl composition saves your treadmill from the damages caused by dust and particles. 

The product is thick enough that it helps your floor from being damaged and prides your treadmill with extra cushioning. Whether you want to place a treadmill, elliptical or other gym equipment, then this can be an ideal choice for you. 

The SuperMats Heavy Duty Equipment Mat is made with environmentally safe materials making it safe for kids as well as for pets. The heavy-duty thick mat is also effective in dampening noise levels and vibrations that might disturb you during your workout. 

Key features:

  • Serves multiple purposes
  • Cushion exercise equipment
  • Dampens vibration
  • Safe for children and pet

Pros

  • Works as a protection for your flooring.
  • Cushions your workout equipment from wear and tear.
  • Versatile and safe for the environment.
  • Reduce noise and vibration. 

Cons

  • Some have reported it for its less durability. Although make sure to give it good maintenance. 

9. Velotas Pro Series High-Density Personal Fitness Equipment Mats

Now bring this professional equipment mat to your home to set up a dedicated home gym. This treadmill mat is available in four different sizes that best fit your space according to the size. 

The high-density foam adds support for different floor types making it ideal for different exercises and machines. The mat is lightweight, so you can move it easily.  One major advantage is that this product is easy to clean. 

The high-quality PVC material has made the product durable enough. The mat Is about 4 mm thick and made with PVC vinyl makes you feel safe during the workout session. 

Key features

  • Tested for safety and quality
  • 4 mm thick PVC Vinyl material
  • Versatile usage
  • Lightweight and easy to clean
  • Suits every type of flooring

Pros

  • Protection for every type of flooring. 
  • Versatile and ideal for every floor. 
  • Easy to clean and maintain

10. TRANR Active Noise Reduction Equipment Mats

The primary focus of this treadmill mat is to reduce noise and absorb shock. The product is made with commercial grade rubber that is best to tolerate wear and tear. 

This is another eco-friendly product made in the USA from recycled tyres. The high-quality commercial-grade rubber ensures that the product will not compress like other foam mats. 

The mat is specially designed to protect your flooring especially for the delicate flooring. Apart from that, it provides a fantastic non-slip surface for your treadmill. 

A major benefit of using a rubber treadmill mat is that it makes the product very easy to clean. You will get a solid thickness from the 

TRANR Active Noise Reduction Equipment Mats are super-efficient in noise reduction. 

Key features:

  • Active noise reduction 
  • Made with commercial-grade rubber
  • Made from USA recycled tyres
  • Dense and durable material

Pros

  • Sigh-quality city black rubber.
  • Waterproof and non-slip surface.
  • Absorb any type of vibration. 

Cons

  • The product has a strong odour when in new condition which takes time to completely go. 

Best noise reduction treadmill mat: Buying Guide 

There are different types of treadmill mat suits for specific purposes. In that case, knowing in detail how to choose the best treadmill mats for reducing noise can be practical for you. Here is a quick buying guide for treadmill mat for noise reduction are given below. 

Proper Dimension

The dimension of a treadmill mat includes three major factors such as height, width and length. Make sure to buy a treadmill mat that has enough dimension to support the treadmill. 

A thick treadmill mat is a good choice but anything too thick may not fit your treadmill in the right way. However, the thickness should not be less than ½  inches. Otherwise, it will be ineffective for reducing noise. 

Material

The treadmill mat should be made with good material. A good treadmill mat is capable of countering sweat and debris that falls on them.  In that case, choose a material that is waterproof as well as dustproof. 

The treadmill mats are generally made with PVC or rubber material or foam. The best material for a treadmill mat is rubber.

Being dense, flexible and durable, it can work best reducing noise. Foam is soft and flexible. But the problem with foam is that it gets compressed easily making it not ideal for the floor.  

As PVC is stable, long-lasting and resistant to friction due to heavy exercise. 

Types of Treadmill Mat

There are three variations of treadmill mat type. They each are made to suit different floor types. Here those types are demonstrated for you: 

1. Hardwood Floor Mat

All treadmill mats do not go well with a hardened floor. The wrong mat may damage your hardened floor later. The first damage sign will appear as a sticky film over the floor and mat. 

If your hardened floor is coated with slippery things, you should buy a slip-resistant treadmill mat. It protects the treadmill from easy movement. 

2. Carpet Floor Mats

Without a proper treadmill mat, your carpet can be damaged. However, almost every treadmill mat is suitable for carpets. Still, a rubber mat can be an ideal choice for you. 

3. Tile Floor Mats

For tile floors, a low-quality thinner mat may not be ideal. It leaves marks on the floor and can break the tile also. The tile floor mat should be thicker and a non-skid high-quality mat. 

Price

The price of a treadmill mat depends on two major factors such as the quality of the mat and how big it is. There are both high priced and low priced treadmill mats. 

In the case of treadmill mats, price is not an indicator of quality. The low priced mats are suited for able walking and slow jogs. But for intense practice daily, you should spend extra money on good quality mats. 

The treadmill mats are generally hefty and thick. So, you may have to pay for heavy postage fee when buying online. 

Size

Size is another crucial factor that needs to be considered when buying a treadmill mat. Make sure your treadmill mat is long enough to accommodate all the gym equipment such as treadmill, exercise bike, cardio mat, etc etc. 

Design

The foldable design is always appreciable to the users. The foldable design makes it ideal for storing.   

Textured design treadmill mat ensures stability during work out. Choose a mat that is easy to roll and install on the floor. 

Density

The treadmill mats are generally ¼ inch thick. Few of them are ⅜ inch thick also. You should sethe lect thickness of your treadmill mat depending upon the delicacy of the floor surface. 

But mat density has a lot of contribution to noise absorption. The foam mats generally work well in reducing levels. PVA C is a bit thicker than foam but does the same job. 

Maintenance

The moisture-wicking and waterproof material of the treadmill mat are easy to clean. It only requires quick wiping for cleaning. 

When buying a treadmill mat, make sure to contact your relatives and friends who have used a waterproof treadmill mat.  Many brands have claimed to be easy to clean in their label. But this is not the actual case.

Waterproof and Water-resistant

 During a workout, people tend to sweat. Easily the sweat gets on the most and creates a mess and leaves an unpleasant odour. 

This is the reason why you need a waterproof water-resistant tent treadmill mat. The waterproof treadmill mat makes it easier to clean the mat. It protects your carpet and environment. 

 Warranty

Warranty is another important thing that you should look for when buying any product. Warranty can protect your treadmill mat from any type of damage and defect issues. 

Apart from that, your treadmill mat can wear and tear resulting in no solution. In that case, ask your manufacturer what their terms and conditions are for the warranty service. 

These all are some important things that you should look for when buying treadmill mats for noise reduction. Following all of these tips, you can save your money and can get the best product for your training session. 

FAQs: nordictrack treadmill mat

Q: Can a treadmill mat reduce noise?

Yes, a treadmill mat can reduce noise. In that case, the mat should be thick enough that can reduce vibration level thus resulting in a low noise level. Choose the right material and the right thickness so that it can work efficiently. 

Q: What should be the ideal thickness for a treadmill mat?

If you are a consistent runner, then choose a mat that is ⅜ inch thick. Make sure the most is at least ½ inch thick. This is the minimum thickness that you require for a house reducing treadmill mat. 

Q: Should I Put a mat under my treadmill mat for the carpet floor?

Yes, the treadmill mat can also go for the carpet floor. Using a treadmill met over the carpet, you can allow the carpet fibre dust to get into the motor and in other electrical parts. This way you can reduce noise while using the treadmill. 

Q: Are treadmill mats necessary?

A quality treadmill mat can protect both your floor and treadmill. The treadmill mats are also effective in reducing noise levels. Choose a waterproof skid-proof design for your treadmill mat so you can practice safely. 

Q: What is the best material for a treadmill mat for noise reduction?

There are different materials used for making treadmill mats such as PVC, rubber and foam. The PVC material is considered the best material for making treadmill mats. Rubber and firm.is also good. Then ensure the mat is at least ¼ inch thick. 

Q: How to reduce the noise level when using a treadmill?

There are many ways to reduce the noise level of treadmills. One of the best ways to reduce noise levels is to invest in the best treadmill mats for reducing noise. There are several choices for choosing a treadmill mat for noise reduction. You can pick one as per your need. 

Conclusion

However, a mat can not make your treadmill stop noise but it can reduce the sound effect.

At the end of our reviews of the top 9 best treadmill mats for reducing noise, we can say that you will find one best from this source. Still, if you are looking for a quick recommendation, follow the below guide. 

In our view, the  ProSource Fit Treadmill & Exercise Equipment Mats is overall a good treadmill mat. The mat is durable and can work for both carpet or hardwood. It absorbs vibration and makes your exercise quieter. 

If you are looking for the best treadmill mat for carpet,  then I would tell you to go for the SuperMats High-Density Commercial-Grade Solid Equipment Mat. As the product is thick enough that it prevents your floor from being damaged. 

As a budget-friendly choice, we will recommend you to buy BestXD Treadmill Mat. At an affordable budget, it can provide you with almost every feature that a good treadmill mat should have. 

All of those recommendations are based on our research and concept. You need to choose a treadmill mat as per your requirement. We have just shared a guide about it. Let us know which one you would like to buy.