Running is an excellent calorie-burning activity because it requires rapid movements of the legs. It also works the upper body, because you have to use your arms for balance and to propel yourself forward.
“Running has many physical benefits including weight loss, injury prevention, increased endurance, cardiovascular health, and improved mood,” says Mayo Clinic.
But you don’t have to run if you do not want to. There are a number of cardio alternatives to running at home that will give you the same level of calorie burn and impact cardiovascular health.
Take a look at some low-impact alternative exercises:
Swimming is a good aerobic workout, which means it gets your heart pumping and improves circulation throughout the body. Swimming can be done in any body of water from a lake or ocean to a swimming pool or hot tub. Exercising in water provides excellent resistance training for all areas of the body while reducing strain on joints.
Water aerobics classes are also an option; they are on strength training through slow movements in the water. Water aerobics is often done in warm water to reduce the impact on joints, which is great for older people or those with joint pain.
If you don’t have access to a pool, there are other ways you can work out in the water:
01- Stand up paddling(SUP):
SUP uses elements of surfing and kayaking to give you an upper-body workout. You can also do yoga or Pilates poses while on your board.
Stand-up paddling is a great way to get in shape, find balance, and relieve stress. This water sport uses parts of surfing and kayaking so you’ll use your whole body as well as tone your muscles. Stand-up paddling is also incredibly peaceful on the water. You can take some time to reflect or even do yoga poses while remaining calm with the soft sound of lapping waves all around you.
It’s an exercise for both young people looking for adventure and seniors who need something more relaxing than running!
02- Swimming:
The same as above but without having to use equipment such as floatation belts and vests; just jump in and go! Check your local council’s website for public outdoor pools near you, which will be cheaper than visiting a private pool.
03- Aqua jogging:
As seen at the Olympics, aqua jogging is running in ankle-deep water. Great for those who want to get a workout but with reduced impact on legs and joints.
If you’re looking to get in shape while keeping your joints and muscles happy, aqua running might be the perfect thing for you.
With this innovative new product on sale at our store, you can work out without the bumps and bruises that come with regular running or jogging. Who wouldn’t want that?
04- Cycling:
Cycling is another great cardio alternative to running at home because it works all of the major muscle groups in both your upper and lower body. Cycling outside or inside in the fresh home ground air provides excellent cardiovascular benefits and gets you closer to nature.
05- Burpees:
Burpees are a great calisthenics exercise for improving strength, cardio, and endurance. You can do burpees anywhere, there is no equipment needed.
06- Jump Rope:
Jumping rope is a great cardio workout at home because it’s easy to do, inexpensive and you can even do it in your living room. If you are jumping rope outside, make sure you wear comfortable shoes.
Kick some major booty with this lung-busting workout. Get lean, mean, and tuned up in time for summer! Sure it may seem like hard work right now, but after a few weeks on the ropes, you’ll be joking jumper’ like an old pro. You can take your jump rope with you any time; just squish that sucker into your pocket or backpack! Intensity levels are low impact so no need to worry about keeling over while getting fitter than ever before. Give up the expensive gym membership (and the constant judgment!) and get rope-tastic at home!
07- Jumping Jacks:
Jumping Jacks are a low-impact cardio workout that you can do at home. They are great for your arms and legs and also improve your endurance and speed.
Imagine the ground coming at you and running away from you as if it were dropping to reveal stars below. Never was there a sight so beautiful – until now.
Your face represents that of a cheetah on the prowl, your strides those of one whose time is precious because they’ll soon be outdone by another kind: death.
The Jumping Jacks will send them packing, however, with six basic movements performed without rest for 15 minutes after which whatever muscles haven’t been sufficiently engaged yet may take a worthwhile break. No, but seriously this shit kicks ass and if anyone tries to sell you anything else please punch them in their stupid-ass faces.”
08- Swinging Kettlebells:
Kettlebells improve strength in the lower body, core, and upper body muscles. They tone muscle while improving cardiovascular health.
Improve your fitness and cardiovascular health with these kettlebells. The easy-grip vessel eliminates the need to switch hands while swinging, meaning you’ll be that much better at improving coordination. Swing away and reap the benefits!
Conclusion:
All are the best eight cardio alternatives to running at home. This is a very important part of any person who wants to exercise on daily basis. Choose a cardiovascular exercise and start to keep fit health with a home workout.
If you are aiming for a healthier lifestyle, running and walking are excellent options to consider. While both activities promote physical fitness and overall health, they differ in intensity, calorie burn, and impact on your body. Running is a high-intensity activity that burns more calories in less time, but it can be harder on the joints. Walking, on the other hand, is low-impact and gentle on your body while still providing significant health benefits.
Let’s explore the benefits of each to help you decide which is better for your fitness goals.
Running VS Walking Which Is Better For Fitness
For Running
What running can do for you
Running, done at a good intensity level, can provide several benefits. It’s very effective in burning calories and improving aerobic endurance. Running also helps strengthen your heart and blood vessels by increasing the capacity of your lungs and increasing the amount of blood that your heart pumps each minute. Furthermore, studies show that running is associated with a lower risk of coronary heart disease and stroke, as well as Type 2 diabetes.
Benefits of Running
Running offers numerous physical and mental health advantages, especially for those looking for a more intense workout.
Burns More Calories: Running burns approximately 10–12 calories per minute for an average adult, depending on speed, weight, and fitness level.
Improves Cardiovascular Health: It strengthens your heart, improves lung capacity, and enhances blood circulation. Regular running can lower your risk of heart disease, stroke, and high blood pressure.
Builds Endurance and Strength: Running engages your core, lower body, and cardiovascular system, helping to build endurance and muscle tone.
Supports Mental Well-Being: It triggers the release of endorphins, reducing stress and improving mood, often referred to as the “runner’s high.”
Aids in Weight Management: Running is one of the most effective ways to shed calories and manage weight.
Walking is also an effective way to burn calories and strengthen your heart. It’s one of the most common forms of physical activity among adults or younger in the United States, so if you’re just starting out it’s easy to find like-minded individuals. You can burn up to twice as many calories per minute than sitting, and walking for at least 30 minutes a day can lower your risk of heart disease and increase your life expectancy.
Whether you prefer running or walking is largely a matter of personal preference.
Benefits of Walking
Walking is a versatile and beginner-friendly activity that provides significant health benefits without the stress of high-impact movements.
Gentle on Joints: Walking is low-impact, making it suitable for people with joint issues or those recovering from injuries.
Burns Calories Steadily: Walking at a brisk pace can burn around 5–7 calories per minute, helping you manage weight and improve overall fitness.
Enhances Heart Health: Walking regularly improves cardiovascular health, lowers blood pressure, and reduces the risk of heart disease.
Boosts Mental Health: Like running, walking can also enhance mood, reduce anxiety, and improve sleep.
Increases Longevity: Studies have shown that walking for at least 30 minutes a day can significantly increase life expectancy.
Calories Burned: Running vs. Walking
The number of calories burned depends on factors like weight, pace, distance, and duration.
Running: A 155-pound person running at a moderate pace (8-minute mile) can burn approximately 600–700 calories in 30 minutes.
Walking: The same person walking briskly (4 mph) can burn about 250–300 calories in the same duration.
While running burns more calories in less time, walking is sustainable for longer periods and easier to incorporate into daily routines.
Which Is Better for You?
The choice between running and walking depends on your fitness level, goals, and preferences:
Choose Running if You:
Want a high-intensity workout and faster calorie burn.
Aim to improve endurance and cardiovascular health rapidly.
Are comfortable with higher-impact exercises.
Choose Walking if You:
Are new to exercise or prefer low-impact activities.
Have joint issues or want a gentler workout.
Enjoy a slower pace that allows you to incorporate fitness into daily activities.
Tips for Getting Started
For Running: Invest in good-quality running shoes to minimize joint impact. Start slow with intervals of running and walking to build stamina.
For Walking: Gradually increase your pace and distance over time. Add variety to your routine with incline walking or intervals of brisk and slow walking.
Conclusion
Both running and walking are excellent ways to improve fitness, support mental health, and enhance your overall well-being. Whether you prefer the intensity of running or the simplicity of walking, the key is consistency. Choose the activity that aligns with your goals and keeps you motivated for the long term.
Remember, any movement is better than none. So, lace up your shoes and take a step—whether it’s a brisk walk or a steady run—toward a healthier you!
One of the most powerful ways to stay fit and to maintain a healthy heart rate is walking. While walking is incredibly beneficial for every aged person, how fast should i walk a mile for my age?
Speed walking is also referred to as power walking. Walking is undoubtedly an enjoyable physical exercise for anyone who doesn’t have time for other physical activities.
However, a report says that people who walk faster have a low risk of cardiovascular disease. Walking is an ideal way for burning fat. If you want to know how fast you should walk and what is Brisk walking, then read the article.
There are several benefits of speed walking. Let see what the experts say about speed walking:
Maintains Healthy Weight: Power walking uses muscles on its intense working resulting in exaggerated movement in the whole body.
Walking at the speed of 4kmph can quickly burn calories up to 345 calories depending upon the exercise. This makes it an efficient way to keep the unexpected calories at the side.
Improve Health Function: Regular exercise like power walking can keep unexpected diseases and illnesses away from your body. This is one of the best ways to level up the good cholesterol in the body and bad cholesterol out of the body.
It also helps in lowering blood pressure levels and recycling the risk of diabetes. The report has shown that people who do power walking are less likely to get specific health issues like cancer and stroke.
Keeps Bones Healthy: Aerobic activity like speed walking builds new bone cells and improves the mineral density in bones. Apart from that, it saves a good impact in straightening the muscles.
Work as a stress buster: People can’t escape from their troubles. But there are some healthy ways to manage stress levels in the body.
Going outside for walking in a quiet environment works as a mood booster. Let the power walk to manage your stress rather than letting it get control over you.
How To Measure Walking Speed
Before knowing how fast should i walk a mile for my age, we should know the process to measure the speed. This is important to know how fast you are walking.
In that case, you can use walking and running applications or GPS monitors. Apart from that, the easiest way to measure your walking speed is using a walking pace calculation.
The walking pace calculation is the average walking speed in km. Follow the below sum to measure your walking speed easily.
Pace = Time\Distance
As an example, if you walk 6 miles in 2 hours, then your walking pace will be 2 hours or 120 minutes/6. The average walking speed in miles per hour results in 20 minutes per mile.
How Fast Should You Walk As Per Your Age
Let follow the below chart to be clear about how fast you should walk as per your age.
The walking speed tells a lot about your health. However, several variables make individual differences in walking, such as age, sex and height.
How fast you Can walk depends on many things such as fitness level, terrain type, and effort that you have provided.
Generally, the walking speed tends to decrease as your age increases. Research says that you are likely to reduce your walking speed at the rate of 1.2 minutes slower in every kilometre. Follow the table below to know more about your walking speed as per the age.
Age
Meters/Second
Miles/Hour
20-29
1.34 to 1.36
3.0 to 3.4
30-39
1.34 to 1.43
3.0 to 3.2
40-49
1.39 to 1.43
3.11 to 3.2
50-59
1.31 to 1.43
2.93 to 3.2
60-69
1.24 to 1.34
2.77 to 3.0
70-79
1.13 to 1.26
2.53 to 2.82
80-89
.94 to .97
2.10 to 2.17
What is brisk walking?
A healthy adult can choose a walking pace of 2.8 miles an hour. but the pace is identified by the metabolism rate that your body uses to access fat in your body. While brisk walking refers to walking at moderate intensity speed walking. It accounts for 100 steps per minute.
Brisk walking is a type of aerobic moderate-intensity yactivity. In brisk walking, the walking speed should be 4.5 miles per hour. If you have a weight loss goal, you should aim to brisk walk at least 30 minutes a day.
What Are The Things That Decide Your Walking Speed
During the brisk walk, you should feel the noticeable breath and should have the capability of speaking complete sentences. Make sure you have a walking pace of 20 minutes. This is considered a moderate to intensity exercise.
Heart Rate Zones Decide Your Walking Speed
For first time doers, it is recommended to wear a fitness tracker or heart rate monitor to show the heart rate. You should check the following things through your heart rate monitor such as:
Healthy Heart Zone: Make sure your heart rate stays between 50%-60%. This heart rate is considered an e and comfortable exercise zone, and you will be able to carry an entire nation.
Fitness Zone: When the heart rate varies between 64%-74%, this is considered moderate-intensity exercise. This is ideal for people who aim to lose weight.
Aerobic Zone: At 77%-93%, you will breathe very hard and can only communicate with short phases—phrases are a vigorous-intensity
How To Do Fast Walking
You can only derive the maximum benefit of power walking when you can do it in the right way. Here is a guideline that you can follow for power walking:
Watch Your Posture
Posture plays an important part in power walking. The correct posture of power walking includes keeping the eyes forward and head upright.
The belly button should be toward your spine. As it engages the core muscles when doing exercise. If you have any tension, then relax. Without good posture, you can’t power walk in the right way.
Pick Up The Pace
Try to double the pace. Two miles per hour is considered a low-intensity but crank your speed to four miles per hour. It should be moderate speed for everyone.
Pump The Arms
Pumping the arms may look slightly silly. But this is beneficial for propelling the body forward and to reviving heart rate. Apart from that, it also does toning action for the upper part of your body. You are recommended to keep your arms bent at least 90° and to pump forward and back.
Maintain Your Stride
When you are doing exercise and taking longer strides, thinking that it will help you cover the mile quickly, this doesn’t make a proper strategy for power walking speed. By doing the opposite, you can better achieve results.
In that case, you can mix up your average walking speed km by age. It adds variety and challenges your body every moment, making a good result on your walk speed.
Invest In Walking Shoes
There are a lot of differences between walking shoes and running shoes. Without the right shoes, you can’t be comfortable during the exercise. Your shoes should be capable of taking your weight.
Apart from that, the right cushioning is also essential for making you comfortable during walking.
Increase Your Distance Gradually
Don’t be limited by partial certainty. Try to increase it gradually. Beginners will not be able to cover 6 miles long in one hour. Instead, give it sometimes.
If you walk two miles an hour on a first date, then ma at least 2.5 miles. This way, you will be able to cover 6 miles a day.
You should not force your body to make more movement. Instead, it takes pretty long so that it adjusts the activity.
Take Intervals
Try to take intervals several times. At a 20-30 walking speed, you should take several intervals. Once you get comfortable with it, then in the interval time or make it within 10-15 minutes. Remember that the breaks make your body and mind relaxed and prepare yourself for the next task.
These all are the tips to help you in walking. Your shorts will help if you make it speedy. Otherwise, you won’t be able to get its critical benefits.
How Do I Keep From Getting Hurt While Power Walking?
Some specific rules can prevent injuries during walking. Apart from that, the walking speed for seniorscan vary as per physician guidelines. Here are some ways that can help you from getting hurt during power walking.
Warm Up Yourself
Your shorts would help if you did not walk at full speed. Somewhat, Instead of a leisurely pace. Give your body time so it can adjust itself from a state motion.
Stretch
You short would help if you made numbered up before doing any strenuous job. Before you start strenuous, give focus on calves and feet. Until your muscles feel listened to, you will not be ready to go.
Track Distance and Adjust
Did you know the ten per cent rule of walking? Try to increase 10% of walking more than the previous week. So, in fast walking, do not double the mile or speed the next day as it may lead to burnout.
How To Get Started On Your Way
Before you start your walking problem, make sure to talk with your healthcare provider. Without your physician’s advice, you should not consider anything.
Primarily this is recommended for you when you are taking medicines for specific health problems. Otherwise, you may face several harmful effects such as feeling dizzy, faint or short of breathing. You should immediately contact your doctor if you are facing an issue with your upper body part.
First, set a goal and then try to attain it. You can also look for the walking communities in your area. Connect with them and get essential guidance for your exercises.
Frequently Asked Questions (FAQs): How fast should I walk a mile for my age
1. How fast should I walk a mile to lose weight?
If you are walking to lose weight, then make sure to keep the pace at 3 miles/ hour or 120 steps per minute. This is standard for senior aged people. But the adult can make it 4 miles per hour or 135 steps per hour.
2. Is walking a 14-minute mile fast?
Brisk walking pace varies between 13-20 minutes per mile. At this pace, you will breathe harder than normal and be able to speak a full sentence. This is considered a low -moderate intensity walk. Fast walking space is considered 20 miles an hour or more than it.
3. How far should a 60-year-old be able to walk?
If the older adult is in good physical condition, they can walk between 2000-9000 steps daily. These steps are counted as the 4-½ distance of walking. For the old aged people, it is better to ask a doctor for their exercises.
4. Is it better to walk faster or longer?
Brisk walking or walking faster is better than walking longer. Walking with your maximum effort burns calories more than longer but slow walking.
5. How long does it take the average person to walk a mile?
An average person takes around 15-22 minutes to walk a mile. However, it depends on the walking speed of the person.
6. Is walking a mile in 16 minutes good?
Yes, walking 16 minutes a mile is good. Brisk walking is effective and ideal for reducing weight. But make sure your doctor recommends you to walk at the following speed.
7. Is walking a mile in 19 minutes good?
The optimal speed of walking varies with the age, fitness level of the same people. Below 20 minutes of walking pace, it is considered average. But below 18 minutes per hour is considered brisk walking.
8. Is walking one mile a day enough?
Walking a mile per day is enough for older adults. But for others, this is recommended to have 150 minutes per week that calculates more than 1 mile a day.
9. How long does it take the average woman to walk a mile?
The average woman with a healthy body weight takes between 14-21 minutes to walk a mile. As per age, normal 20-29 aged women take 14-15 minutes. But for women between 40-49 age takes 15-17 minutes.
10. How much should I walk for my age?
The chart of walking as per the age is given below:
Age
Meters/Second
Miles/Hour
20-29
1.34 to 1.36
3.0 to 3.4
30-39
1.34 to 1.43
3.0 to 3.2
40-49
1.39 to 1.43
3.11 to 3.2
50-59
1.31 to 1.43
2.93 to 3.2
60-69
1.24 to 1.34
2.77 to 3.0
70-79
1.13 to 1.26
2.53 to 2.82
80-89
.94 to .97
2.10 to 2.17
11. Is walking 2 miles a day enough?
Yes, walking 2 miles a day is enough for you. How much you will work depends on your age, weight and health. So, you are recommended to consult a fitness expert to get a full discussion about this.
The Bottom Line
At least 3-4 km average treadmill speed by agewalking speeds per mile is enough for most people. But remember how fast you will walk depends on so many essential things such as fitness level, overall health and age of the person. Try to include walking as an important story of your life to live longer with good health.
Apart from that, understanding how fast you will walk will help you keep your health in shape. Make a practice of walking 30-60 minutes every day. I Hope this schedule mentioned above will help you to enjoy working out and to stay fit.
Do you want to reduce your weight or the fat on your belly? Exercise is the best way to keep you fit and fine. You do not have much time to go to the gym, so it is a big challenge for you to exercise daily. Why do you not go with an easy option, bring a treadmill at home, enjoy an indoor treadmill exercise, and achieve your goals?
You will find it nice and effective to reduce your overall body fats. Only a 20 minute treadmill workout for beginners can bring awesome results for you. But it is also necessary to perform your activities properly to reduce fat and get in shape.
Best 20 minute treadmill workout for beginners
No need to be worried even if you are a beginner; it is pretty easy to work out on the treadmill to get your desired goals. I will teach you about the best 20 minute treadmill workout for beginners. Let’s discuss simple ways to practice to make a 20 minute treadmill workout effective and fruitful.
Our 20 minute HIIT treadmill workout for fat loss includes three major workout intervals and a final cool-down interval. Each interval included in the exercise will be more challenging to make your exercise effective. I have tried to make it simpler and effective to bring effective results.
First Interval Set
Before starting your workout, make sure you have applied an emergency clip. It will keep you comfortable and safe in case of any untoward situation. You can clip it on the lowers of your pants or below the belt. Let’s start the first interval workout.
First Step
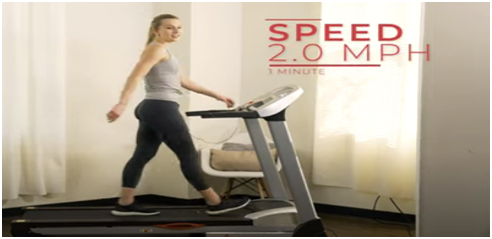
The first step is about warming up to make your body ready for a workout. You can do a warm-up walk at a speed of 2.0 or 2.5. Your warm-up activity includes a 3 minutes continuous walk on the treadmill.
If you want to make your warm-up walk a little challenging, then walk at a speed of 2.0 for 90 seconds and after 90 seconds without a break, set your speed at 2.5 and keep it continuing for another 90 seconds.
All the games that we deal with in this calories burned exercise on the treadmill are with speed. You can increase the speed to make your workout more challenging and tough. If you see you can continue, you can also enhance sometimes but do not go too fast as a beginner.
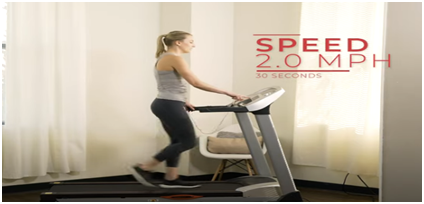
Once the warm-up walk has been completed, reduce the speed up to 2.0 and walk for 30 seconds. It is rest or recovery time; you can also lower down the speed to 1.5. Set the speed at a level where you feel comfortable for recovery. During your recovery time, take deep breaths to make you calm.
Second step
Once you have completed the recovery time, without any break, shift the speed at 3.0, and it is your first interval start. Do walk on the treadmill for 30 seconds at the same pace at a speed of 3.0. when you are going closer to the completion of time in the last 5 seconds, start controlling your speed.
After 30 seconds, slow down your pace, but do not stop and shift the treadmill speed back down to 2.0 and walk for 30 seconds at that speed. It is your recovery time.
Third Step
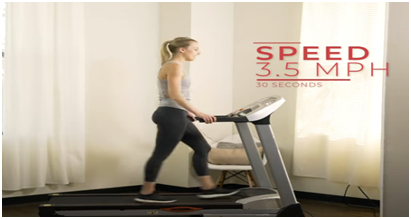
Now it’s time to move toward the next step of the first interval; after completing 30 seconds for recovery, shift treadmill speed at 3.5 to make your workout the best 20 minute treadmill workout to lose weight. You should keep holding the treadmill handles for a safe workout; it will also help you perform your activity safely and get balance. But you can also leave the handles if you are easy to walk.
When you release treadmill handles, you will provide an opportunity for your arms to swing. It will help you strengthen your arms muscles and also help to reduce fats from the upper body.
You have completed your 30 seconds walk at a speed of 3.0, with no shift back down the speed at 2.0 for the recovery period. Do walk on the treadmill for another 30 seconds at speed 2.0.
Fourth Step
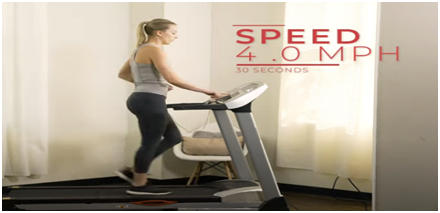
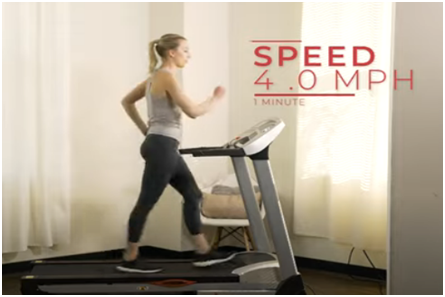
The last step of the first interval is to make your workout challenging and to increase the speed up to 4.0. When you complete your 30 minutes recovery walk, shift the speed to 4.0 and do a 30 seconds walk on the treadmill.
Keep your breath smoother without interrupting; keep your posture stretched and in a good position. Maintain your legs and core muscles stretched.
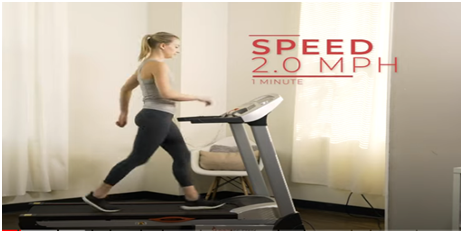
After 30 seconds, shift back down to speed 2.0 and walk for one minute at speed 2.0 to recovery. You can also increase further 30 seconds for recovery if you feel uncomfortable.
Tips for First interval set
While practicing on the treadmill, you can increase or decrease speed according to your comfort level. But following a gradual increase and decrease of speed between 2.0 to 4.0 with recovery time, it could be one of the best treadmill workouts to lose weight for beginners.
If you want to add stress to your workout, then it is good to increase the time of each step but never decrease the recovery time; it will help you perform the workout easily.
Second Interval Set
The second interval is more challenging than the first one; start for the second interval set without any break between the recovery period and second interval to keep your 20 minutes workout continuing.
First step
Start your second interval by setting treadmill speed at 3.0 miles per hour and do a smooth walk for one minute on the treadmill. While walking, take deep breaths to keep yourself calm.
During your walk, try to make a good posture, first find your form and then ensure consistency in your rhythm. Keep your cores tight; upper body relaxed and upright in a good posture.
On completion of your one minute, set back down the speed at 2.0 and do a smooth walk for 30 seconds, and it is recovery time.
Second Step
Next, you need to set the treadmill speed at 3.5 MPH and practice it for one minute on the best treadmill for walkingto burn calories and lose weight. If you feel a little uncomfortable at this high speed, then hold the handrails for your safety and walk on the treadmill.
Keep your flow consistent to make it a cardio exercise; you can leave the handrails, but only if comfortable once your one minute completes; quickly put back down treadmill speed at 2.0 MPH and walk for 30 seconds during the recovery period.
Third Step
Now set treadmill speed at 4.0 MPH and practice for one minute. I recommend you keep handrails held for your safety at a speed of 4.0 in the beginning stage. But if you are confident and comfortable, then you can leave your hands.
Practicing at 4.0 MPH could be the best HIIT treadmill workout for fat loss. But again, keep your flow consistent and also maintain your breath and posture at a good level.
Put back down the speed at 2.0 MPH on completing a one-minute treadmill walk at 4.0 and do a slow walk for one minute. You can also increase the time by 20 to 30 seconds if you feel uncomfortable. During the recovery time, walk, take a deep breath, keep your body relaxed to calm and cool down.
Helpful Tips for a second interval set
Some people try to make their workout more challenging and increase speed and time. But I will recommend you not increase time or speed, because beginners above speed and time durations are enough for good practice at the very start.
Third Interval Set
Be ready for the last interval set of our 20 minute treadmill workout for the beginners’ lesson. We will increase the time by 30 more seconds to make the last interval set challenging and fruitful. Let’s start your workout.
First Step
Start your third interval set by setting the speed of 3.0 MPH and practice for one minute and thirty seconds. It could be challenging, and you may feel uncomfortable after a one-minute walk. But it is a very beneficial calories burned exercise.
It will not just benefit you in maintaining fitness but also be very helpful for your heart health and balance your blood flow. Maintain a pace between your steps and breathe to make it easier. Do not forget to hold the handrails if you feel fear.
Now quickly set back down the speed at 2.0 MPH and do a slow walk for 30 seconds. Also, maintain your breath and try to take a deep and slow breath to make yourself calm.
Second step
Set your treadmill speed at 3.5 MPH and practice for 90 seconds. It could be a more challenging task for you at such a high speed for a 90-second continuous walk. But you can balance it by giving more swing to your arms; it will help you maintain your body balance with your steps.
After that, set back down treadmill speed at 2.0 MPH and practice a slow walk for 30 seconds to recover your breath.
Third Step
The last step of that interval is the most challenging duration for you to walk on the treadmill. You will need to set your treadmill speed at 4.00 MPH and practice for 90 seconds. It could be a much-tensed workout, so be consistent and patient during those 90 seconds.
At such a high speed, it could be tough for you to maintain balance and speed. So keep your posture good, keep your focus on your steps and breathe. A good match of steps and breath will help you maintain a good balance and stay strong on the treadmill. It would be helpful to keep yourself pushing forward.
Once you have done your 90 seconds job, put back down the speed at 2.0 MPH. Just cool down; you have done your job well. Keep your walk for one minute more to get your breath back in normal rhythm, and then stop your treadmill. You have done a nice treadmill exercise in just 20 minutes.
Helpful Tips for Third interval set
The third interval is more challenging and tough, so it could be hard for you to maintain your balance. So keep the focus on your breath, arms, and steps movement and find a good place to ensure a good workout.
Frequently Asked Questions: 20 minute treadmill workout for beginners
Following are the top selected questions related to 20 minute treadmill workout for beginners. Let’s reveal the possible answers.
Question No 1: How to lose weight on a treadmill in a month?
Answer: A simple walk on a treadmill could benefit you and can help you to lose weight. You would need to set a proper workout schedule and then will need to maintain your pace.
Only a consistent workout on the treadmill could decrease your weight up to 5 to 8 pounds in a month. But it depends on some other factors such as your diet and the amount in your body.
Question No 2: How many calories are burned on the treadmill for a 30 minutes workout?
Answer: Treadmill walk or running could be very effective for you. A consistent 30 minutes treadmill workout can burn 240 calories. But it depends on factors such as your weight, workout tension, sex, and age.
Question No 3: What is a good workout for the beginner on a treadmill?
Answer: For beginners, a fast walking workout for 15 to 20 minutes is enough. Speed of the treadmill should not increase more than 4.0 MPH.
Question No 4: How to use the treadmill to lose belly fat?
Answer: Treadmill workout could be an effective workout for your overall body fats loss. With consistent treadmill jogging, you can easily lose belly fat. For effective and quick results, you can set the following jogging sets.
Ø 2 Minutes jogging at a speed of 4.0 MPH
Ø 3 Minutes jogging at a speed of 8.0 MPH
Ø 2 minutes jogging at a speed of 10.0 MPH
Ø 2-minute jogging at a speed of 4.0 MPH
You can also reduce time or speed to make your workout possible and easier for you in the beginning.
Question No 5: What is good running or walking on the treadmill for the beginner?
Answer: When it comes to using the treadmill for exercise for any purpose. It could be tough for you to jump on running directly. So make your task easier and start with a walking schedule. Your easy walking workout at a speed of 4.0 MPH could be very effective for you.
Conclusion
Treadmill is efficient and good equipment for those who could not go outside for a workout or in gyms. Workout at the treadmill is also easier and effective to lose belly fat and overall body fat and keep you fit and fine. Exercise on the treadmill could be very effective if you maintain consistency and proper diet level.You have plenty of choices to practice on a treadmill. We have also provided you with an easy 20 minute treadmill workout for beginners’ methods that are simple to perform and effective.
A few days back, I wanted to make my resistance band workout plan. But I did not have any idea of how to measure resistance band weight. And without it making an effective plan seemed impossible.
So, I have done a little bit of research and found out two methods. Luckily both of these methods worked absolutely fine.
In this article, I will explain in detail how to measure weight of resistance bands. I will also try to give you a brief idea of the resistance bands and their working processes with few workout methods for beginners.
Stay tuned till the end to measure the weight of your resistance bands and learn everything else you need to know.
What is a Resistance Band?
Initially, people returning from an injury used resistance bands during the rehabilitation period. But today, the usage of this tool has been widened. Many people are using the resistance band for workouts.
If you have not used a resistance band before, you might not have a proper idea about this tool.
A resistance band is an elastic band that helps to stretch your muscles for various purposes, such as athletic performance or physical therapy.
Resistance helps to increase your muscle.
It is a great tool to strengthen your muscles and improve fitness. Multiple types of resistance bands are available based on what you want to do. Continue reading the article to learn everything you need to know about a resistance band.
Why and how to Use and measure Resistance Bands weight
Weight measurements of resistant band is very important to before use because lots of fact for measurement which can helps user to achieve perfect goal and many other advantage.
Are you confused? for your band .
As now you know what a resistance band is, you may ask why use a resistance band? How does it help you to have a more efficient workout session?
Well, people use them for various reasons. There is a misconception that resistance bands are only for beginners. These bands can be an excellent way to start working out, but professionals also use them.
Still confused if you want to use a resistance band or not? That is a common dilemma for many people. However, the following are some of the reasons to use a resistance band:
5 reasons to use a resistance band:
There are many benefits to using a resistance band. Here are the top five benefits discussed
How to measure resistance band weight
Strengthen Muscles: The first reason people use a resistance band is to strengthen muscles. When you work out with a resistance band, it forces all of your muscle fibers to work actively. Ultimately it helps you to strengthen your bones.
Strengthen Bones: If you want to strengthen your bone, then you also can use resistance bands. It makes your bones remain active and take the pressure, which helps your bones to be stronger.
Variation of Strength Required: The resistance created by these bands changes during different periods of your exercise. As a result, the strength you use while exercising will also alter frequently. According to experts, such variation enhances the efficiency of workouts.
Variation of Tools: When you are exercising, variation of tools or equipment is also necessary. Using only dumbbells or treadmills may not be very effective. So, you can use resistance bands to bring variation in your workout tools or equipment.
Lose Weight: Proper exercise with a resistance band helps in losing weight. Later in the article, we have included some resistance bands exercises for beginners.
These were some of the common reasons to use a resistance band. You may say there are other tools or equipment available for such results. But with resistance bands, you get some extra advantages. We will talk about the benefits shortly.
So, now you know what you can gain with a resistance band. But how does it work? How are these bands so efficient compared to other exercise equipment?
Our brief explanation may help you to understand the working process of a resistance band.
Working process of a resistance band:
Why and how to masure resistance band waight
If we had to answer the question in two words, we would say “elastic tension.”
The main factor in building or strengthening your muscles is to move them with as much resistance as you can endure. Your muscles do not care or can not tell how you move them. They just respond to your activity and grow.
As you may know, activities such as running, swimming, and doing exercises with different equipment may help you improve your fitness.
Though your muscles do not care about the method you use, they do care about the resistance. Different forms of workouts produce different resistance.
Resistance Bands can produce a high level of resistance. When you try to pull a band, it will force your muscles to be active. And the more you pull, the higher the resistance will be. Based on the resistance, your muscle will respond to achieve your desired fitness goal.
And this is how resistance bands work and help you to strengthen your muscles and improve fitness. You can do various types of workouts with resistance bands. Before knowing about them, it would be better if you know about the different types of resistance bands available in the market.
Types and variation of Resistance Band
Types of resistance band.
Resistance bands come in various forms. As you already have gained a pretty good idea about the resistance bands and their working process, you can guess that different bands are used for different purposes.
Learning about all types of resistance bands will help you understand more about their usage and benefits. Moreover, it will also be helpful to know how to measure weight of resistance bands.
The following are some of the common types of resistance bands available:
Common 5 types of resistance bands
common 5 types of resistance band
1. Flat Bands
Flat bands are the most common types of resistance bands. If you regularly go to the gym, you must have seen them. The name came from their flat appearance. Flat bands are made of rubbers and do not include any handles or grip.
However, these bands come in different colors. Each color represents a certain resistance for each band. You also can guess the resistance by seeing the width of the bands.
The list below express the resistance band weight equivalent colors:
Gold – Heaviest
Silver – Extra Heavy
Black – Heavy
Blue – Medium
Green – Low
Red – Light
Yellow – Lightest
2. Pull-up Bands
Helps to pull-ups
Pull-up bands are quite similar to flat bands. Fitness enthusiasts often use these bands too. Especially if you are new, then pull-up bands will be easier to work with. That’s because you can have better grasps over a pull-up band.
These bands also offer better resistance. Hence, they can be great for building muscles. You can try a wide range of moves with pull-up bands.
Whether you want to do pull-ups or add resistance to pull-ups, you can do both. Such facilities make these bands one of the most versatile resistance bands.
3. Resistance Tubes
Resistance tubes have a different appearance compared to the previous two. Like its name, they look like tubes. The idea came from the earliest versions of resistance bands, which were made of surgical tubes.
However, resistance tubes include two handles for better grip. The use of these bands is pretty convenient. You can hold the middle with your leg and pull up with the handle to exercise.
4. Figure 8 Band
Figure 8 bands.
Figure 8 bands come in different appearances too but are easy to hold like resistance tubes.
The bands come in circular form. But there is a tube connecting the middle of the band. It makes the band look like the number 8, which gives it the name Figure 8.
These bands are also quite easy to use with the handles. You will not need any extra equipment to do the workout.
5. Lateral Resistance Band
Lateral resistance bands are different from all the bands above. While other resistance bands focus on the upper body, lateral resistance bands are suitable for the lower body.
These bands come with cuffs. The cuffs are ideal for the ankle. You can anchor them to the ankles and do workouts. At first glance, it may seem tough. But once you do a little bit of exercise with a lateral resistance band, it will become easier for you.
How to Measure Weight of Resistance Band
Variation of resistance band
Usually, the thicker the resistance band is, the stronger it is. Besides, how much you stretch the band also determines the weight.
Ways to measure Weight of Resistance Band
You can measure the weight of a resistance band in multiple ways. The following two are the easiest options:
Using a fish weighing scale, or
Using dumbbells.
Note: Between these two methods, the fish weighing scale provides an accurate result. On the other hand, the dumbbell method only provides an approximate idea of the weight.
Below we have explained both the methods in detail:
Method 1: Measure Weight of a Resistance Band Using the Fish Weighing Scale
Fish weighing scale
We hope you have a fish weighing scale for measuring the weight of the resistance band. If not, you can purchase it anytime from your local store or on Amazon.
Once you have the fish weighing scale and the resistance band, follow the steps below:
Step 1: Set the Resistance Band
Multiple use of resistance bands
First, set the resistance band in the way you want to use it. Usually, people attach it with different equipment. People also hold the band with their legs and pull up to create resistance. But that would not be a very convenient position for measuring the weight.
So, our suggestion is to attach the resistance band with a fixed structure. If you are in the gym, you will find a lot of poles. But if you are at home, you may use the doorknob or any other structure where you intend to use the band.
Step 2: Determine the Maximum Stretch Point
How work resistance band
After setting up the band, stretch it to the furthest point. Use tape or any other things to mark the position. This mark will enable you to find the maximum weight capacity of the band.
However, you also can measure the weight at different stretching points. If you do not want to pull the band to the maximum, mark the distance to which level you will stretch.
Step 3: Pull the Band with the Fish Weighing Scale
Pull the Band with the Fish Weighing Scale
Now finally, use the fish weighing scale to pull the resistance band. The scale will show the weight as you pull. If you have marked a single position, then stretch the band to that distance and note the weight. In the case of multiple marks, pull the scale to every point and note down the weight the scale shows.
This is the best way to measure the weight of a stretching band. It will give you a perfect measurement.
Method 2 : Measure Weight of a Resistance Band Using Dumbbells
Resistance band and Dumbbells.
However, if you do not have or want to buy a fish weighing scale, you also can use the dumbbells if you have them. It may not give you an accurate result but will give you an idea of the weight.
You will need to have dumbbells of different weights for doing this. After you have the dumbbells and the resistance band, follow the steps below:
Step 1: Wrap the Dumbbell
First, wrap the handle of the dumbbell with the resistance band. Only use the middle of the band, which you will use to attach with the pole.
Step 2: Lift Up the Dumbbell
After you have wrapped the dumbbell well, try to lift it up with the resistance band. If the dumbbell seems heavy and does not come up, that means the weight of the band is lighter than the dumbbell. And if the opposite happens, then the band is heavier.
Step 3: Try Dumbbells of Different Weights
Multiple types of Dumbbell weights.
From the results you get at the first time, try to use a different dumbbell that may be close to the weight of the band. Here you have to rely on your sense of weight completely. After trying different dumbbells, you will have a close idea of the weight of the band.
This is how to measure resistance band weight. We recommend using the fish weighing scale for an accurate result.
The Necessity of Knowing the Weight of Resistance Bands
You may want to know the weight of your resistance band for certain reasons, but in general, the necessity is not significant. Knowing the weight will give you an in-depth insight of your workout. Other than that, there is not much use of it.
If you need a stronger resistance band, go for the thick one. Similarly, if you want a low resistance, get the one that is thinner. We suggest you play with a few resistance bands to find the most suitable one for your strength.
However, you may have made a resistance band workout plan with a certain weight. It is essential to know the weight in such cases. If that’s so, measuring with the fish weighing scale can be the best method.
Resistance Bands Workout for Beginners
If you are new to the resistance band, you may not have a proper idea on how to work out with this tool. Only stretching your hands with the band will not be much effective.
You can make a lot of moves with a resistance band. Such versatility makes this tool favorite to most fitness enthusiasts.
We have listed some of the most efficient exercise resistance bands workouts. Whether you are male or female, you can make these moves to stay fit.
Myth: Resistance bands are only for females.
The Glutes
Improving Glute
Glute bridge abductions are one of the most popular and efficient resistance band exercises. To perform the glute, first place the band on the lower part of the thigh, just a little above the knee.
Now lay flat on your back whilst raising your hips up. Keep your heels pressed on the floor at the same time. Now, stretch and open up your knee to create resistance. Hold into that position for 3 to 4 minutes and then rest for a little bit.
Repeat this process a few times. Many fitness experts say doing the glute bridge abductions burns your burn with maximum efficiency. Check out the best resistance bands for glutes for the most effective results.
One Arm Chest Press
Do resistance bands build muscle? Of course, it does. The one-arm chest press is excellent for chest muscle as well as the core.
First, wrap the band to a sturdy object behind you. Also, loop the handles together. Then hold the end with one hand and step away until you feel the tension in your hand.
Now, start moving the arm bent with the band coming under the arm and the elbow at 90 degrees. The palm should face down. Repeat this a few times with each hand.
The Hip Flexors
Resistance band for hip exercise.
The hip flexors are great for strengthening your hip muscles. First, set the resistance band above your ankles, around the lower calves. Keep your legs wide so that you can feel the tension between your legs.
Now, make a small step to the left and pull a bit until you feel the tension. Take 10 steps to the left and 10 steps to the right. Doing this properly will be highly beneficial for your hip flexors.
These were some of the basic workouts you can try as a beginner. However, we recommend you prepare the resistance bands workout routine to get the best out of your sessions.
Advantages of Using a Resistance Band
There is much other equipment to work with. But why do many fitness gurus suggest using resistance bands? Well, there are plenty of reasons behind that.
Top 5 advantages of using a resistance band:
The following are some of the advantages of using a resistance band:
Good for Joints: If you remember, earlier we said that earlier only people returning from injuries used resistance bands. One of the reasons is that it doesn’t hurt joints. In fact, it helps to strengthen the joints.
Build Muscle: They may not look that tough, but resistance bands are pretty helpful to build muscle.
Consistent Resistance: Resistance bands create a consistent resistance during workouts. It makes all of your body parts participate. As a result, the strength increases evenly.
Travel Friendly: One of the greatest benefits of resistance bands is that you can take them anywhere you want. So, if you are traveling far, you do not have to worry about missing workout sessions.
Suitable for Everyone: People of all ages and different fitness levels can use a resistance band.
These were some of the advantages of using a resistance band.
How To Measure Resistance Band Weight(FAQs:)
How to measure resistance band weight
How to test Resistance Bands?
Resistance band strengths vary from band to band. Following the color code is an easy way to get an idea of the strength. Usually, the black and gold ones are heavy, while the yellow ones are the lightest. Besides, you can do a little bit of stretching to test and get an idea of the resistance.
How to choose resistance bands?
There are several factors to consider when buying a resistance band. First, decide what workout you want to do with it. Different bands are suitable for different workouts. Then select the strength based on your ability. Our suggestion is to purchase multiple resistance bands. It will give you a wide choice of workouts. The good thing is usually, resistance bands are inexpensive.
How to calculate resistance band?
Different producers use different metrics to express the weight level of resistance bands. But you also calculate manually. A fish weighing scale can give you an accurate result. Wrap the band somewhere and pull with the scale to get the measurements.
How many kg is a heavy resistance band?
Heavy resistance bands usually weigh 6 kg and above. When it crosses 13 kg, they are called extra heavy. However, 2.5kg to 3.5kg is considered light. And 3.5 kg to 5.5kg is called medium resistance bands.
Why are bands better than weights?
Resistance bands maintain constant tension on the muscles. In comparison, weights offer the same or inconsistent tensions. Because of the consistency resistance bands offer, they are considered a better option.
Conclusion
I hope you have clearly understood how to measure resistance band weight. Both the fish weighing scale method and the dumbbell method are good.
But once again, if you need an accurate result, there is no alternative to the fish weighing scale. Now with the perfect measurements, you can make a more effective resistance band workout plan.
What is the most compelling part of your body that adds more numbers to your weight? If I am not wrong, people suffering from heavy weight say that belly fat is the major problem. The primary objective of most people and especially women is to lose belly fat.
Many exercises and exercising equipment are available in the market to lose belly fat. Still, among all these, treadmills are one of the best choices for belly fat and losing overall weight. The treadmill is simple to use and gives quick and better results than other equipment. A larger number of people are find the better way for how to use treadmill to lose belly fat.
Yes! You can easily manage your belly fat by walking or running on a treadmill. But not only having a treadmill is enough, but you also need the right treadmill and the proper way to use the treadmill to get the required results. You can get help from my content. I will guide you about appropriately utilizing the treadmill to lose belly fat.
Why is a treadmill better than other gym equipment?
Many reasons make the treadmill a better choice for losing belly fat than other gym equipment. Some significant reasons are as follows.
Top reasons that make treadmills better than other gym equipment:
The first and the primary reason is that you can easily place a treadmill at home. There is no need for much space or installation needs. The treadmill is also affordable and less costly than other gym equipment.
For the people who have busy life routines and cannot go outside for walking, having the best treadmill for walking at home can help them in a significant way.
A treadmill is suitable for the fat guys because it is easier to exercise on the treadmill than on other gym equipment.
The treadmill gives more control to a user; you can adjust the period for exercise, speed, incline, and energy spending schedule for better results.
You have greater flexibility for exercise when you have time you can exercise in day or night.
Having one best treadmill for walking at home is enough for the whole family; everyone can use it.
Treadmills also come with some essential features that help you track your activity and compare the results. You can track your exercise by step counters, heart rate monitor, and fitness progress recorder.
Running on a treadmill burns the calories that reduce belly fat, but overall, your weight will decrease, which positively impacts your overall health.
Does walking on a treadmill better than walking outside?
So what do you think which one would be better: walking on a treadmill or walking outside. Let’s reveal the secrets below.
An Overview: walking on a treadmill vs walking outside
Many experts and people recommend going for a morning walk or running and walking in parks or roads. But when you hear about walking on a treadmill forlosing the belly weight loss for seniors, a question arises in your mind which one is better: walking on a treadmill or walking outside.
There is no doubt about walking outside and on the treadmill; both have benefits to lose weight, but the treadmill has some advantages over the outside walking when losing belly fat.
You can lose your overall weight by walking outside, but finding a unique walking style to put force on your belly to reduce its fat is impossible. But there are many easy ways on a treadmill to exert pressure on the belly to lose belly fats.
The treadmill comes with many supporting features such as adjusting the angle for belly exercise, monitoring your exercise performance, tracking calories burn and intensity of the practice by increasing speed to maintain consistency.
No matter how much effort you make while walking outside, you cannot maintain the consistency in speed, but it is easy to achieve by walking or running on a treadmill.
Walking on a treadmill is also safer than walking outside. It becomes difficult for fat people to manage their balance while walking on rough roads and paths. In some situations like broken paths or after rain, there is a risk of falling but no worry when you have a treadmill at home.
It is not easy for you to go outside for walk-in lousy weather, and sometimes for many days, the weather remains worse, and you are restricted to stay at home that disconnects you from your track. But if you have the best treadmill for walking, then you can continue your exercise schedule without any disturbance.
What are other health benefits of walking on a treadmill?
There are many choices for you to choose from for losing belly fat, but why did you choose the treadmill? Many reasons make the treadmill a good choice for you to walk. I will tell you how good is walking on the treadmill for you.
Health benefits of walking on a treadmill:
There are many health benefits of walking on a treadmill; we only assume that walking on a treadmill is helpful to lose weight, but its health benefits are more than just losing belly fat and overall weight.
Your mind is the central organ that controls all your body functions; when you are stressing, it spoils everything, and you become sick. But when you exercise on a treadmill, your mind relaxes, and your tension and stress also reduce, which may improve your mood.
It has excellent benefits for heart health; it has beneficial effects for heart diseases, coronary artery blockages, and other cardiac issues. Walking on a treadmill reduces the amount of fats and cholesterol reduction in your blood is good for your heart health and protects you from blood blockage issues.
Walking on the treadmill also has benefits for diabetic patients. For diabetic type 2, exercise and diet combination has many beneficial effects for the patient. When you exercise on a treadmill the amount of sugar in your body also decreases, which protects you from diabetic symptoms.
How to choose the best treadmill?
Only having a treadmill is not enough to lose belly fat; it is also necessary to have the best treadmill for walking for quick and better results. So while picking a treadmill, try to choose the best one after considering some essential factors.
Things to consider before choosing the best treadmill:
Storage space
Before going to market, consider the size of your room or area where you will place that treadmill. Ensure enough space for the treadmill to store appropriately and to perform your physical activities. A big size treadmill can be the wrong choice for you.
Consider your workout plan.
It is also necessary to consider how many workouts you will do on the treadmill. If you need a high-intensity exercise, then consider the high quality and giant size treadmill.
Easy to operate and transport
Do not forget to consider its operations to ensure a simple operating treadmill that is simple to do exercises to lose belly fat and easy to move and transport.
Material
When choosing the best treadmill for walking material has great importance to consider. Ensure you have picked a high-quality made treadmill that is durable.
Its specifications material also should be of good quality like PVC running belt; heavy-duty steel-made frame, comfortable, high-quality foam made handrails and much more. Do not skip checking material no matter how much quality brand you are choosing.
Check your budget
Indeed, your choice depends on your budget, so if you do not have enough budget, do not waste your time checking high-quality, expensive treadmills. Suppose you have a 1000$ budget, then consider your essential required features and look for a better option under 1000$.
Consider specifications
Some essential features such as a heart rate monitor, step counter, calories counter, and tracker tracking your exercise progress are also necessary to consider helping you to reach your goal.
Consider motor power
Your treadmill motor is essential to consider because it powers the track and also ensures sufficient speed of your treadmill for walking, jogging, or running.
You need different Horsepower motors for different requirements. It is best if your motor has adjustment functions for walking, jogging, and running but if not possible, then get 2.00 CHP for walking, 2.5 CHP for jogging, and 3 CHP motor for running.
Key features to consider:
Here is the highlight of critical features that you should consider while buying a treadmill.
Versatile and adjustable between walking, jogging, and running
Good quality and Horsepower motor
Treadmill incline
Exercise progress tracker
Heart rate monitor
Comfortable and easy to operate
How to use the treadmill to lose belly fat?
Now come to the vital topic of how to use treadmill to lose belly fat. It is not only enough to exercise on the treadmill to lose belly fat. If you follow incorrect schedules and exercises, it may harm you to slow down your progress to reach your goal.
So it is necessary for everyone suffering from belly fat and wants to reduce belly fat through the use of treadmills that how to use treadmill to lose belly fat in the proper way to get better and quick results. I will share some simple techniques with you that will help you to lose your belly fat quickly.
Techniques to use a treadmill that will help you to lose your belly fat quickly:
Start with short intervals.
Doing a lot of exercise on the treadmill from the very start is not wise; you may face many problems with such a sudden burden.
It will also become hard for you to maintain your exercise pattern because sudden exercise can cause pain in your bones and muscles, making it impossible to continue your sessions, and you may lose hope and quit the practice.
To adopt the slow and straightforward pattern and start with short practice intervals. Suppose you feel comfortable with five minutes to walk, then only do five minutes of walking on the treadmill.
After five or six days, you can increase your time and number of exercise patterns. But never work on high intensity in the start, especially when you are a beginner.
Increase exercise patterns intensity and pattern
It is better to go step by step toward your goals. So when you feel easy with short time patterns, start increasing time and increasing the speed. Suppose you are straightforward with a ten-minute walk, now increase it up to fifteen minutes, jump on to jogging, and increase track speed.
As you feel easy with pattern and time, slowly increase the intensity and time to get better results without facing side effects.
Ensure consistency
People think that the intensity of your exercise is the primary thing for losing belly fat, but I’m afraid I have to disagree with this opinion. You may hear the famous saying, slow and steady wins the race, and it is true. No issue if you try the slow exercise patterns, but consistency and steadiness in your schedule are a must.
Once you have made a schedule with which you feel comfortable, stick with it and strictly follow the patterns. Do not skip your exercise any day without any solid reason, and try to implement your plan with consistency.
Add some incline to your exercise.
As you exercise at higher intensity, you will burn calories. When you become used to treadmill exercise, then give some challenges to you. Add some incline to your practice to make your exercise challenging and to burn more calories. As many calories you will lose quickly, you will lose belly fats.
Set your goal and track your progress
Until a person does not have a goal, he cannot attain what he wants. So set your goal and then struggle to get your goals. Suppose you have set your goal for losing belly fat in one month, then you should research and find the ways to lose weight on a treadmill in a month.
Once you have set your goal, start monitoring your progress; if you see your progress is slow, then work at high intensity. The modern best treadmill for walking comes with the best features that can adequately monitor your progress. You can check your calories burn monitor and make efforts to reach your calories burn target every day.
Do mix up exercise patterns.
Sticking to one pattern may make you dull, so you should try the change for better results without getting bored. You should try a mix-up of exercise. You should follow the exercise mix-up patterns of running, walking, and jogging.
Start your exercise with walking. Do ten minutes walking, then shift to jogging and do 5 minutes jogging, and after that, shift to running and do running for 3 minutes.
Do not stop quickly; come back with the same pattern; after running, jog for 2 minutes and then 3 minutes walking.
How many calories can you burn on a treadmill for 30 minutes?
There is no exact answer for that question, but there is an estimate about the number of calories a person can burn with 30 minutes of training on a treadmill.
Calories burned on a treadmill for 30 minutes:
With a continuous 30 minutes of exercise on the treadmill, one can burn 200 to 250 calories.
But many other factors are involved in the burning of calories. Some significant factors can be your age, gender, amount of fats in your body, and workout intensity. If a person is younger in age and workout for 30 minutes at high intensity can burn up to 350 calories. But a person at average workout intensity cannot burn more than 250 calories.
The number of fats in your body also affects the calories burned. A person who is a fat guy and has enough fat around the belly will burn more calories than a smart person. It is right that with treadmill exercise, you can lose belly fat by burning calories, but there is no exact answer to how many calories one can burn.
In many studies, it is found that fat guys shed belly fat with only 30 minutes spent on the treadmill, but there is no exact answer about calories burned on a treadmill for 30 minutes. It is only an estimate closer to the original calories burned with 30 minutes of training on the treadmill.
How to lose weight on a treadmill in a month?
If you are suffering from belly fats or are overweight and want to start your weight loss journey, then setting your nearest goal for one month is normal.
The weight loss journey is a complex and time-consuming process that may take years, but you can see good results even in one month with proper techniques.
Simple techniques: lose weight on a treadmill in a month
Set your goal
Before everything, set a goal for weight loss; your goal should be realistic. With a maximum intensity of the workout, you can lose a maximum of 10 pounds in a month.
So I will recommend you to set your goal under 10 pounds. If you set unrealistic goals, of course, it will be impossible to achieve, and you will lose interest and will quit your exercises.
Set Workout and Diet schedules
The only workout is not enough; you also need to set a schedule for your diet. So set a schedule for your training and find the best time when you can give 30 to 60 minutes to exercise on a treadmill. You can choose morning or night time whichever is suitable for you.
Less all the fats-containing foods and increase fresh fruits, green leaves, and vegetables on your dining table and take lower meals. Do not eat sugary or fat-containing foods; otherwise, your efforts will go to waste.
Workout intensity
Start with a slow workout like give 20 minutes at the average intensity and every day keep it increasing for burning more calories. You should reach your maximum workout intensity within 10 t0 15 days.
It will be helpful for you to shed more calories and to reach your goal. One thing more strictly follows the schedules and never quit consistency in diet and workout plan.
Frequently Asked Questions: how to use the treadmill to lose belly fat
Question No. 1: Does the treadmill lose belly fat?
Answer: “Yes” treadmill found helpful to reduce belly fats. Treadmill burns fats and calories in our body to lose belly fats and overall body fats. Many studies were done on the effects of the treadmill on losing weight and find it helpful for losing body fats.
Question No. 2: Is the treadmill helpful for losing belly weight loss for seniors?
Answer: “yes” for older people, the treadmill is also an excellent choice to lose belly fat because exercising on a treadmill is easy and flexible for elders who cannot go outside for a walk or exercise.
Question No. 3: how long should you run on a treadmill to lose belly fat?
Answer: There is no exact answer to that question because many factors affect that, like age, gender, the intensity of work, and fats in your body. Some people, like the young and fat guys, burn more calories, and they reduce their belly fat faster than smart people.
But it is a long journey and takes time to reach your goal. But at least after one month of continuous exercise, you may see its effects, but it’s more impact may take a couple of months to reduce your belly fats.
Question No. 4: Can I lose my belly fat with 30 minutes of walking on the treadmill every day?
Answer: As we know, physical activities like walking or exercise help lose weight. With a consistent 30 minutes walk on the treadmill, one can burn up to 150 calories. So if you strictly follow your routine, then you can quickly lose your belly fat.
Question No. 5: What are the reasons for belly fat?
Answer: There are many reasons that maybe it is a genetic effect in some families (they gain weight early even if they do not eat much).
But mostly two main reasons are overeating and no physical activities. So if you want low fats on your belly, then you should avoid overeating, especially fatty and sugary foods, and exercise your habit.
Final Thoughts
The belly is the central part of the body that is the reason for being overweight. Many people are suffering from belly fat, and for women, it is one of the big problems. You can shed your belly fat by exercising on a treadmill. Treadmills are easy to exercise and also suitable for everyone.
But before exercising on the treadmill, you should learn how to use the treadmill to lose belly fat for quick and better results.
It is a good idea to have exercise equipment at home. All of us do not have enough time to visit gym clubs. So if you have exercise equipment at home, you can easily manage time to exercise for better health.
Exercise has many benefits, and we all need to do so to become healthy. At the same time, the proper placement of exercise equipment is also necessary; otherwise, you will be tired early and cannot do the exercise correctly.
When it comes to knowing how to stabilize exercise equipment on the carpet, our content will surely help you.
Can you put exercise equipment on Carpet directly?
when it comes to putting exercise equipment on the carpet, you may face the question like is that it right or what? Don’t worry!!! The following discussion will give a necessary idea.
Putting exercise equipment on Carpet (directly): Yes or Not
Before going for the ways to stabilize exercise equipment on the carpet, it is essential to answer the question: Can you place exercise equipment directly on the carpet?
We researched that and found some reliable information to help you. However, putting exercise equipment on carpet is not a recommended option by the experts.
But if you need to place, then you should try some flooring underneath the idea. You can place the flooring over the carpet directly. But if the carpet is too soft, then it is better to place the plywood between the gym flooring and carpet.
If you have a carpet in the room and keep your exercise equipment in that room, you may wonder why you need to place flooring on the carpet.
Benefits and flaws of placing exercise equipment on the carpet:
There are some benefits and flaws of placing exercise equipment directly on the carpet. Let’s discuss them below:
Benefits of putting exercise equipment on carpet:
Placing the exercise equipment directly on the carpet can save your time and effort. You do not need to make extra efforts to place the exercise equipment like installing floor or plywood.
You do not need any extra things to use, so it makes your project cheap.
Gym flooring also causes damage to exercise equipment. However, the effects of carpet are less than the gym flooring. So it keeps your exercise equipment protected from damages.
If you use the even bare or gym flooring surface, they do not give a good look. But having carpet in your exercise room gives an excellent look to your room.
Carpet is also found helpful to damp the typical gym noises. For example, when you drop the weight on the floor it creates on the bare floor, it creates noise. But a soft carpet gives it a cushion and does not produce much noise.
Disadvantages:
When you put heavy exercise equipment on the carpet, it will damage the carpet, and your carpet will quickly wear out.
Stability is necessary while exercising, but carpet or the things placed under the carpet give cushions and create instability. Therefore, it does not provide better performance when using heavy exercise machines.
More rigid surfaces under your feet give you more strength, and you can apply reasonable force. But unfortunately, carpets are soft, and they provide a cushion that is not feasible for heavy exercise machines.
When you put a carpet in your room, there is a great chance it will make your room environment unhealthy. Because exercises cause sweat, but when sweat drops on the carpet, it absorbs the sweat and causes stains, and makes them sources of germs.
Sometimes you need to drill holes for fixation of exercise equipment. But carpet gives a tedious look and becomes unable to be used for other purposes.
Depending on the kind of carpet you are using in your exercise room, it may not give you the grip that you require for proper exercise.
Stabilizing the exercise equipment is essential. An uneven surface is not suitable for lifting a heavyweight. Carpets, especially of good class, are very soft and give a cushion that makes them unstable for your feet.
How to protect the carpet from exercise equipment?
You can place the exercise equipment on the carpet. It has some advantages to place exercise equipment on the carpet. But it is also essential for us to protect our costly carpets from damage.
Many ways can help you to know how to protect carpet from exercise equipment. Let me share some important one with you.
Use Exercise mat
Exercise mats are widely used no matter whether you are placing your exercise equipment on the floor, carpet, or on any other surface they not just help you to protect the floor or carpet, but they also give a good balance.
You can use any of the quality mats to protect your carpet and protect exercise equipment. It will also help you to dampen the vibration and noise. A good quality mat will cost you on an average between 50 to 75 dollars.
What is an Exercise Mat?
Exercise Matts are the items that provide protection and stability to your exercise equipment. They also help you to get stabilization of exercise equipment.
If you get a good quality mat in the range between 60 to 75 dollars, it will last for years and protect your carpet and floor from damage.
These Matts also protect your exercise equipment from dust and dirt. You can easily find exercise equipment floor protective mat from any local store or a unique shop for exercise equipment.
To better perform your exercise equipment and achieve the benefits of exercise, one must ensure that exercise equipment is stable on the surface. But when you are putting your exercise equipment on a carpet, you need to stabilize them for proper functioning.
Some ways can help you to stabilize exercise equipment, and they will also protect your carpet from exercise equipment.
Use Plywood
Plywood is also an excellent material to use to stabilize the exercise equipment on the carpet. For example, you can put the plywood slabs under the squat rack and the area you use to lift.
If you use the plywood material, it will be a cheap solution, but that can give more stability to your exercise equipment on the carpet. Plywood material also has strength against the pressure that also keeps your carpet protective from damage.
When you place a power rack on plywood, it will also compress the carpet under the plywood, and you will have less squish. Plywood material will also ensure you a more incredible grip that will also increase the stability of your exercise equipment.
Plywood is not just cheap material, but it also lasts for many years. Therefore, you can easily clean and maintain it. It also absorbs your sweat, but it is straightforward to remove the sweat and germs from plywood than carpet.
Overall it is the best option to use for stabilizing exercise equipment, but it may splinter if you drop weights often.
Place Mats
Mats are one of the cheapest and most used items for stabilizing the exercise equipment on the carpet and protecting the carpet from exercise equipment. You may find many exercise equipment floor protector mat that will help you to place the mats between the exercise machine and carpet.
You can find many mats in different materials and varieties, but good rubber mats are the best ones to choose from and to place.
Mats are significantly easier; you can place them with no effort between carpet and exercise equipment. Many of the experts recommend using mats, but some also contradict that recommendation.
The good thing is that they are easy to use and remove and give better support and grip to your exercise equipment. But some features may make it worse for your experience like they provide a horrible smell that causes headaches. Mats also absorb the sweat and also give the smell of your sweat that makes the environment unhealthy.
Mats also leave marks and stains on the carpet because they are made of black rubber material, and it is almost impossible to remove them.
There are some issues with using mats, but still, they are widely used to stabilize the exercise equipment and protect the carpet. But always try to get the best exercise equipment floor protector mat for better performance.
Interlocking gym flooring tiles
Interlocking gym flooring tiles are also a way to stabilize your exercise equipment on a carpet. It is one of the permanent solutions and is widely used.
It also gives a gorgeous look to your carpet. For example, you can use interlocking gym flooring tiles for different purposes under different exercise equipment on a carpet.
They are beneficial to use because they provide perfect stability and will also protect your floor and carpet from damage.
But we will not recommend this as the best one because some flaws also make interlocking gym flooring tiles difficult. They create difficulty in exercise equipment assembly, and you need professional services or need the help of other people to place the exercise equipment properly.
Another problem that we have heard from many users is that tiles do not provide absolute stability because the carpet under the tiles is too soft and can be uneven. Some rubber mats, if placed on tiles, also slide and can uneven the balance. It can also be dangerous.
Rip out Your carpet
If you do not care about the carpet, take it out and store it properly for further use. Then, you can easily remove it without any damage. You can also put it back when needed.
You should take the best quality carpets that are not much harder or softer and are also suitable to place under the exercise equipment. You can use the carpet for many years without damaging its quality.
What are some common mistakes?
Here are some common mistakes that you should avoid when putting exercise equipment on the carpet.
Never buy a very soft carpet
Never buy low quality carpet
Always try to place carpet on an even floor, strictly avoid uneven floor
Do not use carpet where you need to make holes to stabilize exercise equipment
Is it possible to protect your exercise equipment from carpet?
Protect your exercise equipment from carpet: possible or not possible
Putting exercise equipment directly on the carpet may give some benefits like ease. But these are not the best-recommended option. Instead, it is necessary to place some underneath gym flooring ideas like plywood or mats to put exercise equipment.
You can place the gym flooring equipment directly on the top of the carpet and place your exercise equipment on the carpet. But if your carpet pile is too soft, you should put an extra layer of plywood between flooring and carpet; otherwise, it may damage the carpet.
Your carpet is expensive, so you cannot compromise by putting exercise equipment directly on the carpet. However, it will damage the carpet after some days, and it will also cause instability which may be dangerous for you, and you may face serious injury.
What can I place under the exercise equipment on my carpet to stabilize and protect?
You have plenty of choices to place on your carpet under exercise equipment to stabilize and protect. Mats and plywood layers are typical to use under the exercise equipment on the carpet to make your carpet harder to support the exercise equipment.
Mats are made up of denser foam or rubber material that provide their role to evenly place the weight of the exercise machine and protect the equipment from shaking while you use them. Thus, it not just keeps the equipment stable but also keeps the carpet protected.
Can I put my Treadmill on the carpet?
The treadmill is one of the most used exercise equipment; when it comes to putting it on the carpet, many people feel hesitant that placing such a heavy machine is not wise, so they skip it. But you can set the treadmill on the carpet.
You can put the carpet directly on the carpet, but if you feel insecure, then you can also use mats or plywood layers between the carpet and the exercise machine. You will wonder if a treadmill will not damage your carpet more than other furniture items.
Final Thoughts
Exercise equipment is a good item that can help you keep your weight and health maintained. However, when you place exercise equipment at home, one question always arises: Can you place exercise equipment on the carpet and stabilize them on the carpet.
The answer to these questions is straightforward, yes you can place, and there are many ways, as we have discussed in the above content, to stabilize equipment and protect the carpet.
One of the biggest hurdles for a runner is to run when their knees start paining and prevent them from running. You become helpless, and even sometimes, you cannot walk a short distance when your knees are bad.
It becomes a harrowing experience for the runner to run with bad knees. But specific solutions make it possible for you to run even with bad knees. You can choose shoes that help you to run with bad knees.
But the question, running with bad knees what shoe is the best? Well, to reveal the secrets, we are here to help you with some possibleexercises.
What are bad knees?
You can feel pain in your knees due to some problems, such as strained ligaments, tendonitis, cartilage tears, sprained ligaments, and arthritis. There can be many different types of bad knees issues that can cause pain in your knees and stop your running career.
Some common arthritis problems are
swelling and tenderness
Locking and buckling of joints
Loss of space between joints and
Deformities of the knee and some sudden shocks also make your knees painful.
If your knees start paining when you walk and run due to any of the above or any other reasons, it is called bad knees.
It makes your physical activities painful and complex, and you need immediate solutions to get rid of such pain.
Knee pain in both knees: An Overview
Pain in both knees:
Sometimes things become more painful when there is severe pain in both knees, making it impossible to run and even walk. It happens in common with old age people, but sometimes it also happens with young adults.
It is also known as bilateral knee pain, which happens due to many reasons. In that situation, both of your knees hurt at the same time.
These conditions are primarily simple and easily managed with rest, doing proper exercise, or wearing the best shoes. But if it becomes serious, you need to take medical treatments with all the above precautions.
Reasons for knee pain:
There are many reasons for knee pain. These are including:
Osteoarthritis
Trauma in your legs
Patellofemoral pain syndrome
Torn meniscus
IT band syndrome
Pes Anserine Bursitis
Osgood Schlatter disease etc.
N.B. But some rarely occurring reasons for pain in both knees are gout, coping, dislocation of the knee, and sudden shocks.
Solutions and Suggestions:
When you feel severe pain in both knees, you need to take proper care and treatment from a physician. It is better to check it from the doctor because they will diagnose pain in both knees and help you determine the proper treatment according to the situation.
In young adults, due to an accident or any other reason, if a lousy knee problem happens, they can quickly recover from it with some medical treatment or proper rest for some days.
On the other hand, if you are an older adult or an athlete and you feel it continuously, you can take some simple actions and medical treatment to improve your bad knee.
Exercises to improve bad knees:
You can do some specific exercises like knee extension, knee flexion, heel and calf raises, swimming, and wall squats. These exercises will improve your bad knees and facilitate medical treatment to work faster to reduce knee pain.
If you can’t do exercise due to aging problems, then you can also take the help of different shoe pairs to improve your bad knees. Physicians recommend many shoe pairs according to knee condition, which will help you to run and walk , even with bad knees.
When you feel pain in your knees, don’t do too much physical activity, keep your posture in proper balance, and wear appropriate and recommended shoes for early relief.
Tips: In a chronic situation, visit your doctor to find better treatment to get rid of bad knees.
What are some recommended exercises for bad knees?
Physicians recommend many exercises with bad knees, which improve your knee’s condition and help you maintain your health with physical activity.
Top 10 best recommended exercises for bad knees:
1. Walking
If you feel severe pain while running in your knees, then walking is a better option to maintain your health with a low-impact cardio workout.
But make sure you wear the right shoes as recommended by your experts. Do not walk on rough roads; start walking on flat surfaces and then move toward rough paths with improvement.
2. Sitting for knee pain.
It is also an excellent exercise to sit on the bed or mat and extend your legs forward and put your hands behind by keeping your palms flat on the bed surface. Now slightly lean back, squeeze quads, hold this pose for two to three seconds and repeat this twenty to thirty times.
3. Heel and calf stretch
Stand with a wall and place both your hands on the wall; bend your body towards the wall but keep your feet one to two feet away from the wall. Now bend forward your one leg and stay for thirty seconds, then next leg and repeat that exercise.
4. Swimming
Swimming is also one of the recommended exercises that provide a physical movement to your body but also helpful for early healing of your bad knees. But do not swim too fast or with too much force it may hurt you.
5. Sitting march
Sit on a chair comfortably and place your feet on the floor in a flat position. Now move your affected leg slowly forward and backward but in a gentle way. But if you have pain in both knees, you can do it for both legs one by one.
6. Straight leg raises
Lie on your bed, keep both your legs straight, now pull your one leg upward, keep it for two to three-second in that position, then move it down and repeat that for ten to fifteen times for both legs.
7. Assisted calf raises
Stand straight with the support of a chair; put your one hand on the chair and the other hand on your waist. Now pull both your heels up in a gentle way, remain in that pose for three to five seconds, and repeat that fifteen times.
8. Climb stairs
Stairs climbing is also the best exercise with bad knees; slowly climb the stairs but keep your hand on your stairs grill for support and gently do that exercise.
9. Ride stationary bike
Stationary bikes do not need much force to ride; it is also good exercise while you feel pain in your knees, then ride the stationary bike for ten to fifteen minutes in routine but in a gentle way.
10. Move your legs in warm water.
You can heal and exercise your knees simultaneously, stand in a warm water pool and walk in the water. But keep your hands on the sides of the pool for support and walk gently.
How to exercise with bad knees to lose weight?
Suppose you are struggling with weight loss but cannot do your physical exercises properly due to bad knees. There are no worries still; there are many exercise options to lose weight when you suffer from bad knees.
Exercises with bad knees to lose weight:
· You can run by wearing specific shoes to lose weight. But if you cannot run due to a severe injury, you can walk after wearing supportive shoes. There are many other exercises to lose weight but without impacting your knees.
· Try water aerobic exercises when you feel pain in your knees. When you do swimming, it will give strength to your muscles and help you burn your calories without harming your knees.
· Riding on stationary bikes is also helpful to lose weight to burn calories without hurting your knees.
· Tai chi is also a good exercise that gives your knees relief and helps you lose weight.
· Yoga is one of the most recommended exercises for different joints pain issues; it improves your knee pain condition and relaxes your body, mind, and helps you reduce your body weight without hurting your knees.
· Some gym exercises that you can do by sitting on the chair in a gym for the upper parts of your body are also helpful to reduce weight but without hurting your knees.
What shoe is the best for bad knees?
As we have discussed, some of the recommended shoes can also help you run even with bad knees. But the question arises in the mind when running with bad knees what shoe is the best? You should try to find the best shoe for running when you feel pain in your knees.
Many athletes experience knee pain for several reasons, such as running in unbalanced form or running on rugged and rough paths. If you run too much, it can also lead to knee pain, and the most common that happens with age is the weakness of muscles.
Picking shoes that make your body postures balanced:
But you can mitigate that situation by picking shoes that make your body postures straight and balanced. You can select shoes with soft and smooth interior materials to keep your feet comfortable and protect your knees from bending.
Soft and flat shoes help you maintain your body balance when you run on rough and uneven paths.
High arch shoes support your feet ‘back heels and help you reduce the pressure on your feet and knee when running. Also this type of shoes can give a push to your feet when you are running without exerting much force and stress on your knees. Besides, it keeps your knee protective from hurting and makes your experience smoother and effortless.
Does running strengthen knees?
Running is one of the exceptional exercises suitable for health. It shows many positive impacts on human health, strengthens your legs and knees muscles. Running is pretty easy exercise because there is no need to have special equipment for running.
Knee pain complains that it is common among runners that people wrongly perceived that knee pain occurs due to running, but they are wrong. Even the experts also say that running is the reason for your knee pain, which makes people afraid, and they do not try it again to run with bad knees.
But the primary reason when pain in the knees feels is arthritis or any other type of issue that hurts when you run forcefully. But it is wrong that running causes knee pain.
Running can strengthen your joint muscle (knee areas):
Running is good to strengthen your muscles because it gives proper movement to your joint muscles.
But sometimes, due to inconsistent running flows, you may face knee pain. So start with short patterns with gentle running manners and increase stress with improvement. It will not just strengthen your knee and muscle but also helps to early relief from pain.
Suggestion: You should run to strengthen your muscles even when you feel pain. But do not forget to wear the best shoes before running with bad knees.
What are some running tips for bad knees?
Suppose you are suffering from bad knees and hesitate to run because you feel pain while running, and your fear increases when you hear from your expert that you have pain due to running.
There is no need to worry; there are many other reasons: running is better and helpful to early relief from knee pain. Do not hesitate to run; there are some helpful tips to run with bad knees.
Tips to run with bad knees:
You can ask a question from your physiotherapist about running with bad knees what shoe is the best. After that, get the recommended shoe and run even with bad knees to get early relief from pain by strengthening your knee muscles.
When you are suffering from bad knees, then do not try different running patterns like too fast running, backward, and forward running at the same time. It may cause problems and make you pain, and you will be afraid of running again.
Try the gentle way to run, always move forward while running, and not put much pressure on your legs, ankles, and knees. It is only possible when you wear the proper and recommended shoes.
If you feel pain in your knees, do not try to run at hilly paths or rough and uneven paths.
Always choose the flat paths to run; it will protect you from falls and maintain the correct flow of running on the same surface without hurting your knees.
When you are suffering from bad knees, run for ten to fifteen minutes then take rest for some while and then again walk.
Thus, you can maintain your knee health without hurting your knee.
Should I run with knee pain?
Running is better for your health, but most people and experts recommend not running when you are suffering from bad knees and feel pain.
But there is no such issue with running because running strengthens your knees and helps you get early relief from pain.
But it would help if you did careful running while you feel pain in your knee, do not run without wearing the best running shoe, and always try to run on smooth and in a gentle way. It is also better to run flat paths.
It will make you able to get early relief from pain and also maintain your health. So there is no issue if you run carefully and adequately, even with knee pain. Read more.
How to start running with bad knees?
No doubt it is excruciating to run with bad knees, but running is helpful for you when you are suffering from severe knee pain.
You could not start running too fast, but you can run with proper steps and practice. When you want to run with bad knees, the following tips will help you run with bad knees.
Wear the best shoes and start with a walk and practice the walk for three to four days for ten to fifteen minutes.
After that, it is better to speed up but remain on the walk and do not try to run; it will be painful for you and continue that practice for two or three days and do a fast walk for ten minutes every day.
Next, step you will try the mixture, sometimes walk and sometimes gently run and keep that routine for three to four days. Practice in that way for ten to fifteen minutes, but do not run fast; it will hurt you.
When you feel comfortable, start running gently on smooth and straight paths and running for ten to fifteen minutes for three days.
After that, follow the mixture of gentle running and sometimes fast running. Follow that routine for four to five days and make sure you are comfortable with that. Next to that, your step is to run.
When you are going to run fast, wear proper shoes and follow the appropriate rules of running, such as not putting much pressure on your knees. Always try to walk forward and run on flat paths. Try fast running for ten to fifteen minutes.
After that you can run at any place and as you want you will also feel that you have got enough relief from pain. It is a long process, but it will benefit you, and you will also remain comfortable following that step-by-step guide for running.
Watch this video to get more info about “Is running on concrete bad for your knees?”
What shoe is best to run for bad knees?
You may hear from experts to choose the best shoe for running but running with bad knees what shoe is the best. If you are searching for that answer, we will give you the answer to help you choose the best shoe for running with bad knees.
Best shoe for running with bad knees:
Many factors are necessary to consider for choosing the right shoe to run with bad knees comfortably.
Try to choose shoes that fit your feet, but it does not mean too much. Always try to get a fit shoe but have a little bit of space for air passage to keep inside moderate.
Height of shoe heels is also essential; when you are with bad knees, try to choose high arch shoes.
While choosing a shoe, try to choose a shoe that provides you with ample cushioning. Cushioning will make you comfortable and keep you in good balance when there is a sudden shock.
Try to get a suitable outsole because different shoes come with the different outsole to make them comfortable to run with bad knees on different paths.
A good shoe comes with a motion control feature that makes it suitable to keep your motion in control and protect you from the accident.
High arches shoes are comfortable for running?
You may hear from many experts that high arches shoes are best for running with bad knees. It is correct because the high arch shoes are best to choose because they offer ample cushioning and support that make them suitable for the runners.
Due to cushioning, it protects the runners from sudden shocks and also offers greater flexibility to absorb the shocks.
High arches keep your heels fit and comfortable, which makes them easy to run.
When you are running after wearing the high arches, it pushes the runner forward without putting pressure.
Due to that feature, the high arch shoes make it easy for the runners to run without hurting their knees.
Even if you are running on uneven and rough paths, high arched shoes provide you a better platform to stand and walk.
It keeps the surface flat and smooth for the runner.
We have researched high arches shoes and find that experts highly recommend using high arches shoes when you are suffering from bad knees. So there is no doubt high arches shoes are better to choose for the runners when running with bad knees.
N.B. Some people also claim that high arched shoes cause pain in their knees because of the high arches. But you can choose the right size of arches to make them comfortable according to your height and pain condition.
What to Do When You Have Bad Knees?
Pain in the knees is common in older adults, but it also happens with young adults due to many factors.
But what to do when you have bad knees?
Most people recommend not doing anything, only doing the rest until you get relief from the pain.
But we will guide you with some reliable information to help you get early relief from knee pain.
Things to do with bad knees:
First of all, visit your doctor to determine why you feel pain in your knees, and he will also prescribe some medical treatment.
Next to that, if the pain is severe and you cannot walk, try to do some physical activities by sitting on the bed like we also guide you in the above content.
When you feel some comfortability, then start walking to give proper exercise to your knees. It is necessary because, with movement, your knees muscles become more muscular and help them recover quickly.
Over time, start adding new exercises like after walk, start fast walk, and then start running.
But never try challenging exercises like running on rough or hilly paths; it will hurt you. Gently do activities and take your medicines regularly.
Conclusion
You have gone through our article,”running with bad knees what shoe is the best” with complete detail. It becomes very tough for us to run and even walk when there is severe pain in the knees.
But specific solutions and know-how about bad knees can help us to run with bad knees.
Physical exercise is necessary for early healing, so you can do some physical activities to maintain your health and strengthen your knee muscle for early relief from pain.
We have also shared the ten best exercises for you when suffering from bad knees. It is also beneficial for you to wear the best shoes like high arches shoes and other recommended shoes when you want to run with bad knees.
Like regular jogging, exercise, indoor gym, or outdoor sports – a pair of shoes is the first thing you might have looking for! Simply, there’s nothing more special and important than comfortable shoes for better performance in your regular activities! One of the best shoes for getting better performance is Cross training shoes. Today we will try to reveal that fact how Cross training shoes are best for use in. Stay tuned.
An overview: Cross-training shoes
Cross-training – does it sound like a particular sport or activity? Cross training is not a specific sport or activity. It’s just planning or routine of numerous daily workout for proper fitness. It’s one of the best options to create a cohesive movement to improve fitness.
Cross training shoes are generally designed with versatile uses. Both men, women, sportsmen or athletes, young or old -every person can choose these cross-training shoes for their work purpose. It also gains popularity in the market than any other shoes among peoples.
Thus, the benefits and purposes of using these shoes are many. We’re here trying to give you information with recommendations about the best uses of these shoes.
As a beginner, if you’re confused about picking up these shoes or not, then, of course, the article is for you!
Before inspecting the good uses of these shoes, kindly know about them briefly throughout this article.
Let’s look forward and find some exciting information about cross training shoe uses!
Why cross training shoe is best?
Whether basketball shoes are designed for basketball or running shoes are designed for running. Still, cross training shoes are designed for athletes who participate in a variety of workouts or activities. So, obviously, cross training shoes don’t determine a specific sport or activity.
Cross trainers are designed to provide cushioning, stability, and support for comfortable feet in various sports or activities.
If you choose these kinds of shoes for various activities, obviously it’s for you. On the contrary, you don’t need to buy cross training shoes for a single activity. By the way, before picking it, know more about its features, capability,
What are training shoes good for?
As I explained before, cross training shoes are used for multipurpose. Hence, one can use this kind of shoe for running, gym, daily workout, yoga, or casual uses. Now take a look at the construction, material, or function to use the cross training shoes for various purposes.
1.Cross training shoes heel support:
Heel support is one of the constructions of cross training shoes that make a big difference from your regular sneakers. The cross trainers heel support are made up of three materials, such as-
1. Thermoplastic Polyurethane: This is a plastic, orange color layer that is very durable, lightweight, and resistant to compression.
2. High abrasion rubber
3. EVA foam
Rubber outsole and EVA foam also easily differentiate for their resist compressions.
Both of the material of cross trainers heel support and the weightlifting shoe heel almost the same
The heel is much firmer and is good for weight-bearing exercise. But doesn’t suitable for day-to-day wear.
Some cross trainers’ shoes are provided with additional heel support construction for various athlete’s workouts, such as rope climbs and handstand pushups.
For easy grip purposes, the cross -trainers shoe brands also increase midsole material like squats.
2. Outer construction
Cross trainers are coming with multiple layers, so obviously, this construction ensures longer lasting than regular sneakers. Basically, most of the cross trainers made up of these various layers,
Synthetic Mesh
Textured Rubber
Flexweave
Cordura
Flyknit
Dyneema
Nylon
Cloth Blends
The multiple layers increase the shoe’s durability and resilience. Hence, this helps to doing Olympic lifts, jumping movements, and squatting.
Cross Training Shoes vs Running Shoes
Running shoes are definitely used for running. At the same time, cross training shoes are used for various workouts. Take both pairs of shoes side by side, and then you can see the differences between them. Otherwise, they’re almost looking the same. Here, the most differences among cross training and running shoes are note down-
Direction & movement
Cross training shoes are for multidirectional movement or side-to-side movement. In contrast, running shoes are for heel-to-toe activity.
Heel drop
The heel drop of running shoes is more significant than the cross trainers. From a guide, we know that almost all cross training shoe’s versatile heel drop is under 4-7mm, while the traditional running shoes are coming with a heel drop of 10-12mm.
Outsole
Running shoes are more flexible and have thinner heels than cross trainers.
Again, cross trainers have multidirectional changes, side-to-side motion, and more aggressive traction patterns, making a little bit of difference than running shoes.
Midsole
Cross training shoes have a firmer, stable, flatter, more rigid midsole cushioning than running shoes.
The cross training shoes provide a different degree of arch support for stable, solid performance, such as squats, deadlifts, and box jumps.
Cross Training Shoes vs CrossFit Shoes
Cross training shoes and CrossFit shoes- both types of shoes are basically designed for multipurpose workout or sports.
These two shoes can be used in the same activity or sports such as yoga, lifting weights, stretching, elliptical machine, basketball, or Zumba class.
Weather, there are more similarities among two kinds of shoes, but you might break up your misconception in the end. So, there also fewer dissimilarity among CrossFit shoes and cross training shoes.
In general, cross training shoes are more durable, provide more stability, and comfortable to use. Hence, they are used for many physical sports or events than CrossFit shoes.
CrossFit shoes are more used for physical activities like kickboxing, weightlifting, lateral movements of legs as they provide extra support at the sides for superior lateral movements of legs.
Cross training shoes are best for use in HIIT
HIIT stands for high-intensity interval training. HIIT workouts are basically high-intensity workouts combined with rest and recovery time.
Many of us as a beginner choose the normal running shoes for joining a gym to do HIIT training. But have you any idea about this wrong perception.
Doing a HIIT workout is such activity of dynamic cardio, sprint to complex, compound movement, rope climbing, and needs a proper balance on base or feet.
For HIIT training, cross training shoes are the best footwear to choose from. It’s come up with more flexibility. And also help you to grip & stable to balance the base or floor throughout doing the workout.
In another way, in HIIT, many weightlifting workouts need to do such as kettlebell swings, medicine balls, clean-and-jerks, etc.
So, why not choose to pick up cross trainers for HIIT? No confusion at all.
Can Cross training shoes be used in tennis?
If you’ve already a pair of cross training shoes, you need to buy extra tennis shoes for temporary use. But, one thing to note, this one isn’t lasting long or not providing more intensity.
In terms of your legs’ lateral movement on a tennis court, the cross trainers will help you balance and comfort this sport.
In general, The cross trainer’s outsole is thinner, and the insole is less paddle. That’s the reason for not wearing the cross trainers more times on the tennis court.
If you choose a running shoe over a cross training shoe on a tennis court, then you’re absolutely doing wrong !!
Cross trainers are more level to the ground, allowing movement in various directions, better foot cushioning. In comparison, running shoes are just for side-to-side movement. It just gives you injury and nothing at all. So, choosing the cross trainers for the tennis court is acceptable!
Although there’s an option to choose a cross trainer at once, none other than tennis shoes will be replaceable.
Using Cross Training Shoes for Other Sports
Well, cross trainers are coming with versatile designs that cover almost indoors to outdoor sports uses.
Certainly, you’re interested in playing a game of two or four as basketball, volleyball, soccer, or football, but there are no special shoes for specific sports.
Cross training shoes are the most suitable shoes for doing great in that purpose. So, obviously, you can wear this shoe in many sports but once or twice!
Can Training Shoes be Used for Walking?
The answer is probably a big no! Before starting this conversation, I must tell you something. Maintaining fitness, do you like to enjoy walking? Then, pick up a pair of walking shoes. it’s the best for you.
As I mentioned before, the training shoe is a multipurpose shoe that is designed for a heavy workout. In contrast, walking shoes are only made for walking purposes. That’s why it’s completely suitable as it is a lightweight shoe.
Because, while walking, your feet distribute the bodyweight with your steps. A walking shoe provides you better arch support and heel support through the walking journey!
On the other hand, the training shoe is more heavy and uncomfortable to walk. The arch support will not easily be adjusted in walking. It might cause injury also for wrong shoe choices.so, better to buy a walking shoe or running shoes. Not a cross training shoe!
Can cross training shoes be used casually?
Definitely, you can use cross training shoes casually. Plenty of people choose the training shoes for their regular use as it is more comfortable to wear.
You’ll be surprised to know; the training shoes give a great casual look with their versatile design. But one thing to note, you can’t wear this with a formal get-up. Must choose the right pant, a pair of shocks, and suitable color.
Short tips for choosing cross training shoes
We’re at the end of the discussion. But, here is something special for you as I gave the word to tell extra tips to you. So the quick tips are provided here. While shopping, how you can choose the perfect cross-training as a beginner. Let’s have a look.
Right arch: First thing you must have to consider, the suitable arch for your feet. The cross training shoes are designed with three arch support: Normal, Flat, and High. So, here you have to measure your feet arch to choose the comfortable fit of the shoe.
Shoe’s construction: As a beginner, you’ll hesitate to choose the right outsole or bottom of the shoe. The outsole provides more cushion during the heavy workout. Again, the upper of the cross training shoes might be made of leather or synthetic mash. Leather offers more support while the synthetic mesh is breathable.
Traction: Try shifting your shoe side to side and twisting on the balls of your feet and toe. You’ll be recognized with the right traction and proper grip by this method.
Frequently Asked Question
Question 1: Is It OK to run in cross training shoes?
Cross training shoes are applicable for short distances. But, when it comes to long-distance running, then sorry to say, the cross training will not give you support.
Well, running shoes are designed only for running purposes. Hence, the running shoes giving extra support to your feet as they provide more cushioning on the back half than the front half.
Question 2: Can I use training shoes for a treadmill?
Training shoes don’t provide enough cushioning for a lot of impact on the feet on the treadmill. That’s why it doesn’t suitable a pair of shoes for the treadmill. Otherwise, cross training shoes are quite a good choice for short-distance running or walking.
Question 3: Are cross training shoes good for weightlifting?
Cross training shoe is ideal for weightlifting. It has enough feet support, ankle support, flat soal for better performance in weightlifting. It can be more suitable to the activity like shorter runs, aerobics, or outside the gym.
Question 4: Are cross trainers good for losing weight?
Exercise on cross training burns extra calories and helps you to lose weight. But, it would help if you did a high-intensity workout for this purpose.
Question 5: What is a cross trainer shoe good for?
Cross-training shoes are good for HIIT workout, elliptical training, and low-impact workout as they provide more cushioning and pad the ball of the feet.
Conclusion:
There you have the details of how Cross Training Shoes Are Best For Use In. Cross-training builds fitness, helps you to burn calories, and maintains a healthy body. The hybrid shoe as a cross-training shoe is providing versatile features, designs, or uses for more activity. So, buy cross-training shoes and save your money!
Treadmills are one of the most popular forms of indoor workout to lose weight. However, if you’re serious about losing weight on a treadmill, let us inform you, just walking on it regularly won’t help you. Therefore, you should follow some proper steps.
If you have bought a treadmill recently or plan to purchase one to lose weight, this article is perfect for you. Here we will discuss how to lose weight on a treadmill in a month. That’s because if you target for a month at first, you’re likely to stay motivated for a long time.
However, we’ve explained five different procedures for your convenience. In the end, we’ll also share some tips to make your workout sessions more efficient.
How Much Weight You Can Lose in A Month
With regular workouts on a treadmill, you can lose a significant amount of weight in a month. However, there isn’t any specific number that we can tell you to answer this question. That’s because the amount you’ll depend on your intensity of the workout, as well as duration and frequency. Besides, your nutrition takeout is also an essential factor.
According to Mayo Clinic, you need to burn 3500 to 7000 calories to lose one to two pounds of weight. So, if you burn 500 to 1000 calories daily, you can lose 4 to 8 pounds in a month.
However, a treadmill is a great tool to burn calories. And if you run, you’ll likely lose more weight rather than walking. A study by Harvard Health Publishing shows that if a 185-pound person runs at five mph, he will end up burning 336 calories in 30 minutes.
Similarly, if he runs at 7.5 mph for 30 minutes, he will burn 525 calories. And if the speed rises to 10 mph, the burning amount reaches 671 calories.
Although losing one to two pounds per week is an aggressive approach, it’s a safe option. However, you need to maintain your consumption of calories too. You can track your calorie takeout using different online apps. Besides, to track your progress, modern treadmills offer lots of built-in features.
There are multiple ways to lose fat on a treadmill. Nonetheless, which option you choose entirely depends on your target and comfort.
Though in this article, our focus is on treadmill workout, for better results, plan your daily meal too. That’s because if you don’t eat healthily, all your workouts will go in vain. However, the following are some treadmill weight loss plan you can try for a month and beyond:
1. HIIT
HIIT stands for High-intensity interval training. In recent years, it has been one of the most popular fat-burning exercises. However, HIIT consists of a mix of high-intensity exercise and rest. And it allows you to burn a decent amount of calories in a short time.
During HIIT, you’ll do an intense period of exercise with your maximum ability. After that, you’ll be taking a short rest. And this will repeat several times. However, the idea behind HIIT is to avoid continuous workouts for a long time. Besides, it increases the efficiency of the workout.
Although there are multiple variants of HIIT, we’ve divided it into two parts. They are beginner and intermediate to advanced.
If you haven’t done any exercise before or have never done HIIT, then go for the beginner option. On the other hand, if you have previous HIIT experience, you should go for the second option if your body allows it.
For beginners, the following is a simple treadmill workout plan:
Do a 2-3 minutes brisk walk for warm-up.
Walk at 3-4 mph for 1 minute.
Jog at 5-7 mph for 1 minute.
Run at 7-9 mph for 1 minute.
Repeat the walk-jog-run process three to four times.
Finally, cool down with 1 minute of a brisk walk.
The cycle will take around 15 minutes to complete. After that, take a rest for a few minutes. In the first few days, you wouldn’t want to repeat the cycle.
However, once you’re comfortable with the workout, do this at least twice. That means a total of 30 minutes of HIIT. After 10 to 15 days, go for the intermediate workout plan.
For intermediate to advanced people, the following is a process of doing treadmill HIIT plan:
Warm-up with some light exercises on the floor or walk at two mph for 3 to 4 minutes on a treadmill.
Now start with running at 8 to 9 mph for 1 minute.
Then slow down and run at 4 to 5 mph for 1 minute.
Again speed up and go down and repeat this 5 to 10 times.
Finally, cool down with a slow walk for 2 minutes.
Doing HIIT regularly will bring you excellent results. However, don’t perform it every day. That’s because doing an intense workout every day will hurt your body. Therefore, five days a week is an ideal choice.
Nevertheless, HIIT has been proved to be more efficient in fat burning than other moderate workout plans. That is because, in HIIT, you’ll lose calories during the workout and after finishing your running. This process is known as EPOC or excess post-exercise oxygen consumption.
2. Fat Burning Heart-rate
fat burning heart rate
Fat-burning heart rate refers to a rate when you burn most calories per minute. Therefore, you lose more weight. So, you can calculate your fat-burning heart rate and utilize your workout to lose fat more efficiently.
However, to find your fat-burning heart rate first, you need to calculate your maximum rate. This indicates the maximum number of times your heart can beat in a minute. Nonetheless, your heart beats at a higher rate only when you do some intense work.
The easiest way to find your maximum heart rate is to subtract your age from 220. For example, if your age is 30, your maximum heart rate will be (220-30) = 190. And usually, the fat-burning heart rate is 70% of your maximum heart rate. Therefore, in this case, the fat-burning rate will be (190×0.70)=133.
This rate will help you know when to put in the most effort during the workout to burn more calories. Follow the process below to have a more efficient workout session:
First, wear a heart rate monitor on your wrist or chest to track the rate.
Now walk at 2 to 3 mph for 3 minutes to warm up.
Slowly increase the speed until you reach your fat-burning heart rate.
Then run at 8 to 10 mph for 15-30 minutes at that rate.
Again slow down and walk at 2 mph for 5 minutes to finish the session.
Though we calculated 70% of the maximum heart rate as a fat-burning rate, the exact result varies. For some people, it’s 60% & for some, it’s 80%. However, it depends on sex, weight, fitness, and some other factors.
Nonetheless, you can go to a physician or hire a personal trainer to perfectly determine the rate. Moreover, they’ll help you to make you a proper treadmill workout plan to lose weight.
3. Sprint Workout
To make your workout more challenging, you can go for a sprint workout. However, it has some risk of injuries due to its high intensity. Therefore, if you’re not so fit or new to exercising, our recommendation will be your go lighter at first, then try a sprint.
Nonetheless, during your sprint workout session, set the incline of the treadmill to low. This will help you to avoid injuries. Besides, you’ll have a comfortable experience too.
The process of sprint workout involves a minute of high-intensity running followed by a minute of walk. However, follow the steps below for best results:
Start with warming up your legs and body with a light walk at 2mph for 4 to 5 minutes.
Then walk at a moderate speed of 3 to 4 mph for 1 minute.
After that, run at 8 to 10 mph for 1 minute.
Then again, walk at 3 to 4 mph for 1 minute and repeat the process 10-15 times.
Slow down and take a light jog to finish your workout session.
The workout is quite intense. Therefore, before starting this, ensure that your body is ready. However, do this 4 to 5 times a week for the best results. After a month, you’ll lose a significant amount of weight.
4. Incline Workout
Running on an incline is another great way to make your treadmill workout challenging. Besides, this will force you to work harder. Therefore, you can expect to lose a great deal of fat within a month.
Moreover, an incline workout activates more muscle than other workouts. And it helps you to build lean muscle. Nonetheless, more muscle workout allows you to burn more calories.
However, make sure that your treadmill has an adjustable incline option. That’s because, in this method, you’ll do your workout on different inclines. You can check our article on the best treadmill for walking to find out the best one with an incline option.
Nonetheless, the following is a simple process of doing an incline workout:
First, do a warm-up session for 5 minutes with 2 to 3 mph speed. During this time, set the treadmill incline to flat.
Now set the incline to 1% and continue to jog at 4 to 6 mph for one minute.
Then continuously increase the incline by 1% each minute. And do this until you reach 9 to 10 percent of incline.
After that, decrease the incline by 1% after every one minute. And continue to do it until you reach 0% or flat.
Finally, finish the session with walking at 2 to 3 mph for 5 minutes.
The incline workout session will take around 25 to 30 minutes. However, this is enough for one session. Therefore, you don’t need to repeat the process. And again, 4 to 5 times a week for a month will give you excellent output.
However, 4 to 6 mph is an average speed for an incline workout. So, you also can increase your speed if you have the ability. Besides, if you want to make the session easier, you can increase the incline by 0.5% every time. And follow the same procedure.
5. Mixing Up Your Routine
Mixing up your workout routine is an excellent idea to have a more challenging and efficient workout. That’s because when you do the same workout every day, your body gets familiar with it. Thus it tends to burn fewer calories after a few weeks of workouts. But if you mix up the routine with a different workout session every day, then this will not happen.
Besides, doing the same workout is stressful for joints in your body, leading to injury. Therefore, if you avoid doing this and try different methods every day, then the chance of injury also reduces. Moreover, in this way, you’ll avoid boredom.
However, we’ve already explained some of the most efficient workout processes. So, here’s a simple workout routine for a week you can try:
Sunday: Do HIIT treadmill for 25-30 minutes or more if you can.
Monday: Have a light jogging session to rest your body.
Tuesday: Go for a treadmill workout at a fat-burning rate.
Wednesday: Today, try an incline workout.
Thursday: Again, do a light jog or take a rest.
Friday: Try doing a sprint workout today.
Saturday: Choose any of the workout sessions or just do light jogging to avoid working out for 3 days simultaneously.
Continue doing this consistently for at least a month. However, it’s not necessary that you must follow this routine. This is to give you an idea of mixing up sessions. Therefore, you can make your own routine with the workout methods we’ve discussed earlier if you want.
Benefits of Losing Weight on a Treadmill
A treadmill workout is an excellent way to burn fat and lose weight. Besides, working out on a treadmill has some more health benefits too. Click here. These include:
A treadmill workout is another popular form of doing cardio exercises. That’s because you can exercise at a steady heart rate. Therefore, this helps you raise your rate to a healthy level and improves your heart’s health.
Moreover, during a treadmill workout, almost all of your muscles get involved. Hence, you also get a full-body workout. As a result, it helps you to attain a good fitness level.
Besides, treadmill workouts also help you to control the level of blood sugar.
It boosts your immunity system and significantly improves your energy levels.
Also increases the level of HDL, which is good cholesterol for your body.
Working on a treadmill also improves your mental condition. It releases stress and motivates you.
Besides these, treadmill workouts also provide a few more physical and mental health benefits, including improving endurance, having healthy skins, and more.
Tips for Losing Weight on a Treadmill
If you want to lose weight on a treadmill, then just a few workout sessions aren’t enough. Besides, you’ve to maintain discipline. However, the following are some tips to make your workout sessions more efficient and lose a good amount of weight:
Maintain Consistency: Consistency is a vital factor here. If you workout for two days and then take a rest for 5 days, then you won’t lose weight. Therefore, you must maintain consistency. However, you can follow several strategies to maintain a regular workout. These include joining an accountability group, setting smaller goals, or anything else that motivates you to lose weight.
Avoid Holding HandRails: When you walk or run outdoors, do you hold anything for support? The answer would be no. Therefore, when you’re working out on a treadmill, avoid holding the rails. That’s because taking support to run will decrease the rate of your calorie burning. However, if you’re a complete beginner, you can hold the rails for the first few days to get yourself familiar with the treadmill. But after that workout without holding rails.
Proper Nutrition: Consumption of proper nutrition is also essential. If you do a regular workout and eat two or three burgers daily, then instead of losing weight, you may end up gaining weight. Therefore, you should focus on healthy meals. That will help you to lose weight as well as provide other help benefits too.
Set a Target: Working out aimlessly won’t give you the expected output. Therefore, set a target of how much weight you want to lose in a month. Then divide the goal for every single day. Set a target of calories you want to burn every day. Besides, determine the duration required to lose that amount of calories. However, if you want to go aggressive, burning 700 calories a day on treadmill is a good choice. On the other hand, if you want to go slow, burning 300 to 400 a day is enough.
Add Light Exercises: After you do your treadmill workout sessions, add some other lightweight exercises too. However, weightlifting is the most common addition to treadmill workouts.
Conclusion
Losing weight is easy if you know how to do it and follow the process with proper discipline. Therefore, we’ve provided you with a complete guide on how to lose weight on a treadmill in a month.
Now all you need to do is to set your target and start working out. However, follow all the instructions carefully to avoid any injuries.
Though you’re starting with a target of continuing for one month only, don’t stop after that. For losing a significant amount of weight, continue beyond one month.